通过虚拟机安装centos系统,搭建nginx服务器,实现正向代理和反向代理
记录一些自己所学。
通过虚拟机安装centos系统,搭建nginx服务器,实现正向代理和反向代理。
一、所需工具与环境:
Vmware,Centos7,XShell,SCP,Nginx
二、安装虚拟机和操作系统
具体安装步骤可参考其他博主的博客~
安装了四台机器,00为代理服务器,01-03作为反向代理的应用机器
在安装完一台机器后,可以通过快照快速克隆出其他几台新的机器,而不用重新安装。
三、搭建Nginx服务器
1、用XShell和SCP连接服务器:
虚拟机开机,用`ip addr`命令查出虚拟机ip地址,用于远程登陆

ip地址为192.168.88.133
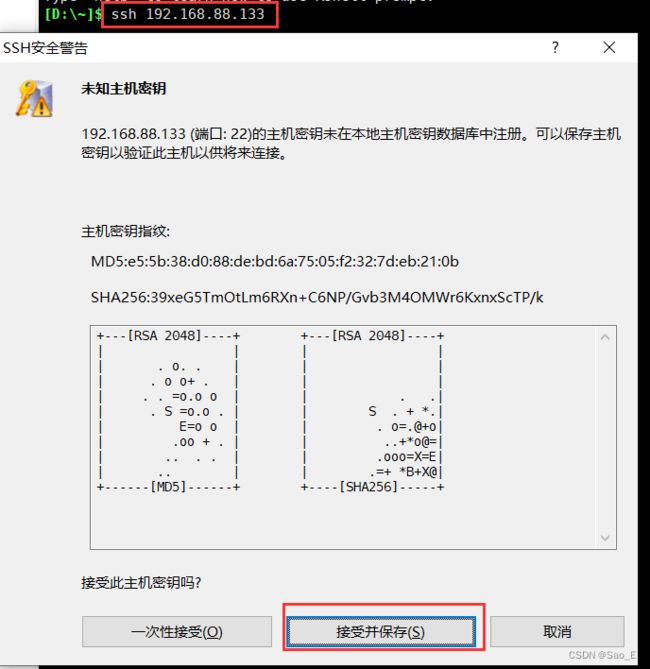
- XShell远程登录
ssh 192.168.88.133
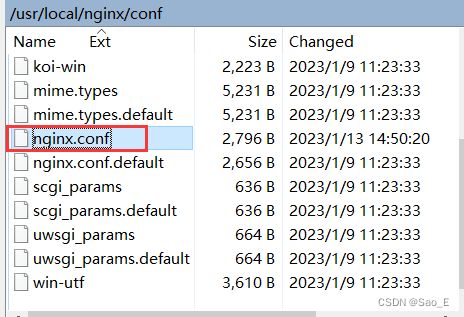
- SCP远程登录
2、安装Nginx服务
yum -y install gcc-c++
yum -y install pcre pcre-devel
yum -y install zlib zlib-devel
yum -y install openssl openssl-devel
- 解压缩
tar -xvf nginx-1.20.2.tar.gz
- 编译nginx源代码
- 进入源代码目录
cd nginx-1.20.2
- 编译安装前的配置
./configure
- 编译
make
- 安装
make install
- 查看安装到什么地方去了
whereis nginx
- 返回上级目录并删除nginx压缩文件和源代码包
cd ../
rm -f nginx-1.20.2.tar.gz
rm -rf nginx-1.20.2
- 创建软链接,方便操作
ln -s /usr/local/nginx nginx
- 由于Nginx默认端口为80,所以远程访问时,需要开启防火墙的80端口
一些防火墙命令:
	systemctl status firewalld	//查看防火墙状态
	systemctl start firewalld	//启动防火墙
	systemctl stop firewalld	//停止防火墙
	systemctl restart firewalld	//重启防火墙
	systemctl enable firewalld  //开机自启动
	systemctl disable firewalld	//禁止开机自启动
端口管理命令(在防火墙开启的状态下使用)
	firewall-cmd --list-ports	//查看已开放的端口列表
	firewall-cmd --permanent --add-port=80/tcp		//开放80端口
	firewall-cmd --permanent --remove-port=80/tcp	//关闭80端口
	firewall-cmd --reload		//重新加载防火墙规则,开闭端口后要执行
至此,Nginx服务安装完毕!
3、访问Nginx服务
- 启动Nginx服务
./nginx/sbin/nginx
四、正向代理

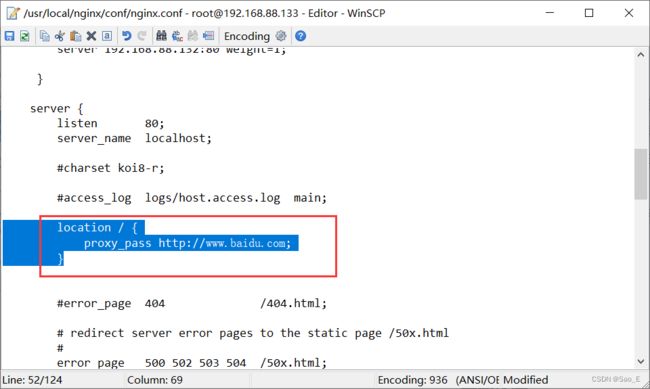
用户不直接访问对应服务器,而是通过访问Nginx服务器,间接访问应用服务器。
以百度服务器为例 www.baidu.com
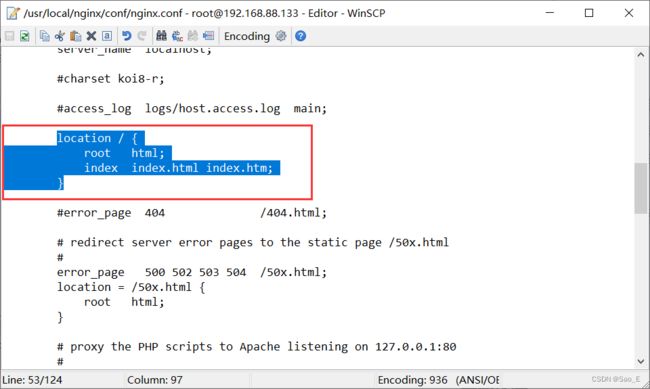
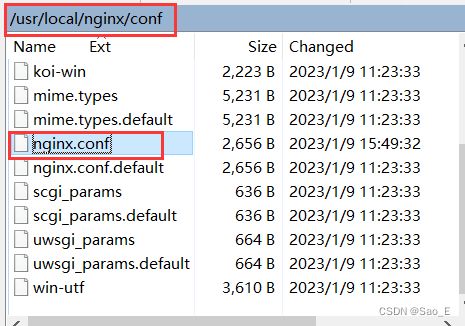
1、修改Nginx服务器配置文件
2、重启服务
- 通过
ps -ef | grep nginx命令查询Nginx服务的进程号
- 杀死进程
kill -9 [进程号]
- 重新启动
./nginx/sbin/nginx
3、再次访问Nginx服务器
此时虽然输入的是Nginx服务器的ip,但会跳转至百度的地址,此时实现了正向代理,给用户的体验就是访问了百度服务器。

五、反向代理与负载均衡算法

1台代理服务器 代理 N台应用服务器
在代理服务器眼里,不明确知道代理的是谁
负载均衡算法以加权轮询算法为例
1、登录四台应用服务器,获取各自的IP地址
Nginx_00		192.168.88.133		作为反向代理服务器(做负载均衡)
Nginx_01		192.168.88.130		作1号应用服务器
Nginx_02		192.168.88.131		作2号应用服务器
Nginx_03		192.168.88.132		作3号应用服务器
2、修改反向代理服务器配置文件并设置权值
upstream cluster{
	server 192.168.88.130:80 weight=3;
	server 192.168.88.131:80 weight=2;
	server 192.168.88.132:80 weight=1;

     }
location / {
            proxy_pass http://cluster;
        }
3、实验准备
在01、02、03号机器中分别上传hello.txt文件

文本内容分别为
01中hello.txt内容:first
02中hello.txt内容:second
03中hello.txt内容:third
保存并重启四台机器的服务
4、访问代理服务器
浏览器输入192.168.88.133/hello.txt
注意此时我们并没有向代理服务器中上传hello.txt文件,那么访问会出现什么结果呢?
第一次:

刷新后第二次:

第三次:

第四次:

第五次:

第六次:

由此可见,代理服务器会分别对3台服务器进行访问,访问顺序为:
01
02
01
03
01
...
造成这样的结果是因为我们对01号机器设置了权值为3,02号机器设置了权值为2,03号机器设置了权值为1。所以每6次访问会出现这样的顺序。相当于是代理服务器向三台性能不同的机器分派各自可以承受的任务量。
六、总结
- 过程bug:
浏览器一直在转:
用户无法访问
代理服务器是安装了Nginx的虚拟机就是代理服务器,检查:
1、服务器有没有开机
2、Nginx有没有启动./nginx/sbin/nginx
3、服务器的防火墙有没有开放80端口 - 反向代理优势
反向代理服务器通过负载均衡算法,不会让集群中任何一台机器过于空闲或过于繁忙。在反向代理模式中,容错率更高,可实现高并发,高性能。当有一台服务器宕机,此时集群模式仍然可以正常使用,Nginx代理服务器会自动将宕机的机器提出集群,不会派发请求给他,而是继续派发给其他的健康机器,健康机器可以继续提供服务,此时也给运维人员时间来维修这台机器,当机器恢复正常,又会继续回到集群继续工作。


