直播系统(推流拉流) nginx+JavaCV+springboot
nginx安装配置
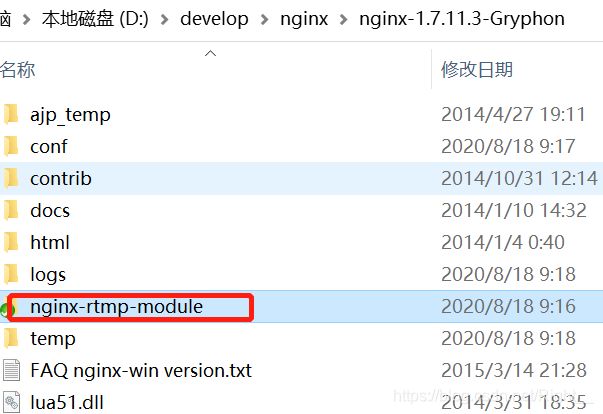
1) 下载安装nginx,我下载的版本是nginx-1.7.11.3-Gryphon(提取码:xj6f),下载完成后解压
2) 下载服务器状态检查程序(提取码:i6hw),下载完成后解压到nginx安装目录下
3) 在nginx解压目录下的conf文件夹中新建nginx-win-rtmp.conf 文件.
#user  nobody;
# multiple workers works !
worker_processes  2;

#error_log  logs/error.log;
#error_log  logs/error.log  notice;
#error_log  logs/error.log  info;

#pid        logs/nginx.pid;

events {
    worker_connections  8192;
    # max value 32768, nginx recycling connections+registry optimization =
    #   this.value * 20 = max concurrent connections currently tested with one worker
    #   C1000K should be possible depending there is enough ram/cpu power
    # multi_accept on;
}

rtmp {
    server {
        listen 1935;
        chunk_size 4000;
        application live {
             live on;

             # record first 1K of stream
             record all;
             record_path /tmp/av;
             record_max_size 1K;

             # append current timestamp to each flv
             record_unique on;

            #  publish only from localhost
             allow publish 127.0.0.1;
             deny publish all;

             #allow play all;
        }
    }
}

http {
    #include      /nginx/conf/naxsi_core.rules;
    include       mime.types;
    default_type  application/octet-stream;

    #log_format  main  '$remote_addr:$remote_port - $remote_user [$time_local] "$request" '
    #                  '$status $body_bytes_sent "$http_referer" '
    #                  '"$http_user_agent" "$http_x_forwarded_for"';

    #access_log  logs/access.log  main;

#     # loadbalancing PHP
#     upstream myLoadBalancer {
#         server 127.0.0.1:9001 weight=1 fail_timeout=5;
#         server 127.0.0.1:9002 weight=1 fail_timeout=5;
#         server 127.0.0.1:9003 weight=1 fail_timeout=5;
#         server 127.0.0.1:9004 weight=1 fail_timeout=5;
#         server 127.0.0.1:9005 weight=1 fail_timeout=5;
#         server 127.0.0.1:9006 weight=1 fail_timeout=5;
#         server 127.0.0.1:9007 weight=1 fail_timeout=5;
#         server 127.0.0.1:9008 weight=1 fail_timeout=5;
#         server 127.0.0.1:9009 weight=1 fail_timeout=5;
#         server 127.0.0.1:9010 weight=1 fail_timeout=5;
#         least_conn;
#     }

    sendfile        off;
    #tcp_nopush     on;

    server_names_hash_bucket_size 128;

## Start: Timeouts ##
    client_body_timeout   10;
    client_header_timeout 10;
    keepalive_timeout     30;
    send_timeout          10;
    keepalive_requests    10;
## End: Timeouts ##

    #gzip  on;

    server {
        listen       80;
        server_name  localhost;


        location /stat {
            rtmp_stat all;
            rtmp_stat_stylesheet stat.xsl;
        }
        location /stat.xsl {
            root nginx-rtmp-module/;
        }
        location /control {
            rtmp_control all;
        }

        #charset koi8-r;
        #access_log  logs/host.access.log  main;

        ## Caching Static Files, put before first location
        #location ~* \.(jpg|jpeg|png|gif|ico|css|js)$ {
        #    expires 14d;
        #    add_header Vary Accept-Encoding;
        #}

# For Naxsi remove the single # line for learn mode, or the ## lines for full WAF mode
        location / {
            #include    /nginx/conf/mysite.rules; # see also http block naxsi include line
            ##SecRulesEnabled;
         ##DeniedUrl "/RequestDenied";
         ##CheckRule "$SQL >= 8" BLOCK;
         ##CheckRule "$RFI >= 8" BLOCK;
         ##CheckRule "$TRAVERSAL >= 4" BLOCK;
         ##CheckRule "$XSS >= 8" BLOCK;
            root   html;
            index  index.html index.htm;
        }

# For Naxsi remove the ## lines for full WAF mode, redirect location block used by naxsi
        ##location /RequestDenied {
        ##    return 412;
        ##}

## Lua examples !
#         location /robots.txt {
#           rewrite_by_lua '
#             if ngx.var.http_host ~= "localhost" then
#               return ngx.exec("/robots_disallow.txt");
#             end
#           ';
#         }
        #error_page  404              /404.html;
        # redirect server error pages to the static page /50x.html
        #
        error_page   500 502 503 504  /50x.html;
        location = /50x.html {
            root   html;
        }
        # proxy the PHP scripts to Apache listening on 127.0.0.1:80
        #
        #location ~ \.php$ {
        #    proxy_pass   http://127.0.0.1;
        #}
        # pass the PHP scripts to FastCGI server listening on 127.0.0.1:9000
        #
        #location ~ \.php$ {
        #    root           html;
        #    fastcgi_pass   127.0.0.1:9000; # single backend process
        #    fastcgi_pass   myLoadBalancer; # or multiple, see example above
        #    fastcgi_index  index.php;
        #    fastcgi_param  SCRIPT_FILENAME  $document_root$fastcgi_script_name;
        #    include        fastcgi_params;
        #}
        # deny access to .htaccess files, if Apache's document root
        # concurs with nginx's one
        #
        #location ~ /\.ht {
        #    deny  all;
        #}
    }
    # another virtual host using mix of IP-, name-, and port-based configuration
    #
    #server {
    #    listen       8000;
    #    listen       somename:8080;
    #    server_name  somename  alias  another.alias;
    #    location / {
    #        root   html;
    #        index  index.html index.htm;
    #    }
    #}
    # HTTPS server
    #
    #server {
    #    listen       443 ssl spdy;
    #    server_name  localhost;
    #    ssl                  on;
    #    ssl_certificate      cert.pem;
    #    ssl_certificate_key  cert.key;
    #    ssl_session_timeout  5m;
    #    ssl_prefer_server_ciphers On;
    #    ssl_protocols TLSv1 TLSv1.1 TLSv1.2;
    #    ssl_ciphers ECDH+AESGCM:ECDH+AES256:ECDH+AES128:ECDH+3DES:RSA+AESGCM:RSA+AES:RSA+3DES:!aNULL:!eNULL:!MD5:!DSS:!EXP:!ADH:!LOW:!MEDIUM;
    #    location / {
    #        root   html;
    #        index  index.html index.htm;
    #    }
    #}
}
4) 在nginx的解压目录下运行命令提示框,输入nginx.exe -c conf\nginx-win-rtmp.conf 命令启动
创建两个maven项目(一个是推流,一个是拉流),引入相关依赖
        org.springframework.boot
        spring-boot-starter-parent
        2.2.1.RELEASE


                org.springframework.boot
                spring-boot-maven-plugin


            org.springframework.boot
            spring-boot-starter-web


            org.bytedeco
            javacv-platform
            1.4.1


            org.bytedeco.javacpp-presets
            opencv-platform
            3.4.1-1.4.1
1. 推流服务
1) 创建工具类
public class RecordPush {

    /**
     * 推流器
     * @param outputPath 接收路径
     * @param v_rs       帧率
     * @throws Exception
     * @throws org.bytedeco.javacv.FrameRecorder.Exception
     * @throws InterruptedException
     */
    public void getRecordPush(String outputPath, int v_rs) throws Exception, org.bytedeco.javacv.FrameRecorder.Exception, InterruptedException {

        Loader.load(opencv_objdetect.class);

        //创建采集器
        OpenCVFrameGrabber grabber = new OpenCVFrameGrabber(0);  //本地摄像头默认为0

        //开启采集器
        try {
            grabber.start();
        } catch (Exception e) {
            try {
                grabber.restart();  //一次重启尝试
            } catch (Exception e2) {
                throw e;
            }
        }

        OpenCVFrameConverter.ToIplImage converter = new OpenCVFrameConverter.ToIplImage();  //转换器
        Frame grabframe = grabber.grab();  //获取一帧
        opencv_core.IplImage grabbedImage = null;
        if (grabframe != null) {
            grabbedImage = converter.convert(grabframe); //将这一帧转换为IplImage
        }

        //创建录制器
        FrameRecorder recorder;
        recorder = FrameRecorder.createDefault(outputPath, 1280, 720);   //输出路径,画面高,画面宽
        recorder.setVideoCodec(avcodec.AV_CODEC_ID_H264);  //设置编码格式
        recorder.setFormat("flv");
        recorder.setFrameRate(v_rs);
        recorder.setGopSize(v_rs);

        //开启录制器
        try {
            recorder.start();
        } catch (java.lang.Exception e) {
            System.out.println("recorder开启失败");
            System.out.println(recorder);
            try {
                if (recorder != null) {  //尝试重启录制器
                    recorder.stop();
                    recorder.start();
                }
            } catch (java.lang.Exception e1) {
                e.printStackTrace();
            }
        }

        //直播效果展示窗口
        CanvasFrame frame = new CanvasFrame("直播效果", CanvasFrame.getDefaultGamma() / grabber.getGamma());
        frame.setDefaultCloseOperation(JFrame.EXIT_ON_CLOSE);
        frame.setAlwaysOnTop(true);

        //推流
        while (frame.isVisible() && (grabframe = grabber.grab()) != null) {
            frame.showImage(grabframe);   //展示直播效果
            grabbedImage = converter.convert(grabframe);
            Frame rotatedFrame = converter.convert(grabbedImage);

            if (rotatedFrame != null) {
                recorder.record(rotatedFrame);
            }

            Thread.sleep(50);  //50毫秒/帧
        }
    }
}
2) 创建启动类
/**
 * @ClassName BroadcastApplication
 * @Description : 启动类
 * @Author : R
 * @Date : 2020/8/17 17:18
 */
@SpringBootApplication
@Configuration
public class PushApplication {
    public static void main(String[] args) throws Exception {
        SpringApplicationBuilder builder = new SpringApplicationBuilder(PushApplication.class);
        builder.headless(false).run(args);
        System.out.println("---------------启动成功---------------");

        //设置rtmp服务器推流地址
        String outputPath = "rtmp://127.0.0.1:1935/live/stream";
        RecordPush recordPush = new RecordPush();
        recordPush.getRecordPush(outputPath, 25);
    }
}这里需要注意,需要在启动时做好配置,即把headless配置为false,否则启动时会报java.awt.HeadlessException异常
3) 运行推流服务,如果弹出窗口并且可以通过摄像头接收到画面,那么表示配置成功
2. 拉流服务
1) 创建工具类
public class PullStream {

    /**
     * 播流器
     * @param inputPath  rtmp服务器地址
     * @throws Exception
     * @throws org.bytedeco.javacv.FrameRecorder.Exception
     */
    public void getPullStream(String inputPath) throws Exception, org.bytedeco.javacv.FrameRecorder.Exception {
        //创建+设置采集器
        FFmpegFrameGrabber grabber = FFmpegFrameGrabber.createDefault(inputPath);
        grabber.setOption("rtsp_transport", "tcp");
        grabber.setImageWidth(960);
        grabber.setImageHeight(540);

        //开启采集器
        grabber.start();

        //直播播放窗口
        CanvasFrame canvasFrame = new CanvasFrame("直播------来自"+inputPath);
        canvasFrame.setDefaultCloseOperation(JFrame.EXIT_ON_CLOSE);
        canvasFrame.setAlwaysOnTop(true);
        OpenCVFrameConverter.ToMat converter = new OpenCVFrameConverter.ToMat();

        //播流
        while (true){
            Frame frame = grabber.grabImage();  //拉流
            opencv_core.Mat mat = converter.convertToMat(frame);
            canvasFrame.showImage(frame);   //播放
        }
    }
}
2) 创建启动类
/**
 * @ClassName BroadcastApplication
 * @Description : 启动类
 * @Author : R
 * @Date : 2020/8/17 17:18
 */
@SpringBootApplication
@Configuration
public class PullApplication {
    public static void main(String[] args) throws Exception {
        SpringApplicationBuilder builder = new SpringApplicationBuilder(PullApplication.class);
        builder.headless(false).run(args);
        System.out.println("---------------启动成功---------------");

        //rtmp服务器拉流地址
        String inputPath = "rtmp://127.0.0.1/live/stream";
        PullStream pullStream = new PullStream();
        pullStream.getPullStream(inputPath);
    }
}
3) 推流服务不要停止的前提下,运行拉流服务,如果弹出窗口,并且可以接收到推流服务中的直播画面,说明拉流服务配置成功.
至此,一套简单的直播系统就完成了,看一下最后的结果展示吧.

本文主要查看了 https://www.cnblogs.com/scywkl/p/12101437.html