locust 分布式大全
准备测脚本locustfile.py
from locust import TaskSet, HttpUser

locust_data = {'environment': 'http://127.0.0.1:8000', 'task_name': '压测一号', 'task': [
    {'path': '/test1/books/read_book/', 'method': 'GET', 'task': '1', 'header': {},
     'data': {}, 'field': '', 'value': ''}]}


class Example:

    def __init__(self, path, method, header, data=None, field="", value=""):
        """
        初始化参数
        :param path:
        :param method:
        :param header:
        :param data:
        :param field: 需要断言的字段
        :param value: 需要断言的值
        """
        self.path = path
        self.method = method.upper()
        self.header = header
        self.data = data
        self.field = field
        self.value = value

    def assert_response(self, response):
        """
        断言规则
        :param response: 接口返回的对象
        :return:
        """
        try:
            if self.field != "":
                if response.json()[self.field] == self.value:
                    return response.success()
                else:
                    return response.failure("返回的数据不对:{}".format(response.json()))
        except:
            return response.failure("请求失败,请检查host、api信息是否填写正确!:{}".format(response.text))

    def example_test(self, obj):
        """任务模板"""
        if self.method == "GET":
            with obj.client.get(url=self.path, headers=self.header, params=self.data, catch_response=True,
                                verify=False) as response:
                self.assert_response(response)

        elif self.method == "POST":
            if 'json' in self.header['Content-Type']:
                with obj.client.post(url=self.path, headers=self.header, json=self.data, catch_response=True,
                                     verify=False) as response:
                    self.assert_response(response)
            else:
                with obj.client.post(url=self.path, headers=self.header, data=self.data, catch_response=True,
                                     verify=False) as response:
                    self.assert_response(response)

        else:
            print('目前仅支持GET、POST接口,其他接口还在开发中!')


class Task:
    """任务类"""


class UserBehavior(TaskSet):
    """设置任务"""
    task_name = locust_data['task_name']
    all_data = locust_data['task']
    """通过反射机制循环添加任务"""
    for i in locust_data['task']:
        setattr(Task, task_name + str(all_data.index(i)),
                Example(path=i['path'], method=i['method'], header=i['header'], data=i['data'], field=i['field'],
                        value=i['value']).example_test)

    """循环设置task权重"""
    tasks = {}
    for i in all_data:
        tasks[getattr(Task, task_name + str(all_data.index(i)))] = int(i['task'])


class WebUser(HttpUser):
    """运行"""
    host = locust_data['environment']
    tasks = [UserBehavior]
    min_wait = 1000
    max_wait = 1000
主机模式
一.UI界面执行
1.maste机运行
locust -f locustfile.py --master --web-host=192.168.16.104
–master:以master形式启动
–web-host:指定master的地址(方便打开UI界面,也可以不指定)
2.slave机运行
locust -f locustfile.py --worker --master-host=192.168.16.104
前提:slave机要有和master机上相同的脚本
–worker:代表是slave机
–master-host:指定master IP
访问页面:http://192.168.16.104:8089/

二.无UI界面执行
主master运行
locust -f locustfile.py --master --headless -u 1 -r 1 -t 10s --csv=example --expect-workers 2
headless:命令运行
-u:总用户数
-r:每秒钟产生的用户数
-t:运行时间
–csv:测试结果保存到 example文档中
–expect-workers:指定slave机的数据量,只有达到这个数量后才会运行
slave机连接master机
与UI界面执行一样
docker运行以及分布式运行
一.环境准备
1.安装docker和docker compose (若不用分布式,可以不装docker compose)
2.docker与docker compose版本对应关系:https://docs.docker.com/compose/compose-file/compose-versioning/
备注:这个版本对应关系我总感觉有歧义,我的docker版本:Docker version 19.03.13,docker compose版本:cker-compose version 1.27.4,最后能成功运行。关键是我找不到docker compose3.8的版本。
2.docker的安装就不说了,就说一下docker compose
官方文档教程:https://docs.docker.com/compose/install/

二.locust关于docker的相关操作
locust官方文档:https://docs.locust.io/en/stable/running-locust-docker.html
安装locust的镜像
docker pull locustio/locust
三.单机运行
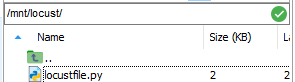
1.将脚本locustfile.py上传至测机(我这里路径直接用的官方的,方便直接运行命令)
2.运行docker
docker run -p 8089:8089 -v $PWD:/mnt/locust locustio/locust -f /mnt/locust/locustfile.py
3.通过IP+8089可以访问
四.分布式
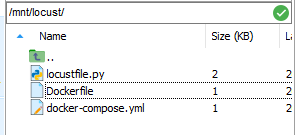
1.准备文件
两个文件docker-compose.yml和Dockerfile
docker-compose.yml(我这里和官网的有点出入,因为我脚本里指定了host,所以这里没指定 -H)
version: '3'

services:
  master:
    image: locustio/locust
    ports:
     - "8089:8089"
    volumes:
      - ./:/mnt/locust
    command: -f /mnt/locust/locustfile.py --master

  worker:
    image: locustio/locust
    volumes:
      - ./:/mnt/locust
    command: -f /mnt/locust/locustfile.py --worker --master-host master
Dockerfile
FROM locustio/locust
RUN pip3 install some-python-package
2.然后将这两文件上传测试机
3.执行命令
worker 可以自定义数量
docker-compose up --scale worker=6
4.访问

5.监控docker 容器的性能
docker stats
