自己写go web框架第二天(Content)
今天实现效果:
将 路由(Route) 独立出来方便后期增强
设计上下文(Content) 封装Request 和 Response ,提供JSON、HTML等返回类型的支持。
先看效果
main.go
package main

import (
	"go-user/red"
	"net/http"
)

func main()  {
	r := red.New()

	r.GET("/red", func(c *red.Content) {
		user := make(map[int]string)
		user[1] = "red"
		user[2] = "momo"
		c.Json(http.StatusOK,user)
	})

	r.Run(":8080")
}
Handler的参数变为了red.Content,提供了查询Query和PostForm参数的功能。
red.Content 封装了HTML,String,JSON函数,能够快速构造http响应。
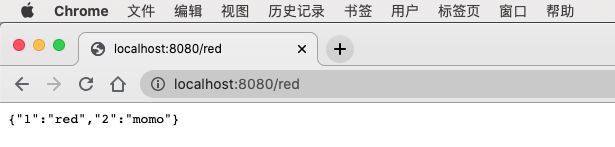
浏览器查看
目录结构为
.
├── README.md
├── go.mod
├── go.sum
├── main.go
└── red
    ├── content.go
    ├── red.go
    └── route.go
设计Content
对Web服务来说,无非是根据请求*http.Request,构造响应http.ResponseWriter。但是这两个对象提供的接口粒度太细,比如我们要构造一个完整的响应,需要考虑消息头(Header)和消息体(Body),而 Header 包含了状态码(StatusCode),消息类型(ContentType)等几乎每次请求都需要设置的信息。
content.go
package red

import (
	"encoding/json"
	"fmt"
	"net/http"
)
//定义Content机构体
type Content struct {
	Writer http.ResponseWriter
	Req *http.Request
	//方法
	Method string
	//请求路径
	Path string
	//状态码
	StatusCode int
}
//构造函数
func newContent( w http.ResponseWriter,r *http.Request) *Content{
	return &Content{
		Writer: w,
		Req: r,

		Method: r.Method,
		Path: r.URL.Path,
	}
}
//获取表单的值
func (c *Content) PostForm(key string) string{
	return c.Req.PostForm.Get(key)
}
//获取url重的值
func (c *Content) Query (key string)string  {
	return c.Req.URL.Query().Get(key)
}
//设置状态码
func(c *Content) setStatus(code int){
	c.StatusCode = code
	c.Writer.WriteHeader(code)
}
//设置头信息
func (c *Content)SetHeader(key,value string){
	c.Writer.Header().Set(key,value)
}
//设置回复体
func (c *Content) String(code int,format string,values...interface{}){
	c.SetHeader("Content-type","text/plain")
	c.setStatus(code)
	c.Writer.Write([]byte(fmt.Sprintf(format,values...)))
}
//设置回复体
func (c *Content)Json(code int,obj interface{}) {
	c.SetHeader("Content-type","application/json")
	c.setStatus(code)
	en := json.NewEncoder(c.Writer)
	if err := en.Encode(obj) ; err != nil {
		http.Error(c.Writer,err.Error(),http.StatusInternalServerError)
	}
}
//设置回复体
func ( c *Content)Html(code int, html string){
	c.SetHeader("Content-type", "text/html")
	c.setStatus(code)
	c.Writer.Write([]byte(html))
}
//设置回复体
func(c *Content)Data(code int,data []byte){
	c.setStatus(code)
	c.Writer.Write(data)
}
- 代码最开头,给map[string]interface{}起了一个别名gee.H,构建JSON数据时,显得更简洁。
- Context目前只包含了http.ResponseWriter和*http.Request,另外提供了对 Method 和 Path
这两个常用属性的直接访问。 - 提供了访问Query和PostForm参数的方法。
- 提供了快速构造String/Data/JSON/HTML响应的方法。
路由(Router)
我们将和路由相关的方法和结构提取了出来,放到了一个新的文件中router.go,方便我们下一次对 router 的功能进行增强,例如提供动态路由的支持。 router 的 handle 方法作了一个细微的调整,即 handler 的参数,变成了 Context。
route.go
package red

import (
	"log"
	"net/http"
)

type  router struct {
	handlers map[string]HandlerFunc
}

func newRouter() *router{
	return &router{make(map[string]HandlerFunc)}
}

func(r *router) addRoute(method string, pattern string, handler HandlerFunc){
	log.Printf("Route %s - %s",method, pattern)
	key := method + "-" + pattern
	r.handlers[key] = handler
}
func (r *router) handle (c *Content) {
	key := c.Method + "-" + c.Path
	if handle, ok := r.handlers[key]; ok {
		handle(c)
	} else {
		c.String(http.StatusNotFound,"404 NOT FOUND %s",c.Path)
	}
}
red.go
package red

import (
	"net/http"
)
//定义函数为HandlerFunc类型
**type HandlerFunc func(*Content)**
//定义Engine结构体
type Engine struct {
	route *router
}
//实现ServeHTTP方法 根据请求的方法及路径来匹配Handler
**func (engine *Engine) ServeHTTP(w http.ResponseWriter, r *http.Request) {
	c := newContent(w, r)
	engine.route.handle(c)
}**
//外部调用框架入口
func New() *Engine {
	return &Engine{newRouter()}
}
//框架新增路由
**func (engine *Engine) addRoute(method string, pattern string, handler HandlerFunc) {
	engine.route.addRoute(method,pattern,handler)
}**
//匹配get方法
func (engine *Engine) GET(pattern string, handler HandlerFunc) {
	engine.addRoute("GET", pattern, handler)
}
//匹配post方法
func (engine *Engine) POST(pattern string, handler HandlerFunc) {
	engine.addRoute("POST", pattern, handler)
}
//启动服务
func (engine *Engine) Run(addr string) (err error) {
	return http.ListenAndServe(addr, engine)
}
将router相关的代码独立后,gee.go简单了不少。最重要的还是通过实现了 ServeHTTP 接口,接管了所有的 HTTP 请求。相比第一天的代码,这个方法也有细微的调整,在调用 router.handle 之前,构造了一个 Context 对象。这个对象目前还非常简单,仅仅是包装了原来的两个参数,之后我们会慢慢地给Context加上更多内容。
RedBdeMacBookPro:go-user huhongbin$ go run main.go
2020/07/13 09:55:04 Route GET - /red
运行代码,还实现了类似日志的输出格式。