springBoot配置文件(四)application常见配置
一、命令行参数:
1、server.address=xxx.xxx.xx.xxx
服务器绑定ip地址,多网卡时可以指定
2、server.port=xxx
可以指定springboot内嵌容器启动的端口,默认使用tomcat容器时在8080端口,右键run- java application/springboot..,可以支持不同的容器,在引入不同的依赖时。当server.port=0时,表示自动扫面获取一个可用的端口。
3、ssl的安全访问配置:
server.port=8443
#ssl的安全访问配置
server.ssl.key-store=classpath:keystore.jks
server.ssl.key-store-password=secret
server.ssl.key-password=another-secret
注意: 目前spring-boot不支持http和https同时启用的情况,只支持使用其中一个,如果需要同时使用,可以使用其他形式的实现方式。
该部分对应org.springframework.boot.autoconfigure.webServerProperties类。
此外还有一些不是很常用的如:server.http2.enable=true/false//该属性可以支持http2的协议类型,目前只支持tomcat和undertow的容器并且需要JDK1.8+,官文上对于内嵌tomcat的配置参数也有很多。
二、开发/测试/生产环境配置:
1、语法:
spring.profiles.active=xxxx//该系统变量可以指明要使用的配置文件,一般应用于多环境配置分离,如生产环境(production),开发环境(development),测试环境(test)等,可以自定义,如开发环境配置文件为application-dev.properties,则spring.profiles.active=dev,在启动时会加载application-dev.properties配置文件。
2、使用方法:
(1)手动指定:这种方法切换环境需要修改配置文件,不够方便
spring.profiles.active = {profile}
#如spring.profiles.active = prod(2)打包自动指定。
[email protected]@3、demo:
启动类:
package com;

import org.springframework.boot.SpringApplication;
import org.springframework.boot.autoconfigure.SpringBootApplication;

@SpringBootApplication
public class ProfilesApplication {

    public static void main(String args[]){
        SpringApplication.run(ProfilesApplication.class,args);
    }
}
多环境配置文件:
开发环境application-dev.properties:
zt.profiles = this is dev测试环境application-test.properties
zt.profiles = this is test生产环境application-prod.properties
zt.profiles = this is prod接口:
package com.controller;
import org.springframework.beans.factory.annotation.Value;
import org.springframework.web.bind.annotation.RequestMapping;
import org.springframework.web.bind.annotation.RestController;
@RestController
public class TestController {
@Value("${zt.common}")
private String common;
@Value("${zt.profiles}")
private String profilesStr;
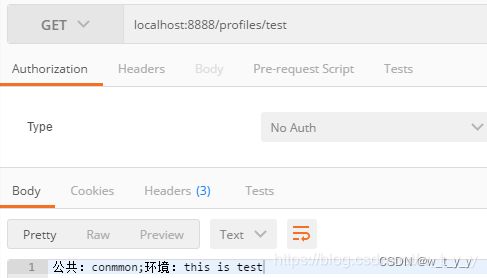
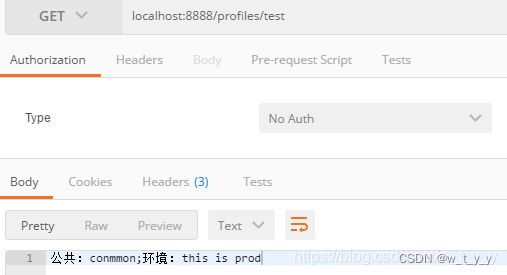
@RequestMapping("/test")
public String getStr(){
return "公共:"+common+";环境:"+profilesStr;
}
}下面分别列下手动、自动方法的区别写法:
(1)手动方法:
pom:
    4.0.0

    com.profiles
    profiles-demo
    1.0-SNAPSHOT


        org.springframework.boot
        spring-boot-starter-parent
        1.4.1.RELEASE


            org.springframework.boot
            spring-boot-starter-web
默认配置文件:
server.port= 8888
server.context-path=/profiles
spring.profiles.active=prod
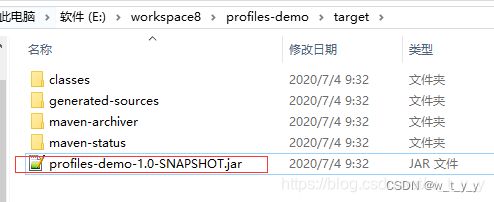
zt.common = conmmonmvn clean package打包测试一下:
这时候我们打包带参数,如mvn clean package -Ptest、mvn clean package -Pdev、mvn clean package -Pprod,打包后的仍然是prod,就是说必须手动修改application.properties中的环境。
(2)自动方法:
在pom中添加以下配置:
            test

                true


                test


            dev

                false


                dev


            prod

                false


                prod
并把application.properties中的profiles指定改为
[email protected]@这时候打包使用mvn clean package -Ptest、mvn clean package -Pdev、mvn clean package -Pprod,打出来的就是指定环境的包了。pom文件中test一项默认是true,所以如果不指定环境直接使用mvn clean package打包就是test环境。
idea启动则可以点击右侧的maven,选择环境勾上,再启动服务即可:


启动服务访问的为prod环境:

再去掉prod,勾上test:

重启服务访问的为test: