day11 动态搜索框+相关知识总结
动态搜索框+相关知识总结
-
- 涉及的HTML5< input >标签属性
-
- placeholder
- 涉及的CSS3 属性
-
- box-sizing
- z-index:
- 补充总结
-
- `position`和`cursor`属性简介在这里:
- `box-shadow`属性简介在这里:
- `transition`属性介绍在这里:
- 对`~`这个选择器有疑惑的看这里:
- `transform`属性介绍在这里:
- 动态搜索框展示
涉及的HTML5< input >标签属性
标签规定了用户可以在其中输入数据的输入字段。 元素在 元素中使用,用来声明允许用户输入数据的 input 控件。输入字段可通过多种方式改变,取决于 type 属性。
可以回顾一下以下博客中提到的中的
day1_1 html和CSS基础
![]()
若不加
placeholder
本例涉及的placeholder 属性是 HTML5 中的新属性。
placeholder 属性规定可描述输入字段预期值的简短的提示信息(比如:一个样本值或者预期格式的短描述)。该提示会在用户输入值之前显示在输入字段中。
注意:placeholder 属性适用于下面的 input 类型:text、search、url、tel、email 和 password。
涉及的CSS3 属性
box-sizing
box-sizing 属性定义如何计算一个元素的总宽度和总高度,主要设置是否需要加上内边距(padding)和边框等。
默认情况下,元素的宽度(width) 和高度(height)计算方式如下:
- width(宽度) + padding(内边距) + border(边框) = 元素实际宽度
- height(高度) + padding(内边距) + border(边框) = 元素实际高度
但若设置box-sizing: border-box;,padding(内边距)和 border(边框)将不会影响元素实际宽度和高度,即永远是固定的width和height,盒子不会被,padding(内边距)和 border(边框)撑破。
比如,创造一个没有设置 box-sizing 属性为 border-box,同时设置其样式为:
width:100px; border:10px solidred; padding:10px;
那么根据默认的宽度计算方法,最终容器的实际宽度为:
100px(width)+2*10px*(padding)+2*10px(border)=140px
即得到了一个比预期设置的width(100px)更大的容器,破坏了网页布局。但margin(外边距)的尺寸不会被计算入最终容器宽度。
但如果我们把容器的 box-sizing 属性为 border-box,那么创建一个和上段中相同设置的容器时,他的最终宽度就是100px, 它的内容部分(content)的有效宽度变成了 100px-210px-210px =60px; 所以会得到一个预期大小的盒子容器,内容部分尺寸被压缩,不影响整体布局。
所以在我的示例中是使用了全局设置。
* {
    margin: 0;
    padding: 0;
    box-sizing: border-box;
}
不太清楚的话可以看看day2 盒子模型和块内元素转换问题
z-index:
z-index属性指定了一个元素的堆叠顺序(哪个元素应该放在前面,或后面)。
一个元素可以有正数或负数的堆叠顺序,具有更高堆叠顺序的元素总是在较低的堆叠顺序元素的前面。
注意: z-index 属性只对具有 position 属性(如 position: relative;、position: absolute;、position: fixed;)的元素有效。如果两个定位元素重叠,没有指定z - index,最后定位在HTML代码中的元素将被显示在最前面。
补充总结
position和cursor属性简介在这里:
day7 CSS实用案例2——下拉菜单。本篇中当 .container 元素的定位为 position: absolute; ,子元素通常需要设置适当的位置属性(如 top、bottom、left、right 等)来相对于 .container 进行定位。
box-shadow属性简介在这里:
day2 盒子模型和块内元素转换问题
transition属性介绍在这里:
day8 CSS3渐变gradients+CSS3过渡transition
对~这个选择器有疑惑的看这里:
day9 兄弟选择器 ~和+
transform属性介绍在这里:
day10 CSS3 transform属性之2D转换+交集选择器
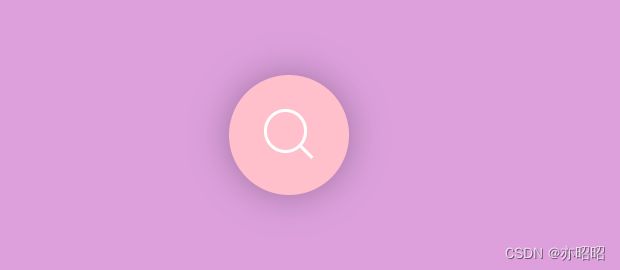
动态搜索框展示
<div class="container">
        <input type="text" placeholder="查找">
        <div class="search">div>
    div>
* {
    margin: 0;
    padding: 0;
    box-sizing: border-box;
}

body {
    width: 100%;
    height: 100%;
    background: plum;
}

/* .search {
    border: 5px solid red;
} */

.container {
    position: absolute;
    margin: auto;
    top: 0;
    left: 0;
    right: 0;
    bottom: 0;
    width: 300px;
    height: 100px;
    /* border: 3px solid blue; */
}

/* 搜索框样式 */
.container .search {
    position: absolute;
    margin: auto;
    top: 0;
    right: 0;
    bottom: 0;
    left: 0;
    width: 80px;
    height: 80px;
    background: pink;
    border-radius: 50%;
    transition: all 1s;
    z-index: 4;
    box-shadow: 0 0 25px 0 rgba(0, 0, 0, 0.3);
}

.container .search:hover {
    cursor: pointer;
}

/* 图标样式
通过:before和:after伪类来创建搜索图标。
:before伪类创建一个斜线,表示放大镜的手柄;
:after伪类创建一个圆圈,表示放大镜的镜头。
通过设置位置和尺寸,并添加过渡效果,
使图标在交互时发生变化。*/
.container .search::before {
    content: "";
    position: absolute;
    margin: auto;
    top: 22px;
    right: 0;
    bottom: 0;
    left: 22px;
    width: 12px;
    height: 2px;
    background: white;
    transform: rotate(45deg);
    transition: all 0.5s;
}

.container .search::after {
    content: "";
    position: absolute;
    margin: auto;
    top: -5px;
    right: 0;
    bottom: 0;
    left: -5px;
    width: 25px;
    height: 25px;
    border-radius: 50%;
    border: 2px solid white;
    transition: all 0.5s;
}

/* 输入框样式 */
.container input {
    font-family: "Inconsolata", monospace;
    position: absolute;
    margin: auto;
    top: 0;
    right: 0;
    bottom: 0;
    left: 0;
    width: 50px;
    height: 50px;
    outline: none;
    border: none;
    background: pink;
    color: white;
    text-shadow: 0 0 10px pink;
    padding: 0 80px 0 20px;
    border-radius: 30px;
    box-shadow: 0 0 25px 0 pink, 0 20px 25px 0 rgba(0, 0, 0, 0.2);
    transition: all 1s;
    opacity: 0;
    z-index: 5;
    font-weight: bolder;
    letter-spacing: 0.1em;
}

.container input::placeholder {
    color: white;
    opacity: 0.5;
    font-weight: bolder;
}

.container input:hover {
    cursor: pointer;
}

.container input:focus {
    width: 300px;
    opacity: 1;
    cursor: text;
}

/*搜索框的变换效果
通过使用相邻兄弟选择器~,
当输入框获得焦点时,搜索框的位置发生变化,
通过设置right属性来改变搜索框的位置,
并改变背景颜色和层级。 */
.container input:focus~.search {
    right: -250px;
    background: plum;
    z-index: 6;
}

/* 放大镜的柄 */
.container input:focus~.search::before {
    top: 0;
    left: 0;
    width: 25px;
}

/* 放大镜的圆圈
将放大镜的镜头变为斜线,并移除边框和圆角效果*/
.container input:focus~.search::after {
    top: 0;
    left: 0;
    width: 25px;
    height: 2px;
    border: none;
    background: white;
    border-radius: 0%;
    transform: rotate(-45deg);
}
学习的代码参考链接:https://c.runoob.com/codedemo/6186/

