【单目测距】3D检测框测距
文章目录
-
- 一、前言
- 二、2D框测距局限性
- 三、3D框测距
-
- 3.1、确定接地点
- 3.2、测距结果对比
- 3.3、代码
- 3.4、代码解析
- 四、后记
一、前言
- 3D 检测模型用的 fcos3D。
- 如何对 3D 框测距?
- 3D 检测框测距对比 2D 检测框测距优势在哪?
二、2D框测距局限性
(1) 横向测距偏差。当目标有一定倾斜角度时,尤其近距离目标。如下图id = 0目标白车,如果是2D检测框测距,会误认为车尾在点 A 处,而实际应该在图像最左侧外部
(2) 无法测量目标的本身的长宽高。如图id = 4目标骑行者。如果是2D检测框,可以估算出目标离自身的距离。但是无法测量目标本身的深度。也无法精确测量目标的宽与高,对后续多目标跟踪、相机雷达融合带来未知的挑战。
三、3D框测距
为了弥补或解决2D检测框的局限性。我们可以采用3D检测框检测测距。3D检测当下主要困难在于:3D数据标注;数据集;模型优化等。
3.1、确定接地点
当前帧3D检测信息。第1位数是类别。后面16位数分别是8个点x像素、y像素。
(1) 对8个点以y像素进行排序。最大的四个y 确定为底边四个点。另四个y确定为顶边四个点。
(2) 在对底边四个点排序。得出前方两个点,后方两个点。再根据x像素排序,得出最终底边结果。
(3) 底边四个点结果得出,根据x像素一致,得出对应的顶边四个顶点。确定最终8个点顺序
窗外的雨水争先恐后拍打河面,寒气(降薪、裁员)冲击大家的心灵。回归初心、不惧困难。竹杖芒鞋轻胜马,谁怕?一蓑烟雨任平生。
3.2、测距结果对比
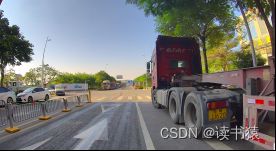
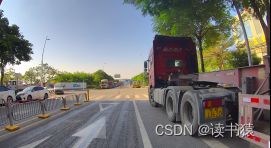
| 2D检测 yolov5 | 3D检测 fcos3D |
|---|---|
 |
 |
注:我这里直接用了原图,没有进行校正
左图:2D 检测 接地点像素: (231, 720) 坐标(10.02413002, 5.98502587)
右图:3D 检测 接地点像素: (127, 726) 坐标 (10.15053704, 7.33307718)
雷达检测目标 坐标为(10.12,8.13)
如果把雷达近似当做真值,对于白车这个目标,2D框测距横向测距误差偏大。
3D 检测还可以计算出 center_x = 11.17567131, center_y = 7.01885511, width = 1.27463446, length = 2.15826759, angle = 73.30978614
3.3、代码
import yaml
import numpy as np
import cv2


def read_yaml(path):
    with open(path, 'r', encoding='utf-8') as f:
        result = yaml.load(f.read(), Loader=yaml.FullLoader)
    return result


def get_r_t_mtx(path, f_r_b_l):
    sensor_list = ["front_center", "right_center", "back_center", "left_center"]
    yaml_result = read_yaml(path)["camera"]  # 读取yaml配置文件h
    res_pitch = yaml_result[sensor_list[f_r_b_l]]["pitch"]
    res_h = yaml_result[sensor_list[f_r_b_l]]["height"]
    res_r = np.array(yaml_result[sensor_list[f_r_b_l]]["rotation"]).reshape(3, 3)
    res_t = np.array(yaml_result[sensor_list[f_r_b_l]]["translation"]).reshape(3, 1)
    res_mtx = np.array(yaml_result[sensor_list[f_r_b_l]]["K"]).reshape(3, 3)
    return [res_pitch, res_h, res_mtx, res_r, res_t]


def get_distance(pixe_x, pixe_y, param):
    pitch, h, K, R, T = param
    sigma = np.arctan((pixe_y - K[1][2]) / K[1][1])
    z = h * np.cos(sigma) / np.sin(sigma + pitch)  # 深度
    x_pixe, y_pixe = 2 * K[0][2] - pixe_x, 2 * K[1][2] - pixe_y
    camera_x = z * (x_pixe / K[0][0] - K[0][2] / K[0][0])
    camera_y = z * (y_pixe / K[1][1] - K[1][2] / K[1][1])
    camera_z = z
    x = R[0][0] * camera_x + R[0][1] * camera_y + R[0][2] * camera_z + T[0]
    y = R[1][0] * camera_x + R[1][1] * camera_y + R[1][2] * camera_z + T[1]
    z = R[2][0] * camera_x + R[2][1] * camera_y + R[2][2] * camera_z + T[2]
    return x, y, z


# show image
def show_img(img):
    cv2.namedWindow("show")
    cv2.imshow("show", img)
    cv2.waitKey(0)


# 画线
def draw_line(img, points, lines, color):
    list_line = []  # 存储 12 根线
    for i, point in enumerate(points):
        line = np.array([points[lines[i][0]], points[lines[i][1]]], np.int32).reshape((-1, 1, 2))  # 3D框8条横线
        list_line.append(line)
        if i < 4:
            line_col = np.array([points[i], points[i + 4]], np.int32).reshape((-1, 1, 2))  # 3D框4条竖线
            list_line.append(line_col)
    cv2.polylines(img, list_line, True, color)  # cv2.polylines 一次性可视化画线
    return img


# 获取类别颜色。不同类别对应不同颜色
def get_color(label):
    # car truck trailer bus vehicle bicycle motorcycle pedestrian traffic_cone barrier
    colors_list = [(96, 48, 176),
                   (105, 165, 218),
                   (18, 153, 255),
                   (15, 94, 56),
                   (203, 192, 255),
                   (34, 139, 34),
                   (211, 102, 160),
                   (171, 89, 61),
                   (140, 199, 0),
                   (0, 69, 255),
                   (31, 102, 156),
                   (42, 42, 128)]
    return colors_list[int(label)]


def point_to_point_distance(point1, point2):
    x1, y1 = point1
    x2, y2 = point2
    res = np.sqrt(np.power(x2 - x1, 2) + np.power(y2 - y1, 2))
    return res


def get_3D_distance(points, param):
    x0, y0, z0 = get_distance(points[0][0], points[0][1], param)
    x1, y1, z1 = get_distance(points[1][0], points[1][1], param)
    x2, y2, z2 = get_distance(points[2][0], points[2][1], param)
    x3, y3, z3 = get_distance(points[3][0], points[3][1], param)
    c_y = (y0 + y1 + y2 + y3) / 4
    c_x = (x0 + x1 + x2 + x3) / 4
    w = point_to_point_distance((x0, y0), (x1, y1))
    l = point_to_point_distance((x0, y0), (x3, y3))
    angle = np.arctan((x3 - x0) / (y0 - y3)) * 180 / np.pi
    return c_x, c_y, w, l, angle


# 根据底面四个点顺序 确定 顶面四个点顺序
def four_point_sort(bottom_four_point, top_four_point):
    res = [[]] * 4
    for i in range(4):
        for x, y in top_four_point:
            if -2 < x - bottom_four_point[i][0] < 2:  # 底面点对应顶面点 x 像素应一致 保险起见 约束在两个像素内
                res[i] = [x, y]
                break
    return res


def visual_detect(path, img):
    msg = np.loadtxt(path)
    for index, object in enumerate(msg):
        if index != 0:
            continue
        color = get_color(object[0])
        point_list = []
        for i in range(8):
            x, y = int(object[1 + 2 * i]), int(object[2 + 2 * i])
            x, y = int(x * 1920 / 1600), int(y * 1080 / 900)
            point_list.append([x, y])
        point_list.sort(key=lambda x: x[1], reverse=True)
        point_res = [[]] * 8
        point_res[:2] = point_list[:2] if point_list[0] < point_list[1] else point_list[:2][::-1]
        point_res[2:4] = point_list[2:4] if point_list[2] > point_list[3] else point_list[2:4][::-1]
        point_res[4:] = four_point_sort(point_res[:4], point_list[4:])
        c_x, c_y, w, l, angle = get_3D_distance(point_res, front_param)
        img = draw_line(img, point_res, lines, color)
        for index, point in enumerate(point_res):
            cv2.circle(img, (point[0], point[1]), 2, color, thickness=2, lineType=None, shift=None)
            cv2.putText(img, str(index), (point[0], point[1]), 2, 1, color, thickness=None, lineType=None)
    show_img(img)


if __name__ == '__main__':
    front_param = get_r_t_mtx("sensor_param.yaml", 0)  # 获取相机外参
    img = cv2.imread("366.jpg")
    lines = [[0, 1], [1, 2], [2, 3], [3, 0], [4, 5], [5, 6], [6, 7], [7, 4]]
    visual_detect("./366.txt", img)
3.4、代码解析
函数 read_yaml 与函数 get_r_t_mtx 是读取相机标定文件,然后获取相机内参、外参。为了后续计算距离。
函数 get_distance 主要是计算接地点距离;看过我之前单目测距博客的朋友应该很熟悉这套公式了。
函数 get_color 获取不同类别对应不同颜色;函数draw_line 画 3D 框
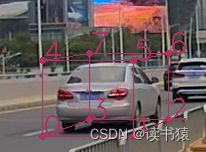
函数 four_point_sort 获取对应点排序,如图 0 1 2 3 4 5 6 7 确定每个点最终顺序。get_3D_distance 计算框中心点、长、框、框朝向角。
函数 visual_detect 对点进行排序与可视化。
四、后记
博客就写到这里吧。有任何疑问,都可提出,欢迎大家私信交流。


