C++&Python&C# 三语言OpenCV从零开发(7):图像的阈值
文章目录
- 相关链接
- 前言
- 阈值
-
- 阈值使用
-
- 代码
-
- Python
- C++
- Csharp
-
- csharp代码问题
- 总结
相关链接
C++&Python&Csharp in OpenCV 专栏
【2022B站最好的OpenCV课程推荐】OpenCV从入门到实战 全套课程(附带课程课件资料+课件笔记)
OpenCV一个窗口同时显示多张图片 (C++)
前言
我感觉我之前的比较实在是太过于偏代码了,缺少了图形学的知识的记录。之后的笔记我会把图形学的知识也记录上去。
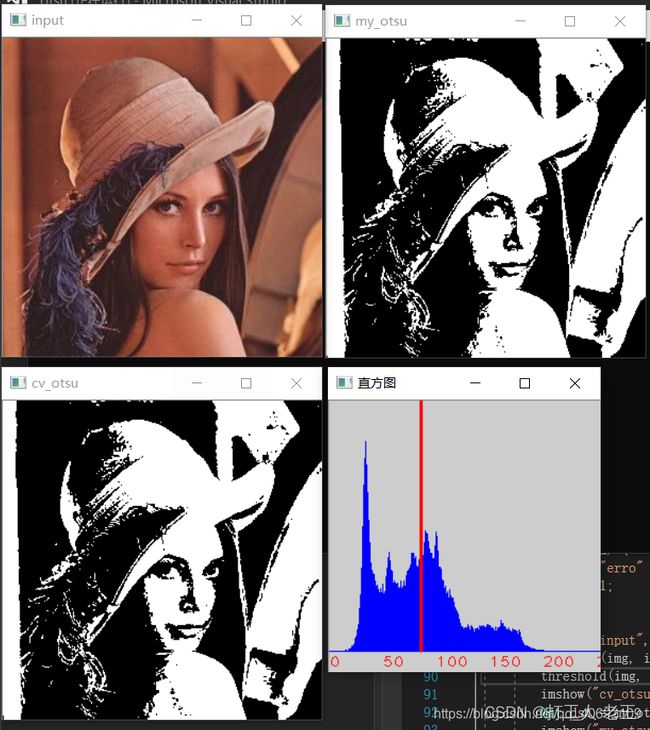
阈值
阈值简单来说就是增强图片的对比。用过Ps的人就知道阈值是什么意思,在电脑绘画中用的还是比较多的
阈值使用

代码
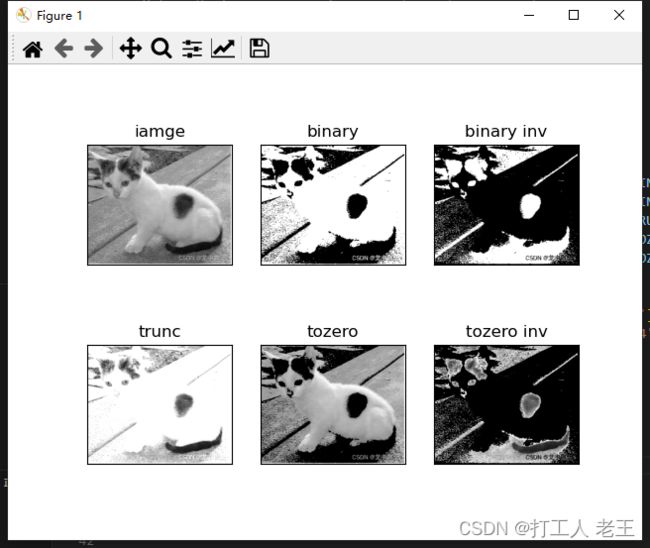
Python
# %%
# 导入包
import cv2
import matplotlib.pyplot as plt
import numpy as np

image = {
    "image":'',
    "gray":'',

}

image["image"] = cv2.imread("D:/workSpace/OpenCV/HellOpenCV/Resources/image/cat.png")

# 获取颜色通道,因为cv2是BGR的顺序,所以这里是B 灰度
image["gray"]= cv2.split(image['image'])[0]

thresh = {
    '1' : '','2': '','3': '','4': '','5': ''
}

# 调用不同的阈值处理算子
ret , thresh['1'] = cv2.threshold(image['gray'],127,255,cv2.THRESH_BINARY)
ret , thresh['2'] = cv2.threshold(image['gray'],127,255,cv2.THRESH_BINARY_INV)
ret , thresh['3'] = cv2.threshold(image['gray'],127,255,cv2.THRESH_TRUNC)
ret , thresh['4'] = cv2.threshold(image['gray'],127,255,cv2.THRESH_TOZERO)
ret , thresh['5'] = cv2.threshold(image['gray'],127,255,cv2.THRESH_TOZERO_INV)

# 将数据总和成数组
titles = ['iamge','binary','binary inv','trunc','tozero','tozero inv']
images = [image['gray'],thresh['1'],thresh['2'],thresh['3'],thresh['4'],thresh['5']]

# 循环赋值到plt中
for i in range(6):
    plt.subplot(2,3,i+1),plt.imshow(images[i],'gray')
    plt.title(titles[i])
    plt.xticks([]),plt.yticks([])

plt.show()
C++
这里为了一次性展示多个窗口,我就CSDN上面找了个方法
OpenCV一个窗口同时显示多张图片 (C++)
#include 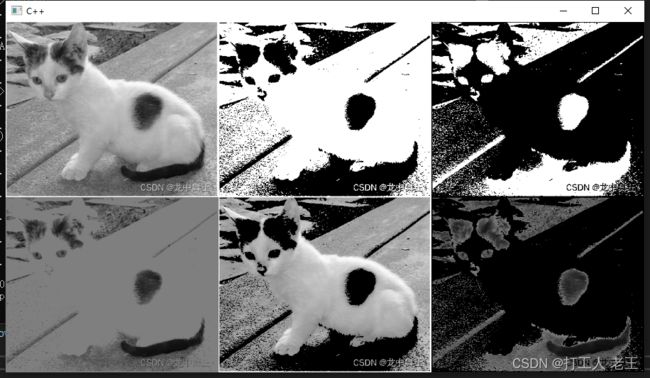
Csharp
还是那句话,C++跑通了,Csharp抄抄就可以了。
using OpenCvSharp;
using System;
using System.Collections.Generic;
using System.Linq;
using System.Numerics;
using System.Security.Cryptography;
using System.Text;
using System.Threading.Tasks;
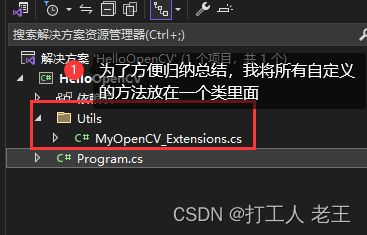
namespace HelloOpenCV.Utils
{
public static class MyOpenCV_Extensions
{
/// 运行代码
 static void Main(string[] args)
 {
     Mat image = Cv2.ImRead("D:/workSpace/OpenCV/HellOpenCV/Resources/image/cat.png");

     Mat[] bgr = new Mat[3];
     Cv2.Split(image, out bgr);
     Mat gray = bgr[0];

     Mat[] threshs = new Mat[5];
     for(var i = 0; i < threshs.Length; i++)
     {
         threshs[i] = new Mat();
     }
     Cv2.Threshold(gray, threshs[0], 127, 255, ThresholdTypes.Binary);
     Cv2.Threshold(gray, threshs[1], 127, 255, ThresholdTypes.BinaryInv);
     Cv2.Threshold(gray, threshs[2], 127, 255, ThresholdTypes.Trunc);
     Cv2.Threshold(gray, threshs[3], 127, 255, ThresholdTypes.Tozero);
     Cv2.Threshold(gray, threshs[4], 127, 255, ThresholdTypes.TozeroInv);

     var res = MyOpenCV_Extensions.MultipleImage(new List<Mat>() {
         gray, threshs[0], threshs[1], threshs[2], threshs[3], threshs[4]
     }, 3);


     Cv2.ImShow("Csharp", res);

     Cv2.WaitKey(0);
     Cv2.DestroyAllWindows();


 }

csharp代码问题
遇到了几个坑
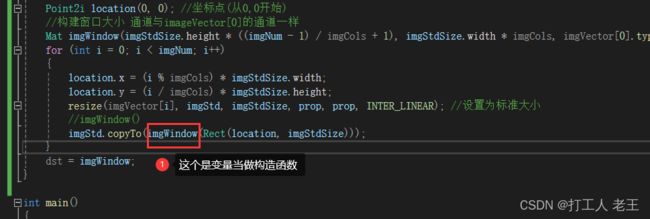
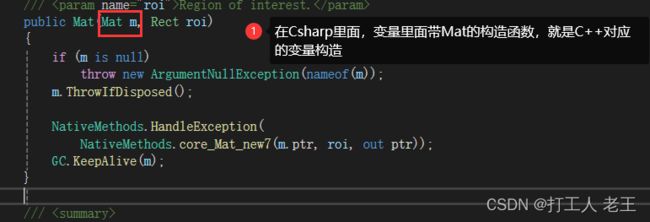
C++是能直接把变量当做构造函数的,C# 对应的代码是构造函数里面带Mat参数的
而且C++的构造函数还不好定位,我进去找不到源码。我不知道C++ 的代码是怎么调试的,毕竟没怎么接触过

总结
跟之前的套路差不多,Python跑通,C++ 翻译Python+上网查资料,Csharp翻译C++。我还是觉得Csharp优雅多了,写起来舒服,C++ 这个语法用起来有点痛苦。而且C++ 报错天天给我报内存变量报错,我哪里能看得懂啊,顶多定位到哪行代码。