使用vue+antd,自定义vue组件,实现功能复用
1.啰唆两句
1)、工作中,我们会发现有些前端操作是经常会用到的,我们就拿Table表格的添加和修改举例子,如果用到一次写一次,那我们的代码就太臃肿了;
2)、我们可以把这些可以复用的功能抽成一个组件来循环使用,哪里需要用到就只需要去调用就行了。
3)、重点是学思路,学方法。
2.直接上图
1)、这是需要做的样式界面。

2)、这是添加界面

3)、这是修改界面

4)、思路分析
其实添加数据跟修改数据的界面都是一模一样,唯一不同的只是,添加只需要填入数据即可;而修改就需要传入一个ID,去调用后端查询接口,查询出需要修改的这条数据,然后把后端返回给我们的数据展示在modal框里面,再去修改。
5)、总结
把不同的数据抽出来,定义成公共的:
1.modal标题
2.组件ID(修改时用来查询数据)
3.上代码
1).环境配置:
vue3.0+antd2.0
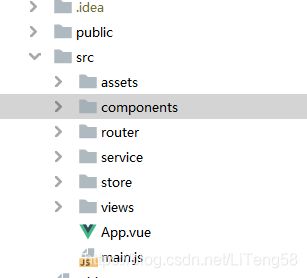
2).新建一个vue页面,为了规范,自定义的组件一般都放在 components中

3).这是我定义的添加跟修改共用的子组件
<!-- 权限 edit Modal -->
<template>
    <div>
        <a-modal :title="modalTitle"			//组件标题,值是从父组件传入
                 :maskClosable="false"
                 :visible=visible				//vision:意思是组件是否显示
                 :footer="null"
                 width="600px"					//组件modal框宽的大小
                 @cancel="handleModalCancel" >	//当我们关闭组件modal框,会触发的函数
            <!-- form -->
            <a-form ref="ruleForm"				//这里需要给form表单设置ref属性,用于后面数据校验
                    :model="permissionForm"		//form表单数据双向绑定
                    :rules="rules"				//form表单数据验证
                    :label-col="labelCol"
                    :wrapper-col="wrapperCol">
                <!--权限名称-->
                <a-form-item ref="perName" label="权限名称" name="perName">
                    <a-input v-model:value="permissionForm.perName" />
                </a-form-item>
                <!-- 权限编码 -->
                <a-form-item label="权限编码" name="perCode">
                    <a-input v-model:value="permissionForm.perCode" />
                </a-form-item>
                <!--菜单ID-->
                <a-form-item label="菜单ID" name="menuId">
                    <a-input v-model:value="permissionForm.menuId" />
                </a-form-item>
                <!--备注-->
                <a-form-item label="备注说明" name="discription">
                    <a-textarea v-model:value="permissionForm.description" :rows="6"/>
                </a-form-item>
            </a-form>

            <!--页脚-->
            <a-row class="bgzt-top-margin">
                <a-col :span="8" :offset="4">
                    <a-button key="back" @click="reset()" class="bgzt-btn">
                        取消
                    </a-button>
                </a-col>
                <a-col :span="8" :offset="4">
                    <a-button key="submit" type="primary" :loading="loading" @click="savePermission()" class="bgzt-btn bgzt-bg-primary">
                        <span v-if="!permissionId">添加</span>
                        <span v-if="permissionId">保存</span>
                    </a-button>
                </a-col>
            </a-row>
        </a-modal>
    </div>
</template>

<script>
    export default {
        name: "PermissionEditModal",	//组件名
        components:{},
        //从父组件传递的值
        props:{
            permissionId: String,       //附属文件主键
            modalTitle: String ,        //modal框 标题
            isVisible: Boolean,			//判断modal框 是否显示
        },
        data(){
            return {
                visible: false,
                permissionForm:{},		//form表单数据源
                rules: { },  			//校验规则
                labelCol: { span: 6 },
                wrapperCol: { span: 15, offset:1 },
                loading: false,
            }
        },
        mounted:function(){
        	//form表单校验规则
            this.rules = {
                perName :[
                    { required: true, message: '请输入权限名称', trigger: 'blur' },
                    { min: 1, max: 50, message: '长度不能超过50个字符', trigger: 'blur' },
                ],
                perCode:[
                    { required: true, message: '请输入权限编码', trigger: 'blur' },
                    { min: 1, max: 50, message: '长度不能超过50个字符', trigger: 'blur' },
                ],
                menuId:[
                    { required: true, message: '请输入菜单ID', trigger: 'blur' },
                    { min: 1, max: 50, message: '长度不能超过50个字符', trigger: 'blur' },
                ],
            };
            //在界面初始化完成之后,调用这个函数
            this.init();
        },
        methods:{
            //初始化数据
            init(){
            	//判断是添加还是修改,添加不会传入ID,修改则会,修改需要先查询出当前修改的数据信息
                if (this.permissionId){
                	//这里就需要换成你们自己交互后端的代码了,这里是我自己交互后端接口的写法
                    this.$axios.get(`/permissionCtrl/queryPermissionById/${this.permissionId}`).then(resp=>{
                        console.log("根据ID查询");
                        console.log(resp);
                        //把查出来的数据传递给form数据集
                        this.permissionForm = resp.result;
                    })
                }
                if (this.isVisible){	//判断是否显示modal框
                    this.visible = true;
                }
            },
            handleModalCancel(){		//隐藏modal框
                this.visible = false;
            },
            savePermission(){			//点击保存的函数
            	//根据我们上面写的校验规则,先校验form表单
                this.$refs.ruleForm.validate().then(() => {
                    this.loading = true;
                    //这里是我请求的后端接口,我的添加跟修改都是调同一个接口,所以我不需要做判断,
                    //如果有小伙伴的接口不是同一个,需要做一个判断,添加操作就调用添加的接口,
                    //修改操作就调用修改的接口,可以在父组件调用子组件的时候,多定义一个属性值,
                    //专门用来判断是添加操作还是修改操作,然后在我们保存的时候,做一个判断操作类型
                    this.$axios.post('/permissionCtrl/savePer',this.permissionForm).then(resp=>{
                            if(resp.success){
                            	//当我们添加或者是修改成功后,给父组件一个回调事件
                            	//(这里可以理解为,子组件已经做完事了,父组件你可以刷新数据了)
                            	//说明一下this.$emit这是固定语法,permissionsave是回调事件名,
                            	//回调事件名只能是小写,不能驼峰式命名,不然会报错,
                            	//后面一个success是我自己随意传递的字符串,具体传递什么看自己需求
                                this.$emit('permissionsave',"success");
                                this.reset(); //重置数据 & 关闭
                            }else{
                                this.$message.error(resp.message);
                            }
                            this.loading = false;
                        });
                }).catch(error => {
                    console.log('error', error);
                });
            },
            reset(){
              this.visible = false;
              this.permissionForm = {};
              this.loading = false;
            },
        },
    }
</script>

<style scoped>

</style>
4).父组件调用子组件
代码有点繁多,不要太多去关注网页样式,我们主要观察怎么去调用子组件即可
<template>
<div class="bgzt-page">
<div class="bgzt-sub-page">
<!-- 添加 -->
<a-row class="bgzt-bottom-margin-sm">
<a-col :span="4" :offset="1" @click="addAuthority()" class="bgzt-pointer">
<img src="../../assets/images/tianjia.png" alt="添加权限"/> 添加
</a-col>
<a-col :span="19"></a-col>
</a-row>
<div class="bgzt-page-content">
<!-- form -->
<a-form layout="inline" :model="permissionForm">
<a-row class="bgzt-bottom-margin">
<a-col :span="8" :offset="1">
<a-form-item label="权限名称" name="name" >
<a-input size="large" v-model:value="permissionForm.name" placeholder="请输入权限名称" allow-clear/>
</a-form-item>
</a-col>
<a-col :span="2" :offset="1">
<a-button type="primary" value="large" class="bgzt-btn bgzt-bg-primary" block @click="querySearch()">
<SearchOutlined />查询
</a-button>
</a-col>
</a-row>
</a-form>
<!-- table -->
<a-table :pagination="pagination"
:row-selection="rowSelection"
:columns="columns"
:data-source="permissionData">
<template #action="{ text}">
<span>
<a @click="()=>editPermission(text.perId)" title="编辑"><FormOutlined class="bgzt-row-icon bgzt-gray"/></a>
<a @click="()=>deletePermission(text.perId)" title="删除"><DeleteOutlined class="bgzt-row-icon bgzt-gray"/></a>
</span>
</template>
</a-table>
</div>
</div>
</div>
/*
* 重点在这里,主要观察这里
* 1.怎么去调用子组件,
* 2.怎么去传递子组件需要的属性,
* 3.子组件怎么给父组件回调事件
*/
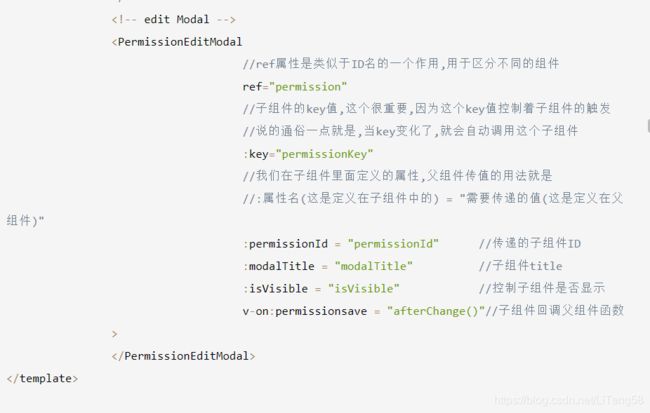
<!-- edit Modal -->
<PermissionEditModal
//ref属性是类似于ID名的一个作用,用于区分不同的组件
ref="permission"
//子组件的key值,这个很重要,因为这个key值控制着子组件的触发
//说的通俗一点就是,当key变化了,就会自动调用这个子组件
:key="permissionKey"
//我们在子组件里面定义的属性,父组件传值的用法就是
//:属性名(这是定义在子组件中的) = "需要传递的值(这是定义在父组件)"
:permissionId = "permissionId" //传递的子组件ID
:modalTitle = "modalTitle" //子组件title
:isVisible = "isVisible" //控制子组件是否显示
v-on:permissionsave = "afterChange()"//子组件回调父组件函数
>
</PermissionEditModal>
</template>
<script>
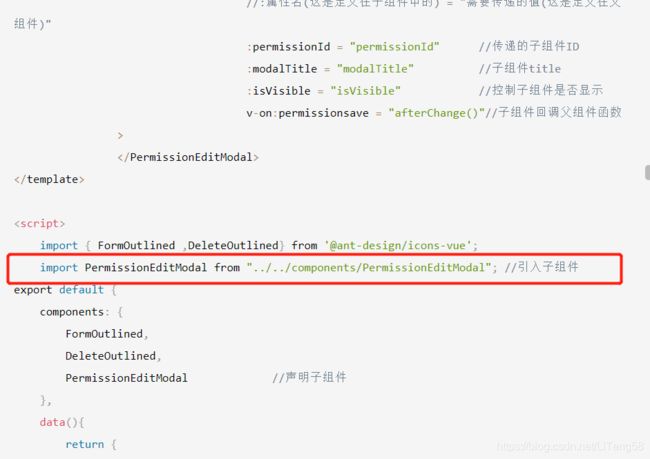
import { FormOutlined ,DeleteOutlined} from '@ant-design/icons-vue';
import PermissionEditModal from "../../components/PermissionEditModal"; //引入子组件
export default {
components: {
FormOutlined,
DeleteOutlined,
PermissionEditModal //声明子组件
},
data(){
return {
permissionData:[], //权限数据集
permissionForm:{ //搜索框查询参数
name:'',
currentPage:1,
pageSize:10
},
pagination: { //分页属性
defaultPageSize: 10,
total:this.total,
showTotal: total => `共 ${total} 条数据`,
showSizeChanger: true,
pageSizeOptions: [ '10', '15', '20'],
change: this.tablePageChange,
onShowSizeChange: this.onShowSizeChange
},
columns,
permissionKey: 0, //控制子组件key
permissionId: null, //编辑子组件的ID
modalTitle: null, //子组件标题
isVisible: false, //控制子组件是否显示
}
},
watch: { //这是分页,不用关注这里代码
pageSize(val) {
console.log('pageSize', val);
this.topgraphMapForm.pageSize = val;
this.topgraphMapForm.currentPage =1;
this.queryTopgraphMapPlanData();
},
current(val) {
this.topgraphMapForm.currentPage = val;
this.queryTopgraphMapPlanData();
},
},
mounted(){
this.selectPermissions(); //查询所有权限数据
},
methods:{
//查询所有的权限数据
selectPermissions(){
this.$httpApi.permission.queryPermissionAll({params:this.permissionForm,config:{}}).then(resp=>{
this.permissionData = resp.result;
}).catch(error=>{
console.log(error);
})
},
//添加权限
addAuthority(){
//这个函数使我们自己定义的,是为了改变子组件的key值,当子组件的key值改变了,就会调用子组件了
this.addSelf();
this.modalTitle = "添加权限";
this.isVisible = true;
},
//搜索框查询
querySearch(){
this.selectPermissions();
},
//编辑权限
editPermission(perId){
this.addSelf();
this.modalTitle = "编辑权限";
this.isVisible = true;
this.permissionId = perId;
},
//删除权限
deletePermission(perId){
const $sysThis = this;
this.$confirm({
title: "确认删除?",
content: "确认删除此条数据",
okText: "确认",
okType: "danger",
cancelText: "取消",
onOk() {
$sysThis.$httpApi.permission.deletePermissionById({params:{perId:perId}}).then(resp=>{
$sysThis.$message.success(resp.message);
$sysThis.selectPermissions();//刷新数据
})
},
onCancel() {
console.log("取消");
},
});
},
//换页
tablePageChange(current, pageSize){
console.log(current, pageSize);
console.log(this.topgraphMapForm);
},
//pageSize改变时候
onShowSizeChange(current, pageSize) {
console.log(current, pageSize);
console.log(this.topgraphMapForm);
},
//表格行选择
rowSelection() {
return {
onChange: (selectedRowKeys, selectedRows) => {
console.log(
`selectedRowKeys: ${selectedRowKeys}`,
"selectedRows: ",
selectedRows
);
},
getCheckboxProps: (record) => ({
props: {
disabled: record.name === "Disabled User", // Column configuration not to be checked
name: record.name,
},
}),
};
},
//自增key
addSelf(){
this.permissionKey += 1;
},
//子组件回调函数
afterChange(){
this.selectPermissions();
}
},
}
const columns = [
{
title: '权限名称',
dataIndex: 'perName',
align:"center",
key: 'perName',
},
{
title: '权限编码',
dataIndex: 'perCode',
align:"center",
key: 'perCode',
},
{
title: '备注',
dataIndex: 'description',
align:"center",
key: 'description',
},
{
title: '操作',
key: 'action',
align:"center",
slots: { customRender: 'action' },
},
];
</script>
<style>
</style>
**
我的代码有点繁杂,我给大家再总结一下,调用子组件的几个步骤
**
1)、先需要自己定义好子组件,如果子组件在写的时候,有代码错误的话,也是会出不来效果的,最好大家先从简单一点的页面上手,再慢慢添加新的操作.
2)、在父组件中引入子组件

3)、声明子组件

4)、最后就是调用了子组件了

5)、大家最好是自己动手定义一个组件,别copy我的代码,因为我的代码里面很多样式都没有放上去,直接用会报错的,弄懂是怎么一个调用过程,然后自己再去尝试着做出来,最有效的学习学的是方法,学思路。
4.最后
我这是第一次写博客,记得自己平时在工作中碰见什么困难,没有头绪的时候,就喜欢去看博客,因为博客里面有很多的技术大牛会给你分享他们踩过的坑,给你分析困难产生的原因,怎么去解决它们;而这种免费的知识分享,让我觉得,这样的编程环境很温暖,对于我们这种刚开始的编程小白很友好,这也是引导着我写博客的原因之一;当然写博客也是为了巩固自己的专业知识,当你学会了一个东西,你能够用自己的语言把它能够描绘出来,去解释给别人听,这个也就是一个巩固自己知识的过程,授人与鱼不如授人与渔。
如果有哪里理解错误的地方,欢迎大家指正出来,谢谢大家观看 mua。