Sentinel从入门到“精通”,从源码层面学习Sentinel
B站视频讲解
文章目录
- 一、安装
-
- 1、原生使用
- 2、dashboard整合
-
- 2-1、非starter整合
-
- 2-1-1、公共
- 2-1-2、Filter
- 2-1-3、AOP
- 2-2、starter 整合
- 3、总结
- 二、常见的策略
-
- 1、限流
-
- 1-1、基于QPS 限流
- 1-2、基于线程数限流
- 2、降级
-
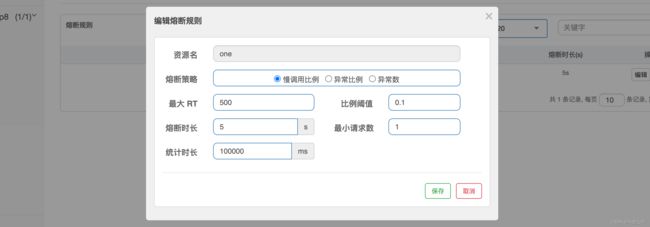
- 2-1、慢调用比例
- 2-2、异常数(限流异常不算)
- 2-3、异常比例(限流异常不算)
- 3、黑白名单
- 4、其它
- 三、全局异常拦截
-
- 1、对拦截器方式的全局异常处理
-
- 1-2、验证拦截器和AOP的双重拦截
- 3、对AOP方式的全局异常拦截
- 四、规则持久化
一、安装
Sentinel 是一个嵌入式的限流框架,所以可以在某个服务中引入它,然后用侵入式的方式去编写限流策略,这当然不是我们想要的,所以它也提供了基于控制台来实时编写限流策略(猜测是基于动态的添加代理和删除代理来实现,后续研究),只需要在代码中引入核心包,然后搭配控制台就可以实时的开启/关闭限流。
- 资源:在Sentinel的世界里任何想要被限制的【代码块】都可以称之为资源
1、原生使用
所谓原生使用就是不搭配控制台。
<dependency>
    <groupId>com.alibaba.cspgroupId>
    <artifactId>sentinel-coreartifactId>
    <version>1.8.6version>
dependency>
Demo 代码
import com.alibaba.csp.sentinel.Entry;
import com.alibaba.csp.sentinel.SphU;
import com.alibaba.csp.sentinel.slots.block.BlockException;
import com.alibaba.csp.sentinel.slots.block.RuleConstant;
import com.alibaba.csp.sentinel.slots.block.flow.FlowRule;
import com.alibaba.csp.sentinel.slots.block.flow.FlowRuleManager;

import java.util.ArrayList;
import java.util.List;

public class Main {
    public static void main(String[] args) throws InterruptedException {
        // 配置规则.
        initFlowRules();

        while (true) {
            // 1.5.0 版本开始可以直接利用 try-with-resources 特性
            try (Entry entry = SphU.entry("HelloWorld")) {
                // 被保护的逻辑
                System.out.println("hello world");
            } catch (BlockException ex) {
                // 处理被流控的逻辑
                System.out.println("blocked!");
            }
            // 防止打印太多了
            Thread.sleep(900);
        }
    }

    private static void initFlowRules(){
        List<FlowRule> rules = new ArrayList<>();
        FlowRule rule = new FlowRule();
        rule.setResource("HelloWorld");
        rule.setGrade(RuleConstant.FLOW_GRADE_QPS);
        // 限制QPS 为 1个
        rule.setCount(1);
        rules.add(rule);
        FlowRuleManager.loadRules(rules);
    }
}
2、dashboard整合
正常情况,我们不会使用原生方式,代码侵入性太强了,可以搭配 dashboard来动态的添加/删除规则。
dashboard本身就是一个SpringBoot 项目,jar包下载地址
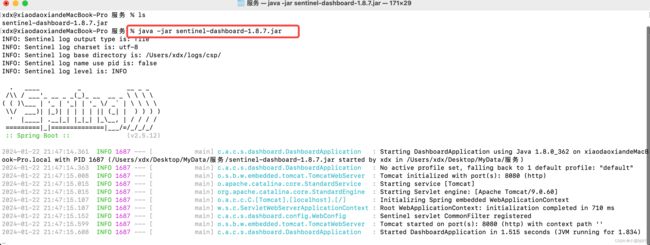
java -jar 启动
http://127.0.0.1:8080
默认账号密码:sentinel/sentinel
2-1、非starter整合
2-1-1、公共
通过上面原生使用方式,得知它的本质其实就和加锁差不多,是有代码侵入性的。在JavaWeb里面如果想实现一个通用的功能并且代码无侵入性的话,Filter和AOP是不错的选择。
在进行Filter和AOP实践之前,先来搭建公共的模块。
pom
<dependency>
    <groupId>com.alibaba.cspgroupId>
    <artifactId>sentinel-coreartifactId>
    <version>1.8.6version>
dependency>


<dependency>
    <groupId>com.alibaba.cspgroupId>
    <artifactId>sentinel-transport-simple-httpartifactId>
    <version>1.8.6version>
dependency>
测试类
import org.springframework.web.bind.annotation.GetMapping;
import org.springframework.web.bind.annotation.RestController;

@RestController
public class Controller {

    @GetMapping("/one")
    public String one() {
        return "ok";
    }
}
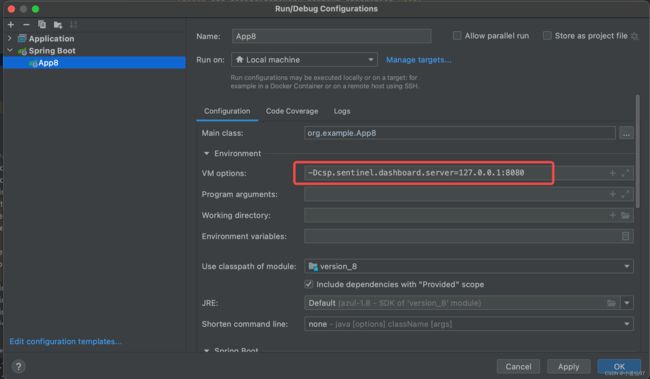
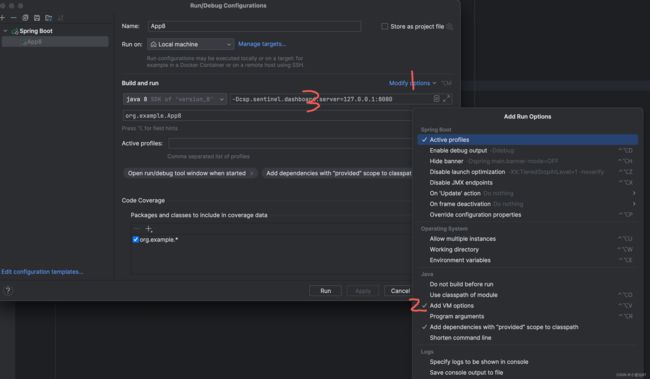
启动的时候加上配置sentinel 的地址 -Dcsp.sentinel.dashboard.server=127.0.0.1:8080
配置入口
Idea 旧版
Idea 新版
Sentinel 是懒加载的,不管使用什么方式,服务启动之后都必须访问 /one 才可以被dashboard监控到
2-1-2、Filter
1、pom文件引入
<dependency>
    <groupId>com.alibaba.cspgroupId>
    <artifactId>sentinel-web-servletartifactId>
    <version>1.8.6version>
dependency>
2、引入过滤器
在Filter里面加一个优先级很高的 CommonFilter
import com.alibaba.csp.sentinel.adapter.servlet.CommonFilter;
import org.springframework.boot.web.servlet.FilterRegistrationBean;
import org.springframework.context.annotation.Bean;
import org.springframework.context.annotation.Configuration;

import javax.servlet.Filter;

@Configuration
public class FilterConfig {

    @Bean
    public FilterRegistrationBean sentinelFilterRegistration() {
        FilterRegistrationBean<Filter> registration = new FilterRegistrationBean<>();
        registration.setFilter(new CommonFilter());
        registration.addUrlPatterns("/*");
        registration.setName("sentinelFilter");
        registration.setOrder(1);

        return registration;
    }
}
通过源码发现,其实它就是在执行之前调用了 entry 方法
2-1-3、AOP
1、pom文件引入
<dependency>
  <groupId>com.alibaba.cspgroupId>
    <artifactId>sentinel-annotation-aspectjartifactId>
    <version>1.8.6version>
dependency>
2、开启代理
@Configuration
public class SentinelAspectConfiguration {
    @Bean
    public SentinelResourceAspect sentinelResourceAspect() {
        return new SentinelResourceAspect();
    }
}
3、定义资源
加上 @SentinelResource
@GetMapping("/one")
@SentinelResource("one")
public String fun() {
    return "one";
}
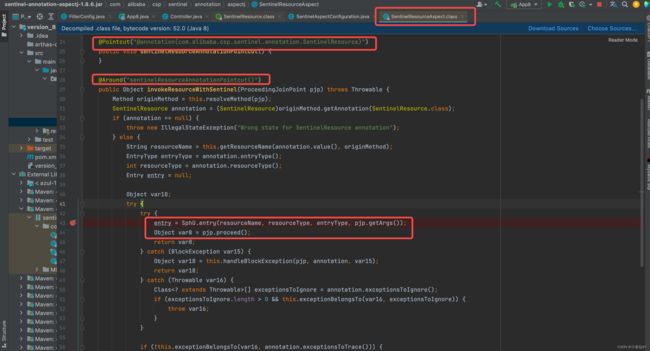
通过源码发现代理的方式其实也是一样的
2-2、starter 整合
1、pom文件引入
<dependency>
    <groupId>com.alibaba.cloudgroupId>
    <artifactId>spring-cloud-starter-alibaba-sentinelartifactId>
    <version>2021.0.1.0version>
dependency>
和SpringBoot对应的版本
2、yaml 文件
spring:
  application:
    name: version_11
  cloud:
    sentinel:
      transport:
        dashboard: 127.0.0.1:8080
      eager: true
3、测试代码
import org.springframework.web.bind.annotation.GetMapping;
import org.springframework.web.bind.annotation.RestController;

@RestController
public class Controller {

    @GetMapping("/two")
    public String fun2() {

        return "ok";
    }
}
可以看到使用Starter的方式极其简单,它会把所有的请求都映射成资源。限流结果:
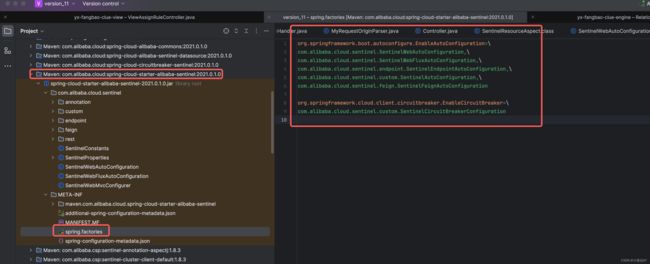
按照以往的经验,使用stater增强功能的时候,只需要大致看看stater中的 spring.factory 注入了什么,然后依次去看看每个注入带来什么功能
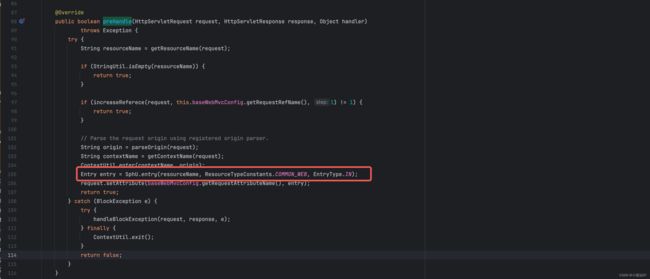
在SentinelWebAutoConfiguration中注入了一个SentinelWebInterceptor,它里面的 preHandle 方法如下:
3、总结
Sentinel提出了资源的概念,不管是如何使用本质都是在访问某个“资源”之前,先进行 SphU.entry 。所以这个资源并不一定是接口,可以是我们想要限制的任何代码。
可能有人好奇为啥dashboard 可以实时的添加/删除规则,如果熟悉代理的朋友应该知道,代理是可以动态的添加和删除的。
基于上面实践发现使用Sentinel的限流可以有四种方式
- 原生方式
- Filter
- Interceptor
- AOP
二、常见的策略
1、限流
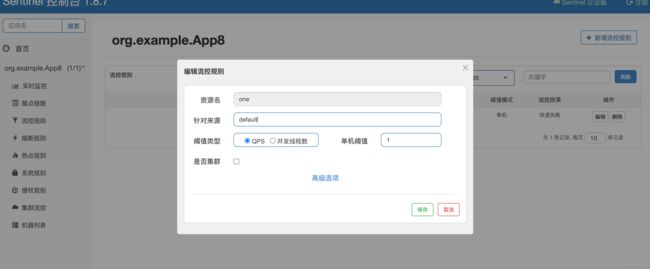
1-1、基于QPS 限流
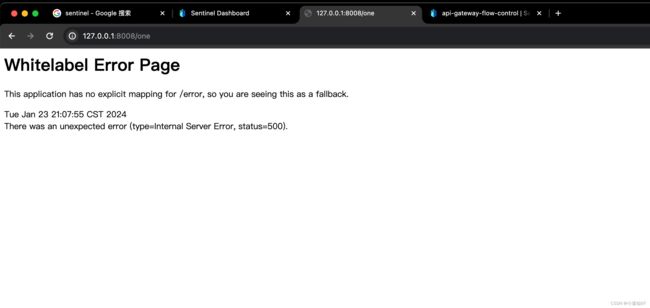
多次点击接口,会出现正常和500错误,500就说明被限制了
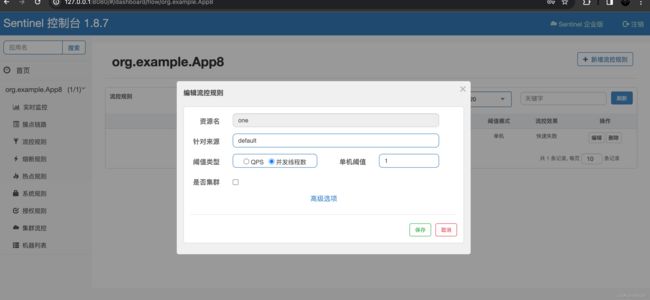
1-2、基于线程数限流
因为测试的demo响应时间在2ms,所以不好测试,在代码里面加上让线程睡眠 1s,就会看到限流异常
2、降级
当服务出现异常的时候(大部分是并发异常,业务异常基本是必现的),系统可能接受不了那么大的请求,这时候为了避免整个服务被击垮,需要有一个限制瓶颈,当触发这个瓶颈的时候,快速失败。
2-1、慢调用比例
2-2、异常数(限流异常不算)
2-3、异常比例(限流异常不算)
3、黑白名单
Sentinel 提供了一个方法来判断当前请求的服务方,可以基于这个方法去进行黑白名单的限制。
注:建议使用stater的方式这样就不需要单独引入很多包
加入判断请求来源的代码
@Component
public class MyRequestOriginParser implements RequestOriginParser {

        /**
         * 通过request获取来源标识,交给授权规则进行匹配
         * @param request
         * @return
         */
        @Override
        public String parseOrigin(HttpServletRequest request) {

            if (request.getHeader("x-forwarded-for") == null) {
                return request.getRemoteAddr();
            }

            return request.getHeader("x-forwarded-for");
        }
}
上面的配置就可以限制 127.0.0.1 的请求了。
4、其它
Sentinel的使用还有很多,包括但不限于下面的场景
- 可以在网关层面限制请求(可以配置nginx使用) nginx 使用
- 可以基于热点参数进行限制,这样就比接口层面更细了
- sentinel 官方文档
三、全局异常拦截
为何只是简单配置一个类就可以做到全局拦截?我们要知其然且知其所以然。
1、对拦截器方式的全局异常处理
使用 stater的方式,会同时开启 Interceptor、和AOP,上面已经知道AOP是基于自定义注解实现的,所以没有使用 @SentinelResource 的时候是不会有AOP的,就只有Interceptor。
熟悉SpringMVC流程的朋友应该知道,Filter > Interceptor > AOP,如果使用了@SentinelResource那就相当于两次限流了,相当于两道门。
通过Interceptor的前置拦截方法可以看到它把异常吞掉了,转而用 handleBlockException 去处理了
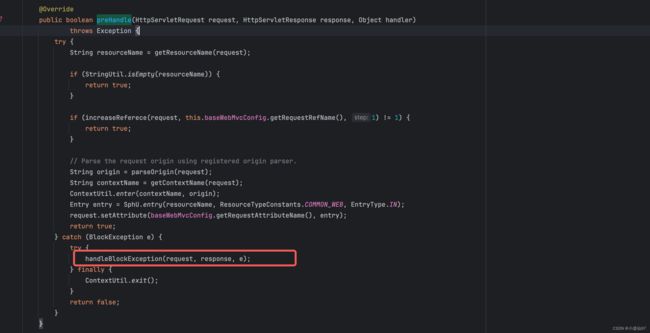
handleBlockException它里面是调用了一个 BlockExceptionHandler,实现它然后重写里面的 handle 方法,就可以做到全局自定义异常处理
@Component
public class MyBlockExceptionHandler implements BlockExceptionHandler {

    public MyBlockExceptionHandler() {
    }

    @Override
    public void handle(HttpServletRequest request, HttpServletResponse response, BlockException e) throws Exception {
        response.setStatus(429);
        PrintWriter out = response.getWriter();
        out.print("My Limiting");
        out.flush();
        out.close();
    }
}
1-2、验证拦截器和AOP的双重拦截
为了更好的帮助大家理解拦截器和AOP的双重拦截,在使用 stater的方式中,我在Controller上面加一个@SentinelResource注解,去Sentinel控制台看看资源情况
- /one 是拦截器定义的
- org.example.Controller:fun() 就是AOP定义的
对 org.example.Controller:fun() 限流错误提示为
对 /one 限流错误提示为
且当对两个资源同时限流,限流规则一样的时候,org.example.Controller:fun() 的限流不会触发,因为拦截器是在AOP的前面呀
为什么AOP拦截给资源取的名字是这个呢?通过源码可以看到,使用AOP的时候
会先获取注解上的 value做资源名,如果没有就会用方法的权限定名。
# com.alibaba.csp.sentinel.annotation.aspectj.SentinelResourceAspect#invokeResourceWithSentinel

String resourceName = this.getResourceName(annotation.value(), originMethod);
protected String getResourceName(String resourceName, Method method) {
    return StringUtil.isNotBlank(resourceName) ? resourceName : MethodUtil.resolveMethodName(method);
}
3、对AOP方式的全局异常拦截
使用@SentinelResource 的时候可以配置blockHandler和fallback 限流处理和失败处理,但如果我们没有配置的话,最后就会将异常抛出来。(这个流程可以直接一步步源代码看到,下面只给出入口)
既然是抛异常,又在Spring里面,那就简单了,搞一个全局异常处理器就好了
@ControllerAdvice
public class MyExceptionHandler {

    @ExceptionHandler(value =BlockException.class)
    @ResponseBody
    public String exceptionHandler(BlockException e){

        return "AOP Limiting";
    }
}
注:如果想对不同的资源进行不同的异常处理,那可以配置@SentinelResource 上面对应的blockHandler和fallback就好了,这个很简单。
拦截器是直接基于访问路径当成资源名的,比如上述demo中就是 /one,如果你很俏皮的设置了这样一个注解 @SentinelResource(“/one”) ,这样在控制台就只能看到一个资源了,但如果你对这个资源进行限流,相当于两道门都给限制了。
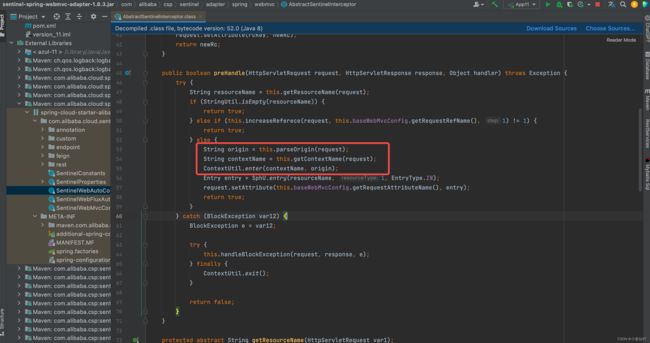
前面我们讲到有一个黑白名单的策略,在Filter和Interceptor的源码里都可以看到这一处理,但是在AOP中没有,所以要想使用这个功能的话,进行AOP资源限流是不可以的。
Filter
Interceptor
AOP
四、规则持久化
Sentinel 的持久化还是有些复杂的,单独写一篇文章来讲解
