【python】滑动验证码拼接图片robotframework openCV
自动化处理滑动拼接验证码
-
-
- 问题:
- 解决:
-
- 1.抓取背景图
- 2.抓取缺口图
- 3.随便写几行代码
- 4.开始测试
-
使用环境:python3.8+robotframework+cv2
问题:


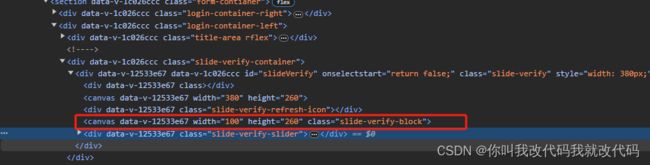
以上为canvas标签内图片
用以上内容实现前端left属性的自动化用例
解决:
1.抓取背景图
用传统的爬虫无法对实时生成的验证码图片抓取除非公司内部测试专用通道,因此可以用截图的方式来获取其内容
selenium或者集成的robotframework都有截图的功能,百度都有
这里我用的RF关键字:Capture Element Screenshot [xpath]

2.抓取缺口图
因为缺口图在行索【长方形的宽】引上下摆动,而且图片固定的几个来回随机,就选择手动获取了
抓下来如下(这里不需要适配图片大小,能让cv2看的清楚就行):
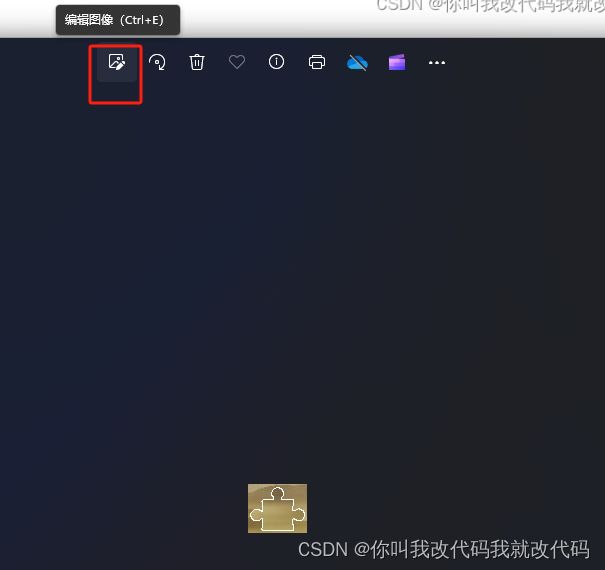
注意:此处截图不要微信截图,分辨率容易下降
截图正确姿势:
1.自动化框架根据xpath截图并保存本地
2.保存后使用win11自带的图片查看器查看,编辑
例如以下方式 保证分辨率与原图一样
![]()

![]()
3.随便写几行代码
import cv2
import os
import random
# from getVerifyCodeNew_ECSO_return_dir import return_image
def return_image():
rand = str(random.randint(0, 99999))
return os.path.join(os.getcwd(), 'test' + rand + '.png')
#获取验证码
def GET_VERIFY_CODE_NEW(main_image_list=[r'D:\WORKING\PycharmProjects\py_CMSS\main_image\a1.png',
r'D:\WORKING\PycharmProjects\py_CMSS\main_image\a2.png',
r'D:\WORKING\PycharmProjects\py_CMSS\main_image\a3.png',
r'D:\WORKING\PycharmProjects\py_CMSS\main_image\a4.png',
r'D:\WORKING\PycharmProjects\py_CMSS\main_image\a5.png'],
b_imagepath=r'D:\WORKING\RideProjects\logList\1\selenium-element-screenshot-1.png'):
"""
获取验证码
:param main_image_list:
:param b_imagepath:
:return:
"""
try:
#读取图片
b_image = cv2.imread(b_imagepath)
#读取缺口图尺寸 此处测试专用
# for i in range(len(main_image_list)):
# img_ss = cv2.imread(main_image_list[i])
# height, width = img_ss.shape[:2]
# print(height, width)
# 获取图像的原始尺寸
bheight, bwidth = b_image.shape[:2]
# 背景图定义特定区域的位置和大小
x = 47 #47代表从背景图左下角开始的列索引延申长度,因为背景图要避开canvas生成的两个缺口图之一
y = 0
width = bwidth
height = bheight
# 提取特定区域
b_image = b_image[y:y + height, x:x + width]
# 识别图片边缘
b_image = cv2.Canny(b_image, 100, 200)
# 转换图片格式
b_image = cv2.cvtColor(b_image, cv2.COLOR_GRAY2RGB)
# 获取每个预制缺口图匹配相似的最低位置和最高位置
res_list = []
for st_image in main_image_list:
#重复以上背景图操作
st_image = cv2.imread(st_image)
st_image = cv2.Canny(st_image, 100, 200)
st_image = cv2.cvtColor(st_image, cv2.COLOR_GRAY2RGB)
#缺口匹配
res = cv2.matchTemplate(b_image, st_image, cv2.TM_CCOEFF_NORMED)
min_val, max_val, min_loc, max_loc = cv2.minMaxLoc(res) # 寻找最优匹配
#解释:在cv2.minMaxLoc()函数中,返回的maxLoc元组内的两个值代表最大值的位置坐标。具体来说:
# 第一个值表示最大值所在的列索引,
# 第二个值表示最大值所在的行索引。这两个值共同确定了最大值在图像中的位置。
res_list.append([min_val, max_val, min_loc, max_loc])
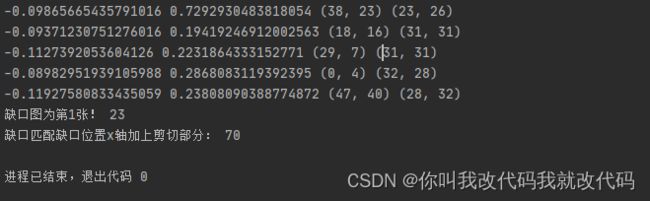
print(min_val, max_val, min_loc, max_loc)
# -0.09865665435791016 0.7292930483818054 (38, 23) (23, 26)
new_res = 0 #每个缺口图的最高相似层度
new_max_loc = 0 # 缺口图列表中最高相似度的缺口图相似度
is_location = 0 # 最高相似度的缺口图编号
#获取最高相似缺口图缺口位置列索引延申长度,即left属性大小
for res in range(len(res_list)):
if res == 0:
new_res = res_list[res][1]
new_max_loc = res_list[res][3][0]
is_location = 1
continue
else:
if new_res < res_list[res][1]:
new_res = res_list[res][1]
new_max_loc = res_list[res][3][0]
is_location = res+1
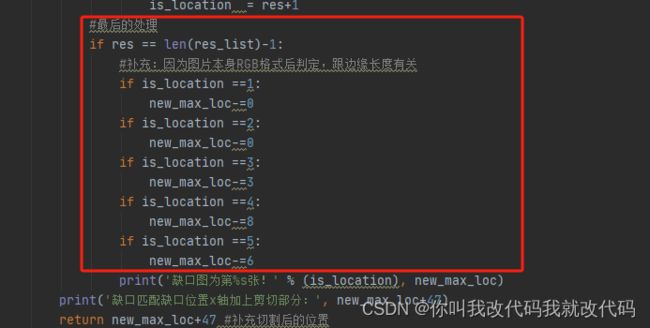
#最后的处理
if res == len(res_list)-1:
#补充:因为图片本身RGB格式后判定,跟边缘长度有关
if is_location ==1:
new_max_loc-=0
if is_location ==2:
new_max_loc-=0
if is_location ==3:
new_max_loc-=3
if is_location ==4:
new_max_loc-=8
if is_location ==5:
new_max_loc-=6
print('缺口图为第%s张!' % (is_location), new_max_loc)
print('缺口匹配缺口位置x轴加上剪切部分:', new_max_loc+47)
return new_max_loc+47 #补充切割后的位置
except Exception as e:
print('失败:',e)
return 1
4.开始测试
执行RIDE,在自动化脚本执行完截图操作后,20时间内查看canvas标签的left属性,手动试试长度如何,
【我看了下cv2计算的长度win11截图计算的长度CSS3计算的长度 约等于,这里百度有大佬解释下么】
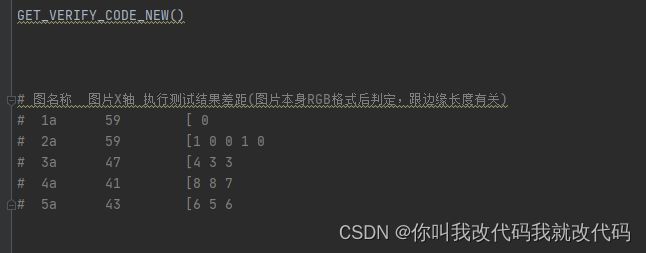
知道left的执行后的属性,那就执行代码测试下吧,以下是测试结果:
以下是我对每个缺口图测试的结果,分析得出每次默认差距
随便修改几下
最后得出的列索引延申长度为70 正常的可以摆动幅度为1,所以,71,69都可以是正常的数值
都获取到了CSS中left的值大小,还不快去试试
以下为本文章贡献者链接:
http://wpue.com/31984.html 解决初始问题
了解更牛逼的文章:
https://blog.csdn.net/qq_25305833/article/details/126265634
以下为该链接解释:他这个仅供看啊哈哈,新手接触openCV还是看我的吧