QT实现图像处理-傅立叶变换、傅立叶反变换、平滑、锐化与模板匹配
实验环境:
1,Linux操作系统
2,QT3编程开发环境
3,C++编程语言
傅立叶变换和傅立叶反变换
1.1. 主要源代码
readImage() 从图像中读取数据
writeImage() 往图像中写入数据
fft() 快速傅立叶变换
ifft() 快速傅立叶反变换
adjustImageSize() 调整图像大小
fourier() 傅立叶变换
ifourier() 傅立叶反变换
1.1.1 从图像中读取数据
void ImageProcess::readImage(complex<double> data[], const QImage &srcImage)
{
byte *pImageBytes = srcImage.bits(); //数据首地址
int depth = srcImage.depth(); //每个像素的bit数
int lineBytes = srcImage.bytesPerLine(); //每行的字节数
int w = srcImage.width(); //宽
int h = srcImage.height(); //高
byte *pByte;
//遍历读取每个像素,并转换为灰度值
int i, j;
for(i = 0; i < h; i++)
{
for(j = 0; j < w; j++)
{
if(8 == depth) //采用了256色调色板,8位颜色索引
{
pByte = pImageBytes + i * lineBytes + j;
data[i * w + j] = complex<double>( *pByte, 0);
}
else if(32 == depth)//32位表示,数据格式为0xFFBBGGRR或0xAABBGGRR
{
pByte = pImageBytes + i * lineBytes + j * 4;
//根据RGB模式转化成YIQ色彩模式的方式,取Y作为灰度值
byte pixelValue = (byte)(0.299 * (float)pByte[0] + 0.587 * (float)pByte[1]
+ 0.114 * (float)pByte[2]);
data[i * w + j] = complex<double>( pixelValue, 0);
}
else
{
cout << "invalid format. depth = " << depth << "\n";
return;
}
}
}
}
1.1.2 将数据写入图像
//coef为比例系数,主要用来调整灰度值以便于观察
void ImageProcess::writeImage(QImage &destImage, const complex<double> data[], double coef)
{
int lineBytes = destImage.bytesPerLine();
int depth = destImage.depth();
int w = destImage.width();
int h = destImage.height();
byte *pImageBytes = destImage.bits();
byte *pByte;
for(int i = 0; i < h; i++)
{
for(int j = 0; j < w; j++)
{
double spectral = abs(data[i * w + j]) * coef; //灰度值调整
spectral = spectral > 255 ? 255 : spectral;
//根据图像格式写数据
if(8 == depth)
{
pByte = pImageBytes + i * lineBytes + j;
*pByte = spectral;
}
else if(32 == depth)
{
pByte = pImageBytes + i * lineBytes + j * 4;
pByte[0] = pByte[1] = pByte[2] = spectral;
}
else
{
return;
}
}
}
}
1.1.3 递归形式的快速傅立叶变换
//数组a为输入,数组y为输出,2的power次方为数组的长度
void ImageProcess::fft(const complex<double> a[], complex<double> y[], int power)
{
if(0 == power)
{
y[0] = a[0];
return;
}
int n = 1 << power;
double angle = 2 * PI / n;
complex<double> wn(cos(angle), sin(angle));
complex<double> w(1, 0);
complex<double> *a0 = new complex<double>[n / 2];
complex<double> *a1 = new complex<double>[n / 2];
complex<double> *y0 = new complex<double>[n / 2];
complex<double> *y1 = new complex<double>[n / 2];
for(int i = 0; i < n / 2; i ++)
{
a0[i] = a[2 * i];
a1[i] = a[2 * i + 1];
}
//分开成两个子fft过程
fft(a0, y0, power - 1);
fft(a1, y1, power - 1);
complex<double> u;
for(int k = 0; k < n / 2; k++) //蝶形算法
{
u = w * y1[k];
y[k] = y0[k] + u;
y[k + n / 2] = y0[k] - u;
w = w * wn;
}
delete[] a0;
delete[] a1;
delete[] y0;
delete[] y1;
}
1.1.4 快速傅立叶反变换
//y为输入,a为输出,2的power次方为数组的长度
void ImageProcess::ifft(const complex<double> y[], complex<double> a[], int power)
{
int count = 1 << power;
complex<double> *x = new complex<double>[count];
memcpy(x, y, sizeof(complex<double>) * count);
int i;
for(i = 0; i < count; i++)
{
x[i] = complex<double>(x[i].real(), -x[i].imag()); //共轭复数
}
fft(x, a, power); //调用快速傅立叶变换算法
for(i = 0; i < count; i++)
{
a[i] = complex<double>(a[i].real() / count, -a[i].imag() / count); //共轭复数
}
delete[] x;
}
1.1.5 调整图像的大小
//宽和高都截取为2的指数倍
void ImageProcess::adjustImageSize(QImage &image)
{
int w = 1;
int h = 1;
int width = image.width();
int height = image.height();
wp = 0, hp = 0;
while(w * 2 <= width) { w *= 2; wp++; }
while(h * 2 <= height) {h *= 2; hp++;}
QImage adjustedImage(w, h, image.depth(), image.numColors(), image.bitOrder());
byte *destBytes = adjustedImage.bits();
byte *srcBytes = image.bits();
int lineBytes = image.bytesPerLine();
int bytesPerPixel = image.depth() / 8; //每个象素的字节数
for(int i = 0; i < h; i++) //拷贝数据
{
memcpy(destBytes + i * w * bytesPerPixel, srcBytes + i * lineBytes,
sizeof(byte) * w * bytesPerPixel);
}
image = adjustedImage; //更新图像
}
1.1.6 傅立叶变换的主过程
void ImageProcess::fourier()
{
int w = currentImage.width();
int h = currentImage.height();
if(needAdjust) //调整图像的大小为2的幂次以便于快速傅立叶变换
{
adjustImageSize(currentImage); //调整大小
needAdjust = false;
if(currentImageData)
{
delete[] currentImageData;
}
currentImageData = new complex<double>[w * h];
readImage(currentImageData, currentImage); //读取数据
}
else if(NULL == currentImageData)
{
currentImageData = new complex<double>[w * h];
readImage(currentImageData, currentImage); //读取数据
}
w = currentImage.width(); //更新宽和高
h = currentImage.height();
complex<double> *TD = currentImageData; //当前读取的数据为时域
complex<double> *FD = new complex<double>[w * h]; //申请空间保存变换结果
int i, j;
for(i = 0; i < h; i++) //在x方向上对按行进行快速傅立叶变换
{
fft(&TD[w * i], &FD[w * i], wp);
}
memcpy(TD, FD, sizeof(complex<double>) * w * h);
complex<double> *columnt = new complex<double>[h];
complex<double> *columnf = new complex<double>[h];
for(i = 0; i < w; i++) //调整行列数据,在y方向上按列进行快速傅立叶变换
{
for(j = 0; j < h; j++)
{
columnt[j] = TD[j * w + i];
}
fft(columnt, columnf, hp);
for(j = 0; j < h; j++)
{
FD[j * w + i] = columnf[j];
}
}
delete[] columnt;
delete[] columnf;
writeImage(currentImage, FD, 0.02); //写入数据
delete[] currentImageData;
currentImageData = FD;
pDispLabel->setPixmap(QPixmap(currentImage));
}
1.1.7 傅立叶反变换
傅立叶反变换的思想与傅立叶变化相似,只是时域和频域互换,然后调用快速傅立叶反变换ifft而不是快速傅立叶变换fft。
1.2. 运行截图
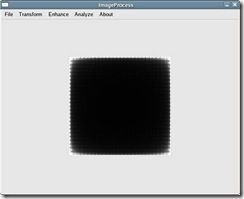
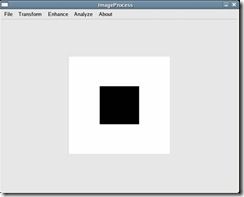
1.2.1 正方形
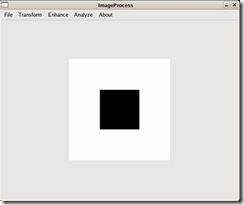
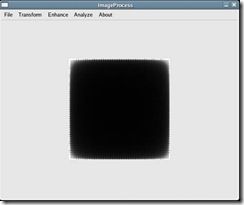
输入一个256*256的图形,背景为白色,中间有一黑色的正方形,如图1-1所示。经过傅立叶变换后的结果如图1-2所示(注:没有采用平移到中心的方法)。
图1-1
图1-2
1.2.2 旋转45度
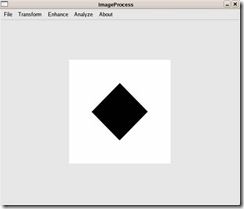
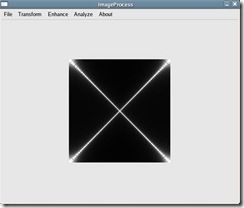
将图1-1旋转45度后的输入如图1-3所示。其傅立叶变换结果如图1-4所示。
图1-3
图1-4
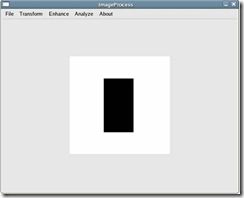
1.2.3 输入长方形图像
输入图像如图1-5所示。傅立叶变换结果如图1-6所示。
图1-5
图1-6
1.2.4 傅立叶反变换
对傅立叶变换结果图1-2进行傅立叶反变换,其结果与原图1-1相同,如图1-7所示:
图1-7
图像增强
图像增强是一种很重要的图像处理技术,为了方便人们观察以及机器处理而去处理给定的一幅图像。有很多图像增强的方法,以下这部分实现了其中的平滑和锐化这两种方法。
2.1. 主要源码
2.1.1 平滑
void ImageProcess::smooth()
{
int w = currentImage.width();
int h = currentImage.height();
if(NULL == currentImageData) //判断是否需要重新读取数据
{
currentImageData = new complex<double>[w * h];
readImage(currentImageData, currentImage);
}
//拷贝一份数据便于计算
complex<double> *buffer = new complex<double>[w * h];
memcpy(buffer, currentImageData, sizeof(complex<double>) * w * h);
//根据模板进行计算
//为了简化编码忽略了图像边界(i =0 or h, j =0 or w),对于整体效果没有影响
int i, j;
for(i = 1; i < h - 1; i++)
{
for(j = 1; j < w - 1; j++)
{
complex<double> k;
k = buffer[(i - 1) * w + j - 1];
k += buffer[(i - 1) * w + j];
k += buffer[(i - 1) * w + j + 1];
k += buffer[i * w + j - 1];
k += buffer[i * w + j];
k += buffer[i * w + j + 1];
k += buffer[(i + 1) * w + j - 1];
k += buffer[(i + 1) * w + j];
k += buffer[(i + 1) * w + j + 1];
k = complex<double>(k.real() / 9, 0);
currentImageData[i * w + j] = k;
}
}
writeImage(currentImage, currentImageData);
pDispLabel->setPixmap(QPixmap(currentImage));
}
2.1.2 锐化
void ImageProcess::sharp()
{
int w = currentImage.width();
int h = currentImage.height();
if(NULL == currentImageData) //判断是否需要读取数据
{
currentImageData = new complex<double>[w * h];
readImage(currentImageData, currentImage);
}
//拷贝一份数据便于计算
complex<double> *buffer = new complex<double>[w * h];
memcpy(buffer, currentImageData, sizeof(complex<double>) * w * h);
//根据模板进行计算
//为了简化编码忽略了图像边界(i =0 or h, j =0 or w),对于整体效果没有影响
int i, j;
complex<double> k;
for(i = 1; i < h - 1; i++)
{
for(j = 1; j < w - 1; j++)
{
k = buffer[i * w + j];
k = complex<double>(k.real() * 5, 0);
k -= buffer[(i - 1) * w + j];
k -= buffer[i * w + j - 1];
k -= buffer[i * w + j + 1];
k -= buffer[(i + 1) * w + j];
currentImageData[i * w + j] = k;
}
}
writeImage(currentImage, currentImageData);
pDispLabel->setPixmap(QPixmap(currentImage));
}
2.2. 运行截图
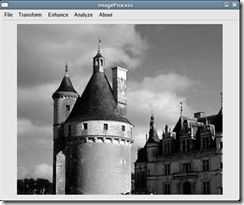
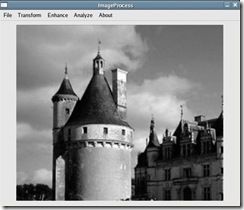
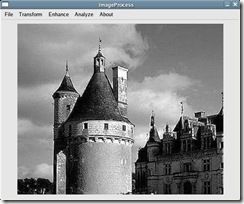
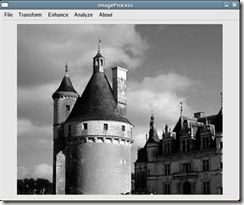
输入图像2-1,其平滑结果为图2-2,锐化结果为 图2-3。
图2-1原来的图像
图2-2 平滑后的图像
图2-3 锐化后的图像
图像分析
这部分主要实现了图像的模板匹配。模板匹配是一种非常原始的模式识别方法。有很多模板匹配的算法。这里采用的算法是计算二者之间的相似度,在目标图像中选取一个坐标,将以该坐标为左上角选定一块区域,计算该区域与模板的相似度,相似度最大的点即为匹配之处。通过二者之间的差异度来判断其相似程度,差异度的计算:m = ![]() 。即将累加其像素之间的差值,为了提高计算速度,可以设置阀值,当m大于阀值时,认定该块区域不匹配,继续寻找下一区域。
。即将累加其像素之间的差值,为了提高计算速度,可以设置阀值,当m大于阀值时,认定该块区域不匹配,继续寻找下一区域。
3.1. 主要源码
void ImageProcess::match()
{
//让用户选取模板
QString fileName = QFileDialog::getOpenFileName("/home/tanqiyu", "Images (*.png *.xpm
.jpg)", this, "open file dialog", "Choose a model image");
if(QString::null == fileName)
{
return;
}
//读取模板数据
QImage modelImage(fileName);
int mw = modelImage.width();
int mh = modelImage.height();
complex<double> *modelImageData = new complex<double>[mw * mh];
readImage(modelImageData, modelImage);
unsigned long t = mw * mh * 8; //根据匹配模板的大小设置一定的阀值
unsigned long m = t; //初始差异度
int ri = -1; //z左上角坐标(ri, rj)
int rj = -1;
int w = currentImage.width();
int h = currentImage.height();
if(NULL == currentImageData) //判断是否需要读取目标图像数据
{
currentImageData = new complex<double>[w * h];
readImage(currentImageData, currentImage);
}
//遍历目标图像,选取左上角坐标,考虑到模板图像的大小注意不要越界
int i, j;
for(i = 0; i < h - mh + 1; i++ )
{
for(j = 0; j < w - mw + 1; j++)
{
//下面开始对点(i, j)为左上角的mw * mh区域进行匹配
bool overFlag = false;
unsigned long k = 0; //差异值的累加和
int u, v;
for(u = 0; u < mh && !overFlag; u++)
{
for(v = 0; v < mw && !overFlag; v++)
{
k += abs(currentImageData[(i + u) * w + j + v].real()
- modelImageData[u * mw + v].real()); //计算差值并累加
if(k >= t) //判断是否大于阀值
{
overFlag = true;
}
}
}
if(k < m) //判断是否找到更加匹配的区域
{
ri = i;
rj = j;
m = k;
}
}
}
//找到匹配区域,则将目标图像匹配区域之外的点置成白色以便于观察结果
if(ri != -1)
{
for(i = 0; i < h; i++)
{
for(j = 0; j < w; j++)
{
if(i < ri || j < rj || i > ri + mh - 1 || j > rj + mw - 1)
{
currentImageData[i * w + j] = complex<double>(255, 0);
}
}
}
}
writeImage(currentImage, currentImageData);
pDispLabel->setPixmap(QPixmap(currentImage));
}
3.2. 运行截图
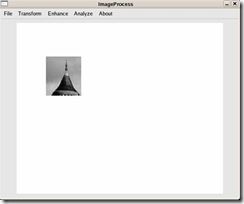
目标图像为图3-1,图3-2位匹配模板,匹配结果为图3-3。
图3-1 目标图像
图3-2 匹配模板
匹配结果
