鸿蒙(API 12 Beta3版)【使用Image完成图片解码】图片开发指导依赖JS对象
图片解码指将所支持格式的存档图片解码成统一的[PixelMap],以便在应用或系统中进行图片显示或[图片处理]。当前支持的存档图片格式包括JPEG、PNG、GIF、WebP、BMP、SVG、ICO、DNG。
开发步骤
添加依赖
在进行应用开发之前,开发者需要打开native工程的src/main/cpp/CMakeLists.txt,在target_link_libraries依赖中添加libace_napi.z.so,libpixelmap_ndk.z.so,libimage_source_ndk.z.so,librawfile.z.so 以及日志依赖libhilog_ndk.z.so。
target_link_libraries(entry PUBLIC libace_napi.z.so libhilog_ndk.z.so libpixelmap_ndk.z.so libimage_source_ndk.z.so librawfile.z.so)
添加接口映射
打开src/main/cpp/hello.cpp文件,在Init函数中添加getSyncPixelMap函数接口映射,作用是以同步的方式生成PixelMap,具体代码如下:
EXTERN_C_START
static napi_value Init(napi_env env, napi_value exports)
{
    napi_property_descriptor desc[] = {
        { "getSyncPixelMap", nullptr, getSyncPixelMap, nullptr, nullptr, nullptr, napi_default, nullptr },
    };

    napi_define_properties(env, exports, sizeof(desc) / sizeof(desc[0]), desc);
    return exports;
}
EXTERN_C_END
JS侧调用
- 打开src\main\cpp\types\libentry\index.d.ts(其中libentry根据工程名生成),导入如下引用文件:
import { image } from '@kit.ImageKit';
import { resourceManager } from '@kit.LocalizationKit';

// 同步调用,入参为资源管理器和图片资源名称,返回PixelMap
export const getSyncPixelMap: (resMgr: resourceManager.ResourceManager, src: string) => image.PixelMap;
-
准备图片资源文件,本示例文件名为example.jpg,导入到src\main\resources\rawfile\ 路径下。
-
打开src\main\ets\pages\index.ets,导入"libentry.so(根据工程名生成)",调用Native接口,传入JS的资源对象。示例如下:
import testNapi from 'libentry.so'
import { image } from '@kit.ImageKit';

@Entry
@Component
struct Index {
  @State pixelMap : PixelMap | undefined = undefined;
  aboutToAppear() {
     // 调用自定义的getSyncPixelMap接口,获取pixelMap
     this.pixelMap = testNapi.getSyncPixelMap(getContext(this).resourceManager, "example.jpg")
  }

  build() {
     Row() {
        Column() {
        Image(this.pixelMap)
           .width(100)
           .height(100)
        }
        .width('100%')
     }
     .height('100%')
  }
}
Native接口调用
在hello.cpp文件中获取JS的资源对象,并转为Native的资源对象,即可调用Native接口,调用方式示例代码如下:
添加引用文件
   // 引入图片框架、raw文件、raw文件管理和日志打印头文件
   #include
   #include
   #include
   #include
   #include
   #include
   #include

   static napi_value getSyncPixelMap(napi_env env, napi_callback_info info)
   {
      size_t argc = 2;
      napi_value args[2] = {nullptr};

      napi_get_cb_info(env, info, &argc, args , nullptr, nullptr);

      napi_valuetype srcType;
      napi_typeof(env, args[0], &srcType);

      // 入参args[0]是资源管理器,用来初始化native层的资源管理器
      NativeResourceManager *mNativeResMgr = OH_ResourceManager_InitNativeResourceManager(env, args[0]);

      size_t strSize;
      char srcBuf[2048];
      // 入参args[1]是文件名称
      napi_get_value_string_utf8(env, args[1], srcBuf, sizeof(srcBuf), &strSize);

      // 用资源管理器打开Raw文件
      RawFile * rawFile = OH_ResourceManager_OpenRawFile(mNativeResMgr, srcBuf);
      if (rawFile != NULL) {
         // 获取文件大小,并读取数据
         long len = OH_ResourceManager_GetRawFileSize(rawFile);
         uint8_t * data = static_cast(malloc(len));
         int res = OH_ResourceManager_ReadRawFile(rawFile, data, len);

         OhosImageSource imageSource_c;
         imageSource_c.buffer = data;
         imageSource_c.bufferSize = len;

         OhosImageSourceOps ops{};
         napi_value imageSource;
         napi_value pixelMap;

         // 用读取到的Raw数据创建ImageSource
         int32_t ret = OH_ImageSource_Create(env, &imageSource_c, &ops, &imageSource);

         // 初始化native层的ImageSource
         ImageSourceNative * imageSourceNative_c = OH_ImageSource_InitNative(env, imageSource);
         OhosImageDecodingOps decodingOps{};
         // 创建pixelMap
         OH_ImageSource_CreatePixelMap(imageSourceNative_c, &decodingOps, &pixelMap);

         // 下列方法,为gif等动图格式提供。
         // napi_value pixelMapList;
         // OH_ImageSource_CreatePixelMapList(imageSourceNative_c, &decodingOps, &pixelMapList);
         // OhosImageSourceDelayTimeList list{};
         // OH_ImageSource_GetDelayTime(imageSourceNative_c, &list);
         // uint32_t count;
         // OH_ImageSource_GetFrameCount(imageSourceNative_c, &count);

         OhosImageSourceInfo info{};
         // 读取图片宽高
         OH_ImageSource_GetImageInfo(imageSourceNative_c, 0, &info);
         OH_LOG_Print(LOG_APP, LOG_INFO, 0xFF00, "[decode]", "imageInfo width:%{public}d , height:%{public}d", info.size.width, info.size.height);

         // 读取图片源的ImageWidth配置参数并打印日志
         OhosImageSourceProperty target;
         char exifKey_c[] = "ImageWidth";
         target.size = strlen(exifKey_c);
         target.value = exifKey_c;

         OhosImageSourceProperty response{};
         response.size = 20;
         response.value = static_cast(malloc(20));
         OH_ImageSource_GetImageProperty(imageSourceNative_c, &target, &response);
         OH_LOG_Print(LOG_APP, LOG_INFO, 0xFF00, "[decode]", "ImageProperty width after modify:%{public}s", response.value);

         // 处理完毕,释放native层资源
         OH_ImageSource_Release(imageSourceNative_c);
         OH_ResourceManager_CloseRawFile(rawFile);
         return pixelMap;
      }
      OH_ResourceManager_ReleaseNativeResourceManager(mNativeResMgr);
      return nullptr;
   }
图片框架支持增量式解码,使用方法如下:
   // 引入图片框架、raw文件、raw文件管理和日志打印头文件
   #include
   #include
   #include
   #include
   #include
   #include
   #include

   static napi_value getSyncPixelMap(napi_env env, napi_callback_info info)
   {
      size_t argc = 2;
      napi_value args[2] = {nullptr};

      napi_get_cb_info(env, info, &argc, args , nullptr, nullptr);

      napi_valuetype srcType;
      napi_typeof(env, args[0], &srcType);

      // 入参args[0]是资源管理器,用来初始化native层的资源管理器
      NativeResourceManager * mNativeResMgr = OH_ResourceManager_InitNativeResourceManager(env, args[0]);

      size_t strSize;
      char srcBuf[2048];
      // 入参args[1]是文件名称
      napi_get_value_string_utf8(env, args[1], srcBuf, sizeof(srcBuf), &strSize);

      // 用资源管理器打开Raw文件
      RawFile * rawFile = OH_ResourceManager_OpenRawFile(mNativeResMgr, srcBuf);
      if (rawFile != NULL) {
         // 获取文件大小,若大于2048字节,则增量式解码,否则直接全部解码
         long len = OH_ResourceManager_GetRawFileSize(rawFile);
         if (len > 2048) {
            uint8_t * data = static_cast(malloc(len));
            // 读取文件全部数据
            int res = OH_ResourceManager_ReadRawFile(rawFile, data, len);

            uint8_t * holderdata = static_cast(malloc(len));

            OhosImageSource imageSource_c;
            // imageSource_c的buffer分配了空间,但是数据是空的
            imageSource_c.buffer = holderdata;
            imageSource_c.bufferSize = len;
            OhosImageSourceOps ops{};
            napi_value imageSource;
            // 初始化增量ImageSource
            OH_ImageSource_CreateIncremental(env, &imageSource_c, &ops, &imageSource);

            // 初始化native层的ImageSource
            ImageSourceNative * imageSourceNative_c = OH_ImageSource_InitNative(env, imageSource);

            // 以下模拟分片加载场景,分两次加载分片。第一次加载2048字节,第二次加载剩余的数据。
            OhosImageSourceUpdateData firstData{};
            firstData.buffer = data; // 图片数据
            firstData.bufferSize = len; // 图片数据总大小
            firstData.isCompleted = false;
            firstData.offset = 0; // 第一次重头开始加载
            firstData.updateLength = 2048; // 第一次加载了2048字节
            OH_ImageSource_UpdateData(imageSourceNative_c, &firstData);

            OhosImageSourceUpdateData secondData{};
            secondData.buffer = data;
            secondData.bufferSize = len;
            secondData.isCompleted = true; // 最后一次加载,要标记加载完成
            secondData.offset = 2048; // 已经加载过2048字节了,第二次偏移已经加载的量
            secondData.updateLength = len - 2048; // 第二次加载剩余的数据
            OH_ImageSource_UpdateData(imageSourceNative_c, &secondData);

            napi_value pixelMap;
            OhosImageDecodingOps decodingOps{};
            decodingOps.index = 0;
            // 创建pixelMap
            OH_ImageSource_CreatePixelMap(imageSourceNative_c, &decodingOps, &pixelMap);

            // 处理完毕,释放native层资源
            OH_ImageSource_Release(imageSourceNative_c);
            OH_ResourceManager_CloseRawFile(rawFile);
            return pixelMap;
         }
         // 读取Raw文件全部数据
         uint8_t * data = static_cast(malloc(len));
         int res = OH_ResourceManager_ReadRawFile(rawFile, data, len);

         OhosImageSource imageSource_c;
         imageSource_c.buffer = data;
         imageSource_c.bufferSize = len;

         OhosImageSourceOps ops{};
         napi_value imageSource;
         napi_value pixelMap;

         // 用读取到的Raw数据创建ImageSource
         int32_t ret = OH_ImageSource_Create(env, &imageSource_c, &ops, &imageSource);

         // 初始化native层的ImageSource
         ImageSourceNative * imageSourceNative_c = OH_ImageSource_InitNative(env, imageSource);
         OhosImageDecodingOps decodingOps{};

         // 创建pixelMap
         OH_ImageSource_CreatePixelMap(imageSourceNative_c, &decodingOps, &pixelMap);

         // 处理完毕,释放native层资源
         OH_ImageSource_Release(imageSourceNative_c);
         OH_ResourceManager_CloseRawFile(rawFile);
         return pixelMap;
      }
      OH_ResourceManager_ReleaseNativeResourceManager(mNativeResMgr);
      return nullptr;
   }
最后呢
很多开发朋友不知道需要学习那些鸿蒙技术?鸿蒙开发岗位需要掌握那些核心技术点?为此鸿蒙的开发学习必须要系统性的进行。
而网上有关鸿蒙的开发资料非常的少,假如你想学好鸿蒙的应用开发与系统底层开发。你可以参考这份资料,少走很多弯路,节省没必要的麻烦。由两位前阿里高级研发工程师联合打造的《鸿蒙NEXT星河版OpenHarmony开发文档》里面内容包含了(ArkTS、ArkUI开发组件、Stage模型、多端部署、分布式应用开发、音频、视频、WebGL、OpenHarmony多媒体技术、Napi组件、OpenHarmony内核、Harmony南向开发、鸿蒙项目实战等等)鸿蒙(Harmony NEXT)技术知识点
如果你是一名Android、Java、前端等等开发人员,想要转入鸿蒙方向发展。可以直接领取这份资料辅助你的学习。下面是鸿蒙开发的学习路线图。
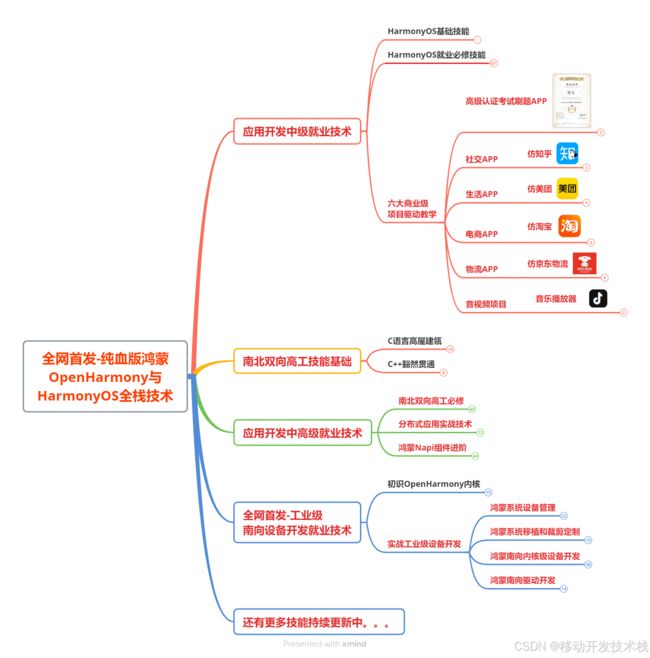
针对鸿蒙成长路线打造的鸿蒙学习文档。话不多说,我们直接看详细鸿蒙(OpenHarmony )手册(共计1236页)与鸿蒙(OpenHarmony )开发入门视频,帮助大家在技术的道路上更进一步。
- 《鸿蒙 (OpenHarmony)开发学习视频》
- 《鸿蒙生态应用开发V2.0白皮书》
- 《鸿蒙 (OpenHarmony)开发基础到实战手册》
- OpenHarmony北向、南向开发环境搭建
- 《鸿蒙开发基础》
- 《鸿蒙开发进阶》
- 《鸿蒙开发实战》
总结
鸿蒙—作为国家主力推送的国产操作系统。部分的高校已经取消了安卓课程,从而开设鸿蒙课程;企业纷纷跟进启动了鸿蒙研发。
并且鸿蒙是完全具备无与伦比的机遇和潜力的;预计到年底将有 5,000 款的应用完成原生鸿蒙开发,未来将会支持 50 万款的应用。那么这么多的应用需要开发,也就意味着需要有更多的鸿蒙人才。鸿蒙开发工程师也将会迎来爆发式的增长,学习鸿蒙势在必行! 自↓↓↓拿