爆改YOLOv8|利用yolov10的PSA注意力机制改进yolov8-高效涨点
1,本文介绍
PSA是一种改进的自注意力机制,旨在提升模型的效率和准确性。传统的自注意力机制需要计算所有位置对之间的注意力,这会导致计算复杂度高和训练时间长。PSA通过引入极化因子来减少需要计算的注意力对的数量,从而降低计算负担。极化因子是一个向量,通过与每个位置的向量点积,确定哪些位置需要计算注意力。这种方法可以在保持模型准确度的前提下,显著减少计算量,从而提升自注意力机制的效率。
关于PSA 的详细介绍可以看论文:https://arxiv.org/pdf/2405.14458
本文将讲解如何将PSA 融合进yolov8
话不多说,上代码!
2, 将PSA融合进yolov8
2.1 步骤一
找到如下的目录'ultralytics/nn/modules',然后在这个目录下创建一个PSA.py文件,文件名字可以根据你自己的习惯起,然后将PSA的核心代码复制进去
import torch
import torch.nn as nn

__all__ = ['PSA']

def autopad(k, p=None, d=1):  # kernel, padding, dilation
    """Pad to 'same' shape outputs."""
    if d > 1:
        k = d * (k - 1) + 1 if isinstance(k, int) else [d * (x - 1) + 1 for x in k]  # actual kernel-size
    if p is None:
        p = k // 2 if isinstance(k, int) else [x // 2 for x in k]  # auto-pad
    return p


class Conv(nn.Module):
    """Standard convolution with args(ch_in, ch_out, kernel, stride, padding, groups, dilation, activation)."""

    default_act = nn.SiLU()  # default activation

    def __init__(self, c1, c2, k=1, s=1, p=None, g=1, d=1, act=True):
        """Initialize Conv layer with given arguments including activation."""
        super().__init__()
        self.conv = nn.Conv2d(c1, c2, k, s, autopad(k, p, d), groups=g, dilation=d, bias=False)
        self.bn = nn.BatchNorm2d(c2)
        self.act = self.default_act if act is True else act if isinstance(act, nn.Module) else nn.Identity()

    def forward(self, x):
        """Apply convolution, batch normalization and activation to input tensor."""
        return self.act(self.bn(self.conv(x)))

    def forward_fuse(self, x):
        """Perform transposed convolution of 2D data."""
        return self.act(self.conv(x))


class Attention(nn.Module):
    def __init__(self, dim, num_heads=8,
                 attn_ratio=0.5):
        super().__init__()
        self.num_heads = num_heads
        self.head_dim = dim // num_heads
        self.key_dim = int(self.head_dim * attn_ratio)
        self.scale = self.key_dim ** -0.5
        nh_kd = nh_kd = self.key_dim * num_heads
        h = dim + nh_kd * 2
        self.qkv = Conv(dim, h, 1, act=False)
        self.proj = Conv(dim, dim, 1, act=False)
        self.pe = Conv(dim, dim, 3, 1, g=dim, act=False)

    def forward(self, x):
        B, _, H, W = x.shape
        N = H * W
        qkv = self.qkv(x)
        q, k, v = qkv.view(B, self.num_heads, -1, N).split([self.key_dim, self.key_dim, self.head_dim], dim=2)

        attn = (
                (q.transpose(-2, -1) @ k) * self.scale
        )
        attn = attn.softmax(dim=-1)
        x = (v @ attn.transpose(-2, -1)).view(B, -1, H, W) + self.pe(v.reshape(B, -1, H, W))
        x = self.proj(x)
        return x


class PSA(nn.Module):

    def __init__(self, c1, c2, e=0.5):
        super().__init__()
        assert (c1 == c2)
        self.c = int(c1 * e)
        self.cv1 = Conv(c1, 2 * self.c, 1, 1)
        self.cv2 = Conv(2 * self.c, c1, 1)

        self.attn = Attention(self.c, attn_ratio=0.5, num_heads=self.c // 64)
        self.ffn = nn.Sequential(
            Conv(self.c, self.c * 2, 1),
            Conv(self.c * 2, self.c, 1, act=False)
        )

    def forward(self, x):
        a, b = self.cv1(x).split((self.c, self.c), dim=1)
        b = b + self.attn(b)
        b = b + self.ffn(b)
        return self.cv2(torch.cat((a, b), 1))
2.2 步骤二
在task.py导入我们的模块
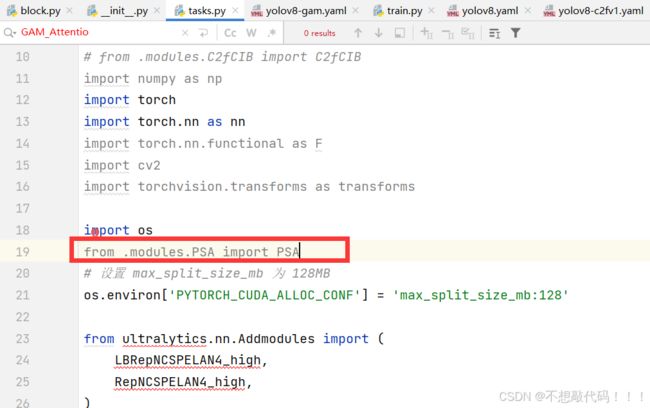
from .modules.PSA import PSA2.3 步骤三
在task.py的parse_model方法里面注册我们的模块
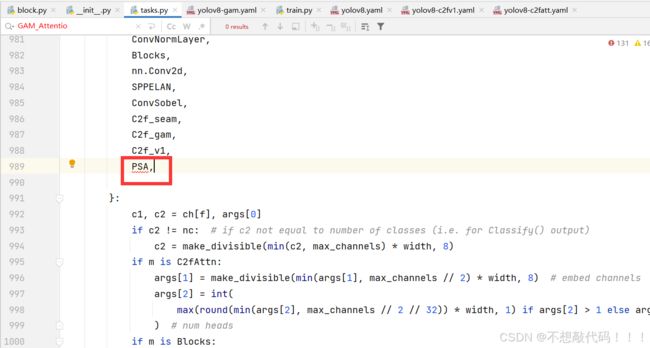
到此注册成功,复制后面的yaml文件直接运行即可
yaml文件
# Ultralytics YOLO , AGPL-3.0 license
# YOLOv8 object detection model with P3-P5 outputs. For Usage examples see https://docs.ultralytics.com/tasks/detect

# Parameters
nc: 80  # number of classes
scales: # model compound scaling constants, i.e. 'model=yolov8n.yaml' will call yolov8.yaml with scale 'n'
  # [depth, width, max_channels]
  n: [0.33, 0.25, 1024]  # YOLOv8n summary: 225 layers,  3157200 parameters,  3157184 gradients,   8.9 GFLOPs
  s: [0.33, 0.50, 1024]  # YOLOv8s summary: 225 layers, 11166560 parameters, 11166544 gradients,  28.8 GFLOPs
  m: [0.67, 0.75, 768]   # YOLOv8m summary: 295 layers, 25902640 parameters, 25902624 gradients,  79.3 GFLOPs
  l: [1.00, 1.00, 512]   # YOLOv8l summary: 365 layers, 43691520 parameters, 43691504 gradients, 165.7 GFLOPs
  x: [1.00, 1.25, 512]   # YOLOv8x summary: 365 layers, 68229648 parameters, 68229632 gradients, 258.5 GFLOP

# YOLOv8.0n backbone
backbone:
  # [from, repeats, module, args]
  - [-1, 1, Conv, [64, 3, 2]]  # 0-P1/2
  - [-1, 1, Conv, [128, 3, 2]]  # 1-P2/4
  - [-1, 3, C2f, [128, True]]
  - [-1, 1, Conv, [256, 3, 2]]  # 3-P3/8
  - [-1, 6, C2f, [256, True]]
  - [-1, 1, Conv, [512, 3, 2]]  # 5-P4/16
  - [-1, 6, C2f, [512, True]]
  - [-1, 1, Conv, [1024, 3, 2]]  # 7-P5/32
  - [-1, 3, C2f, [1024, True]]
  - [-1, 1, SPPF, [1024, 5]]  # 9
  - [-1, 1, PSA, [1024]]  # 10

# YOLOv8.0n head
head:
  - [-1, 1, nn.Upsample, [None, 2, 'nearest']]
  - [[-1, 6], 1, Concat, [1]]  # cat backbone P4
  - [-1, 3, C2f, [512]]  # 13

  - [-1, 1, nn.Upsample, [None, 2, 'nearest']]
  - [[-1, 4], 1, Concat, [1]]  # cat backbone P3
  - [-1, 3, C2f, [256]]  # 16 (P3/8-small)

  - [-1, 1, Conv, [256, 3, 2]]
  - [[-1, 13], 1, Concat, [1]]  # cat head P4
  - [-1, 3, C2f, [512]]  # 19 (P4/16-medium)

  - [-1, 1, Conv, [512, 3, 2]]
  - [[-1, 10], 1, Concat, [1]]  # cat head P5
  - [-1, 3, C2f, [1024]]  # 22 (P5/32-large)

  - [[16, 19, 22], 1, Detect, [nc]]  # Detect(P3, P4, P5)
# 关于PSA添加的位置可以自行调试,针对不同数据集位置不同,效果不同
不知不觉已经看完了哦,动动小手留个点赞吧--_--