初识爬虫2
requests学习:
小技巧,如果你用的也是pycharm,对于控制台输出页面因为数据很长一行,不方便进行查看,
可以让它自动换行:
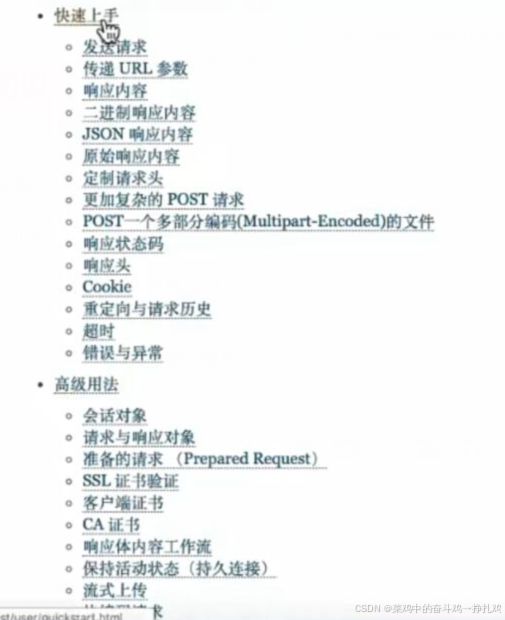
1.requests文档阅读学习链接:快速上手 — Requests 2.18.1 文档
需掌握
2.发送请求和获取响应
# -*- coding: utf-8 -*-
# 安装:pip install requests
import requests
url = 'https://www.baidu.com'
response = requests.get(url)
# response是string类型,编码格式可能出现问题
# 方法一:
# response.encoding = 'utf8'
# print(response.text)

# 方法二:
# content存储的是bytes类型的响应源码
# decode()默认utf-8 常见编码字符集:utf-8 gbk gb2312 ascii iso-8859-1
print(response.content.decode())

# 常见的响应对象参数与方法
# 响应url
# print(response.url)

# 状态码
# print(response.status_code)

# 响应头的请求头
# print(response.request.headers)
# 响应头
# print(response.headers)

# 答应响应设置cookies
# print(response.cookies)
3.发送带请求头的参数(上一篇讲到的重点user-agent)
# -*- coding: utf-8 -*-
import requests
# ctrl+点击 可实现跳转
url = 'https://www.baidu.com'
# response = requests.get(url)
#
# print(len(response.content.decode()))
# print(response.content.decode())

# headers参数的使用,伪装 user-agent
# 构建请求头字典
headers = {'user-agent': 'Mozilla/5.0 (Windows NT 10.0; Win64; x64) AppleWebKit/537.36 (KHTML, like Gecko) Chrome/128.0.0.0 Safari/537.36'}
# 发送带请求头的请求
response1=requests.get(url,headers=headers)
print(len(response1.content.decode()))
print(response1.content.decode())
4.发送带参数的请求
4.1 url中直接带参数
4.2 通过params携带参数字典
百度搜索python,可以发现访问链接是一个长串,其实里面很多是广告的插入:
可以从末尾&删除找到依次删除,最后得到:
# -*- coding: utf-8 -*-
import requests

import requests
import time

# 方法一:url中直接带参数
url = 'https://www.baidu.com/s?wd=python'
headers = {
    'User-Agent': 'Mozilla/5.0 (Windows NT 10.0; Win64; x64) AppleWebKit/537.36 (KHTML, like Gecko) Chrome/96.0.4664.110 Safari/537.36'
}

# 加一个延迟
time.sleep(2)

response = requests.get(url, headers=headers)

with open('baidu.html', 'wb') as f:
    f.write(response.content)

# 方法二:使用params参数
# url = 'https://www.baidu.com/s?'
# headers = {'user-agent': 'Mozilla/5.0 (Windows NT 10.0; Win64; x64) AppleWebKit/537.36 (KHTML, like Gecko) Chrome/128.0.0.0 Safari/537.36'}
#
# #构建参数字典
# data = {'wd': 'python'}
#
# response = requests.get(url, headers=headers, params=data)
# print(response.url)
# with open('baidu1.html', 'wb') as f:
#     f.write(response.content)
因为百度加强了反爬机制, 上面代码得到的html文件并不含有需要的
尝试更换 User-Agent,适当降低请求频率:
import requests
import time

# 方法一:url中直接带参数
url = 'https://www.baidu.com/s?wd=python'
headers = {
    'User-Agent': 'Mozilla/5.0 (Windows NT 10.0; Win64; x64) AppleWebKit/537.36 (KHTML, like Gecko) Chrome/96.0.4664.110 Safari/537.36'
}

# 加一个延迟
time.sleep(2)

response = requests.get(url, headers=headers)

with open('baidu.html', 'wb') as f:
    f.write(response.content)
还是没有解决,最后只能使用 Selenium 进行浏览器自动化,我这用的edge,也可以chrome.
# -*- coding: utf-8 -*-
# 安装:pip install selenium
from selenium import webdriver
from selenium.webdriver.edge.service import Service
from selenium.webdriver.edge.options import Options
import time

# 设置 Edge 选项
edge_options = Options()
edge_options.add_argument("--headless")  # 无头模式,不显示浏览器界面
edge_options.add_argument("--no-sandbox")
edge_options.add_argument("--disable-dev-shm-usage")

# 创建 Edge 驱动
service = Service('E:\\edgedriver\\msedgedriver.exe')  # 替换为你的 msedgedriver 路径
driver = webdriver.Edge(service=service, options=edge_options)

# 打开百度搜索
driver.get('https://www.baidu.com/s?wd=python')

# 等待页面加载
time.sleep(3)

# 获取页面源代码
html = driver.page_source

# 保存到文件
with open('baidu_search_results.html', 'w', encoding='utf-8') as f:
    f.write(html)

# 关闭浏览器
driver.quit()


