【计算机视觉】CV实战项目- Four-Flower:基于TensorFlow的花朵分类实战指南
深度解析Four-Flower:基于TensorFlow的花朵分类实战指南
-
- 项目概述与技术背景
-
- 技术栈组成
- 完整实战流程
-
- 环境配置
-
- 1. 基础环境安装
- 2. 项目环境搭建
- 3. 环境验证
- 数据准备
- 模型架构解析
- 训练过程优化
-
- 1. 训练配置
- 2. 关键参数建议
- 3. 训练监控
- 常见问题与解决方案
-
- 1. 内存不足错误
- 2. 过拟合问题
- 3. 类别不平衡
- 模型部署与应用
-
- 1. GUI界面实现
- 2. 模型导出
- 进阶改进方向
- 学术背景与扩展阅读
-
- 基础理论
- 花朵分类研究
图像分类是计算机视觉的基础任务,而花朵分类因其丰富的类别和细微的差异成为理想的入门项目。本文将全面剖析一个基于TensorFlow的花朵分类项目——Four-Flower,从技术原理到实战部署,为读者提供一份完整的深度学习图像分类实践指南。
项目概述与技术背景
Four-Flower是一个基于TensorFlow实现的四类花朵图像分类系统,其核心特点包括:
- 端到端解决方案:涵盖数据准备、模型训练、评估测试全流程
- 用户友好界面:提供GUI界面方便实际应用
- 教育导向设计:代码结构清晰,适合深度学习初学者
- 轻量级实现:基于标准CNN架构,无需复杂配置
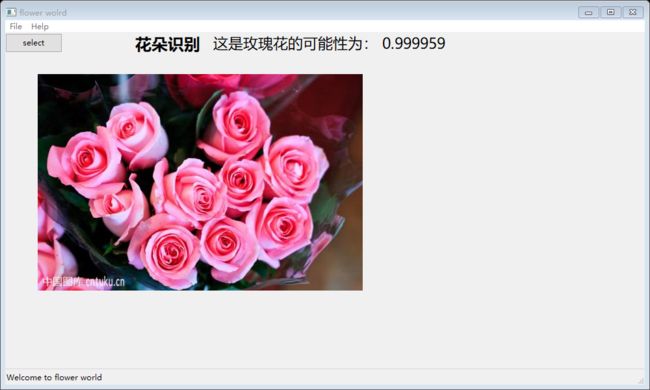
图:Four-Flower项目GUI识别界面
技术栈组成
- 框架核心:TensorFlow 2.x
- 数据处理:OpenCV, PIL
- 可视化界面:Tkinter/PyQt
- 环境管理:Anaconda
完整实战流程
环境配置
1. 基础环境安装
# 下载并安装Anaconda
wget https://repo.anaconda.com/archive/Anaconda3-2023.03-Linux-x86_64.sh
bash Anaconda3-2023.03-Linux-x86_64.sh
2. 项目环境搭建
git clone https://github.com/username/four-flower.git
cd four-flower
conda env update -f=environment.yaml  # 从YAML文件创建环境
conda activate four-flower
3. 环境验证
import tensorflow as tf
print(tf.__version__)  # 应显示2.x版本
数据准备
-
数据集结构
解压后的input_data应包含如下结构:input_data/ ├── train/ │ ├── daisy/ │ ├── dandelion/ │ ├── roses/ │ └── sunflowers/ └── val/ # 验证集目录结构同train -
数据增强配置
项目使用TensorFlow的ImageDataGenerator:from tensorflow.keras.preprocessing.image import ImageDataGenerator train_datagen = ImageDataGenerator( rescale=1./255, rotation_range=20, width_shift_range=0.2, height_shift_range=0.2, shear_range=0.2, zoom_range=0.2, horizontal_flip=True )
模型架构解析
项目采用经典CNN结构,核心代码如下:
model = tf.keras.Sequential([
    tf.keras.layers.Conv2D(32, (3,3), activation='relu', input_shape=(224,224,3)),
    tf.keras.layers.MaxPooling2D(2,2),

    tf.keras.layers.Conv2D(64, (3,3), activation='relu'),
    tf.keras.layers.MaxPooling2D(2,2),

    tf.keras.layers.Conv2D(128, (3,3), activation='relu'),
    tf.keras.layers.MaxPooling2D(2,2),

    tf.keras.layers.Flatten(),
    tf.keras.layers.Dense(512, activation='relu'),
    tf.keras.layers.Dense(4, activation='softmax')
])
该架构特点:
- 3个卷积块逐步提取特征
- 每层后接最大池化降维
- 512维全连接层作为分类器
- 输出层使用softmax激活实现多分类
训练过程优化
1. 训练配置
model.compile(
    optimizer=tf.keras.optimizers.Adam(learning_rate=0.001),
    loss='categorical_crossentropy',
    metrics=['accuracy']
)

history = model.fit(
    train_generator,
    steps_per_epoch=train_generator.samples // batch_size,
    epochs=30,
    validation_data=validation_generator,
    validation_steps=validation_generator.samples // batch_size
)
2. 关键参数建议
- Batch Size:32或64(根据GPU显存调整)
- 初始学习率:0.001(可配合ReduceLROnPlateau回调)
- Epochs:20-50(观察验证集损失变化)
3. 训练监控
import matplotlib.pyplot as plt

acc = history.history['accuracy']
val_acc = history.history['val_accuracy']
loss = history.history['loss']
val_loss = history.history['val_loss']

plt.figure(figsize=(12, 4))
plt.subplot(1, 2, 1)
plt.plot(acc, label='Training Accuracy')
plt.plot(val_acc, label='Validation Accuracy')
plt.legend()
plt.title('Accuracy Metrics')

plt.subplot(1, 2, 2)
plt.plot(loss, label='Training Loss')
plt.plot(val_loss, label='Validation Loss')
plt.legend()
plt.title('Loss Metrics')
plt.show()
常见问题与解决方案
1. 内存不足错误
现象:ResourceExhaustedError: OOM when allocating tensor
解决方案:
- 减小batch size(16或32)
- 降低输入图像分辨率(如从224x224降至150x150)
- 使用数据流式加载:
train_generator = train_datagen.flow_from_directory(
    train_dir,
    target_size=(150, 150),
    batch_size=32,
    class_mode='categorical'
)
2. 过拟合问题
现象:训练准确率高但验证准确率低
解决方案:
- 增加数据增强参数:
datagen = ImageDataGenerator( rotation_range=40, width_shift_range=0.3, height_shift_range=0.3, shear_range=0.3, zoom_range=0.3, horizontal_flip=True, fill_mode='nearest' ) - 添加正则化层:
tf.keras.layers.Dense(512, activation='relu', kernel_regularizer='l2') - 早停回调:
callbacks = [
    tf.keras.callbacks.EarlyStopping(patience=5),
    tf.keras.callbacks.ModelCheckpoint('best_model.h5', save_best_only=True)
]
3. 类别不平衡
现象:某些类别准确率显著低于其他类别
解决方案:
- 使用类别权重:
from sklearn.utils import class_weight import numpy as np class_weights = class_weight.compute_class_weight( 'balanced', classes=np.unique(train_generator.classes), y=train_generator.classes ) model.fit(..., class_weight=class_weights) - 过采样少数类别
模型部署与应用
1. GUI界面实现
项目使用Tkinter实现简单界面:
import tkinter as tk
from tkinter import filedialog
from PIL import ImageTk, Image

class FlowerApp:
    def __init__(self):
        self.window = tk.Tk()
        self.model = tf.keras.models.load_model('flower_model.h5')
        self.setup_ui()

    def setup_ui(self):
        self.window.title("Flower Classifier")
        self.btn_load = tk.Button(text="Load Image", command=self.load_image)
        self.btn_load.pack()
        self.label_result = tk.Label(text="Prediction will appear here")
        self.label_result.pack()

    def load_image(self):
        file_path = filedialog.askopenfilename()
        img = Image.open(file_path)
        img = img.resize((224,224))
        img_array = np.array(img)/255.0
        img_array = np.expand_dims(img_array, axis=0)

        pred = self.model.predict(img_array)
        class_idx = np.argmax(pred)
        classes = ['daisy', 'dandelion', 'roses', 'sunflowers']
        self.label_result.config(text=f"Prediction: {classes[class_idx]}")
2. 模型导出
# 保存完整模型
model.save('flower_model.h5')

# 导出为TensorFlow Lite格式(移动端部署)
converter = tf.lite.TFLiteConverter.from_keras_model(model)
tflite_model = converter.convert()
open("flower_model.tflite", "wb").write(tflite_model)
进阶改进方向
-
模型架构升级:
- 使用预训练模型(如MobileNetV2, EfficientNet)
base_model = tf.keras.applications.MobileNetV2( input_shape=(224,224,3), include_top=False, weights='imagenet' ) -
超参数优化:
tuner = kt.Hyperband( create_model, objective='val_accuracy', max_epochs=20, directory='tuning', project_name='flower' ) -
可视化分析:
- 使用Grad-CAM可视化关注区域
- 混淆矩阵分析
-
部署优化:
- 使用TensorRT加速
- 开发Web API接口
学术背景与扩展阅读
基础理论
-
CNN基础:
- LeCun Y, et al. “Gradient-based learning applied to document recognition.” Proceedings of the IEEE 1998
-
现代架构:
- Simonyan K, Zisserman A. “Very deep convolutional networks for large-scale image recognition.” ICLR 2015
花朵分类研究
-
专业数据集:
- Oxford Flowers 102数据集
- Kaggle Flowers Recognition数据集
-
最新方法:
- 注意力机制在细粒度分类中的应用
- 自监督预训练策略
通过本项目的实践,读者不仅能掌握TensorFlow的基本使用方法,还能深入理解图像分类任务的全流程实现。Four-Flower项目作为入门起点,为进一步研究更复杂的计算机视觉任务奠定了坚实基础。