Gprinter Android SDK V2.0 使用说明
Gprinter Android SDK旨在佳博用户更快速,更高效的在Android平台下开发和使用佳博打印机。如果您在使用SDK中碰到问题,或者发现BUG,请留言
一、下载GprinterSDKV2.0
GprinterSDKV2.0可打电话到0756-3866865,填写客户资料后,即可获得。
二、安装Gplink打印机驱动
在GprinterSDKV2.0文件夹中,可以看到Gplink.apk的软件,在手机或平板上安装此软件。Gplink提供打印服务。
三、导入Android例程
在eclipse,导入GprinterClient工程,以下对此例程进行说明,用户开发时可以先研究此例程,再进行开发
四、gprinter-v2.0.jar和commons-lang-2.6文件
可以看到在GprinterClient工程中可以开到libs文件夹中有两个文件gprinter-v2.0.jar和commons-lang-2.6,如图1
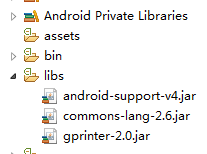
图1
gprinter-v2.0.jar,是用来提供打印时所需的API,API的详细说明可以查看手册
commons-lang-2.6.JAR,是用来处理base64的操作。
如果是用eclipse开发,新建工程,将gprinter-v2.0.jar和commons-lang-2.6拷贝到工程的libs文件夹下即可。
五、GpService.aidl文件
可以看到在scr中,com.gprinter.aidl包中有个GpService.aidl的文件,是用来和Gplink提供的服务进行交互的,如图2
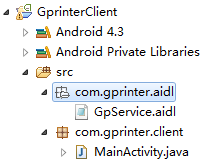
图2
GpService.aidl文件说明,具体的方法说明请看 GprinterSDKV2.0文件夹中的GpService.aidl说明文档
package com.gprinter.aidl;
interface GpService{
void openPortConfigurationDialog(); //打开端口连接对话框
int printeTestPage(int PrinterId); // 打印测试页
int queryPrinterStatus(int PrinterId); //查询打印机状态
int getPrinterCommandType(int PrinterId); //查询打印机指令类型
int sendEscCommand(int PrinterId, String b64);//发送ESC指令
int sendTscCommand(int PrinterId, String b64); //发送TSC指令
}
如果是用eclipse开发,在工程的src中增加com.gprinter.aidl包,在包中加入GpService.aidl文件即可
六、绑定打印服务
可以看到,在MainAcitivty.java的onCreate方法中的对GpService进行了绑定
private GpService mGpService;
private static final String DEBUG_TAG = "MainActivity";
private PrinterServiceConnection conn = null;
@Override

    public void onCreate(Bundle savedInstanceState) {

        super.onCreate(savedInstanceState);

        setContentView(R.layout.activity_main);

        Log.e(DEBUG_TAG, "onCreate");

        connection();

    }

    private void connection() {

        conn = new PrinterServiceConnection();

        Intent intent = new Intent("com.gprinter.aidl.GpPrintService");

        bindService(intent, conn, Context.BIND_AUTO_CREATE); // 绑定服务

    }

    class PrinterServiceConnection implements ServiceConnection {

        @Override

        public void onServiceDisconnected(ComponentName name) {

            Log.i("ServiceConnection", "onServiceDisconnected() called");

            mGpService = null;

        }

        @Override

        public void onServiceConnected(ComponentName name, IBinder service) {

            mGpService =GpService.Stub.asInterface(service);

        }

    };
七、实现打印机的操作
1、在openPortDialogueClicked方法,可以打开端口连接对话框
    public void openPortDialogueClicked(View view) {

        try {

            mGpService.openPortConfigurationDialog(); // 点击连接打印机时,需要打印机错误灯不闪烁的情况下才能连接

        } catch (RemoteException e1) {

            // TODO Auto-generated catch block

            e1.printStackTrace();

        }

    }
打开对话框后,可以看到如下画面,如图3,此对话框可以对蓝牙、USB、网口打印机进行连接操作。
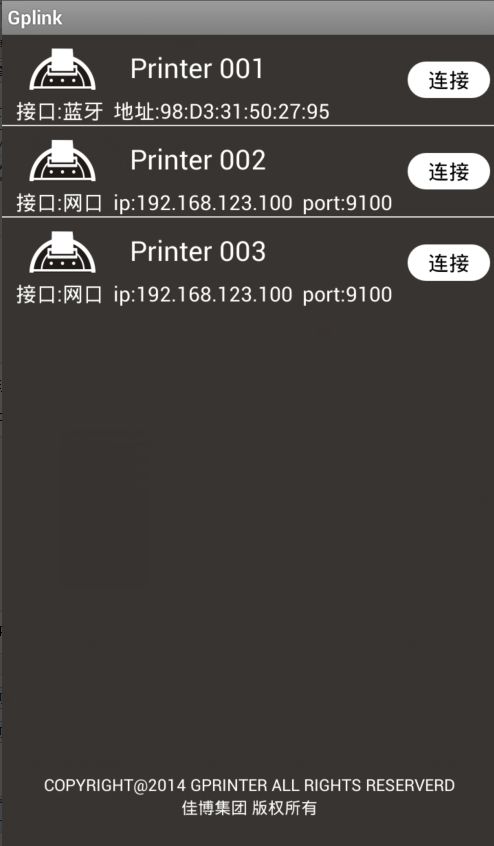
图3
打印机开机,选择正确的端口,如果是usb接口则需要otg的转接线连接usb打印机。再点击连接按钮,则可以连接到佳博打印机。
2、在printTestPageClicked实现打印测试页
    public void printTestPageClicked(View view) {

        try {

            int rel = mGpService.printeTestPage(mPrinterIndex); //

            Log.i("ServiceConnection", "rel " + rel);

            GpCom.ERROR_CODE r=GpCom.ERROR_CODE.values()[rel];

            if(r != GpCom.ERROR_CODE.SUCCESS){ //显示错误信息

                Toast.makeText(getApplicationContext(),GpCom.getErrorText(r),

                        Toast.LENGTH_SHORT).show();

        }

        } catch (RemoteException e1) {

            // TODO Auto-generated catch block

            e1.printStackTrace();

        }

    }
如果连接的是票据打印机则测试页内容如图4:
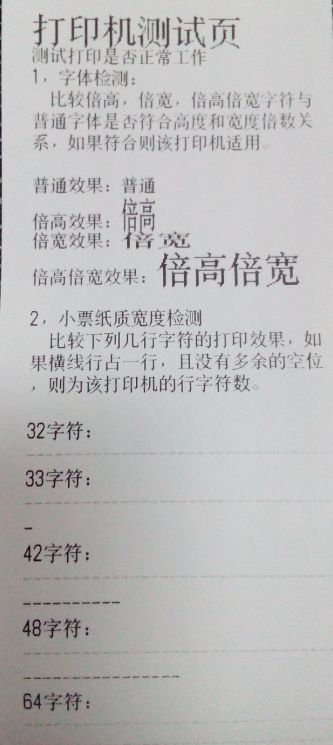
图4
如果连接的是标签打印机则测试页内容如图5:
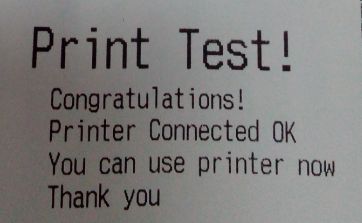
图5
3、在getPrinterStatusClicked中可以获取打印机当前状态。每次执行打印之前需获取打印机状态,打印机正常才能够再发送命令给打印机
    public void getPrinterStatusClicked(View view) {

        try {

            int status = mGpService.queryPrinterStatus(mPrinterIndex);

            String str = new String();

            if (status == GpCom.STATE_NO_ERR) {

                str = "打印机正常";

            } else if ((byte) (status & GpCom.STATE_OFFLINE) > 0) {

                str = "打印机脱机";

            } else if ((byte) (status & GpCom.STATE_PAPER_ERR) > 0) {

                str = "打印机缺纸";

            } else if ((byte) (status & GpCom.STATE_COVER_OPEN) > 0) {

                str = "打印机开盖";

            } else if ((byte) (status & GpCom.STATE_ERR_OCCURS) > 0) {

                str = "打印机出错";

            }

            Toast.makeText(getApplicationContext(),

                    "打印机:" + '0' + " 状态:" + str, Toast.LENGTH_SHORT).show();

        } catch (RemoteException e1) {

            // TODO Auto-generated catch block

            e1.printStackTrace();

        }

    }
4、在getPrinterCommandTypeClicked中可以获取打印机的指令类型,票据打印机为ESC指令,标签打印机为TSC指令
    public void getPrinterCommandTypeClicked(View view) {

        try {

            int type = mGpService.getPrinterCommandType(mPrinterIndex);

            if (type == GpCom.ESC_COMMAND) {

                Toast.makeText(getApplicationContext(), "打印机使用ESC命令",

                        Toast.LENGTH_SHORT).show();

            } else {

                Toast.makeText(getApplicationContext(), "打印机使用TSC命令",

                        Toast.LENGTH_SHORT).show();

            }

        } catch (RemoteException e1) {

            // TODO Auto-generated catch block

            e1.printStackTrace();

        }

    }
5、在printReceiptClicked发送票据,每次打印之前查询打印机状态
    public void printReceiptClicked(View view) {

        try {

            int type = mGpService.getPrinterCommandType(mPrinterIndex);

            if (type == GpCom.ESC_COMMAND) {

                int status = mGpService.queryPrinterStatus(mPrinterIndex);

                if (status == GpCom.STATE_NO_ERR) {

                    sendReceipt();

                }

                else{

                    Toast.makeText(getApplicationContext(),

                            "打印机错误!", Toast.LENGTH_SHORT).show();

                }

            }

        }

        catch (RemoteException e1) {

            // TODO Auto-generated catch block

            e1.printStackTrace();

        }

    }
票据的内容编辑,按照ESC指令编写,可以参考EscComand API说明文件
void sendReceipt(){

        EscCommand esc = new EscCommand();

        esc.addPrintAndFeedLines((byte)3);

        esc.addSelectJustification(JUSTIFICATION.CENTER);//设置打印居中

        esc.addSelectPrintModes(FONT.FONTA, ENABLE.OFF,ENABLE.ON, ENABLE.ON, ENABLE.OFF);//设置为倍高倍宽

        esc.addText("Sample\n");   //  打印文字

        esc.addPrintAndLineFeed();


        /*打印文字*/

        esc.addSelectPrintModes(FONT.FONTA, ENABLE.OFF,ENABLE.OFF, ENABLE.OFF, ENABLE.OFF);//取消倍高倍宽

        esc.addSelectJustification(JUSTIFICATION.LEFT);//设置打印左对齐

        esc.addText("Print text\n");   //  打印文字

        esc.addText("Welcome to use Gprinter!\n");   //  打印文字

        esc.addPrintAndLineFeed();

        /*打印图片*/

        esc.addText("Print bitmap!\n");   //  打印文字

        Bitmap b = BitmapFactory.decodeResource(getResources(),

                R.drawable.gprinter);

        esc.addRastBitImage(b,b.getWidth(),0);   //打印图片


        /*打印一维条码*/

        esc.addText("Print code128\n");   //  打印文字

        esc.addSelectPrintingPositionForHRICharacters(HRI_POSITION.BELOW);//设置条码可识别字符位置在条码下方

        esc.addSetBarcodeHeight((byte)60); //设置条码高度为60点

        esc.addCODE128("Gprinter");  //打印Code128码

        esc.addPrintAndLineFeed();


        /*QRCode命令打印

            此命令只在支持QRCode命令打印的机型才能使用。

            在不支持二维码指令打印的机型上,则需要发送二维条码图片

        */

        esc.addText("Print QRcode\n");   //  打印文字

        esc.addSelectErrorCorrectionLevelForQRCode((byte)0x31); //设置纠错等级

        esc.addSelectSizeOfModuleForQRCode((byte)3);//设置qrcode模块大小

        esc.addStoreQRCodeData("www.gprinter.com.cn");//设置qrcode内容

        esc.addPrintQRCode();//打印QRCode

        esc.addPrintAndLineFeed();


        /*打印文字*/

        esc.addSelectJustification(JUSTIFICATION.CENTER);//设置打印左对齐

        esc.addText("Completed!\r\n");   //  打印结束

        esc.addPrintAndLineFeed();


        Vector<Byte> datas = esc.getCommand(); //发送数据

        Byte[] Bytes = datas.toArray(new Byte[datas.size()]);

        byte[] bytes = ArrayUtils.toPrimitive(Bytes);

        String str = Base64.encodeToString(bytes, Base64.DEFAULT);

        int rel;

        try {

            rel = mGpService.sendEscCommand(mPrinterIndex, str);

            GpCom.ERROR_CODE r=GpCom.ERROR_CODE.values()[rel];

            if(r != GpCom.ERROR_CODE.SUCCESS){

                Toast.makeText(getApplicationContext(),GpCom.getErrorText(r),

                        Toast.LENGTH_SHORT).show();

                  }

        } catch (RemoteException e) {

            // TODO Auto-generated catch block

            e.printStackTrace();

        }

    }
打印效果如图6
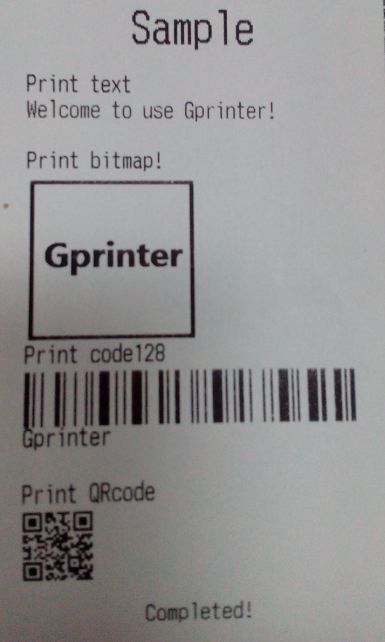
图6
6、在printLabelClicked发送标签,每次打印之前查询打印机状态
    public void printLabelClicked(View view) {

        try {

            int type = mGpService.getPrinterCommandType(mPrinterIndex);

            if (type == GpCom.TSC_COMMAND) {

                int status = mGpService.queryPrinterStatus(mPrinterIndex);

                if (status ==GpCom.STATE_NO_ERR) {

                    sendLabel();

                }

                else{

                    Toast.makeText(getApplicationContext(),

                            "打印机错误!", Toast.LENGTH_SHORT).show();

                }

            }

        } catch (RemoteException e1) {

            // TODO Auto-generated catch block

            e1.printStackTrace();

        }

    }
标签的内容编辑,按照TSC指令发送,可以参考TscComand API说明文件
void sendLabel(){

        TscCommand tsc = new TscCommand();

        tsc.addSize(60, 60); //设置标签尺寸,按照实际尺寸设置

        tsc.addGap(0);           //设置标签间隙,按照实际尺寸设置,如果为无间隙纸则设置为0

        tsc.addDirection(DIRECTION.BACKWARD,MIRROR.NORMAL);//设置打印方向

        tsc.addReference(0, 0);//设置原点坐标

         tsc.addTear(ENABLE.ON); //撕纸模式开启

        tsc.addCls();// 清除打印缓冲区

        //绘制简体中文

         tsc.addText(20,20,FONTTYPE.SIMPLIFIED_CHINESE,ROTATION.ROTATION_0,FONTMUL.MUL_1,FONTMUL.MUL_1,"Welcome to use Gprinter!");

         //绘制图片

        Bitmap b = BitmapFactory.decodeResource(getResources(),

                R.drawable.gprinter);

        tsc.addBitmap(20,50, BITMAP_MODE.OVERWRITE, b.getWidth(),b);

        //绘制二维条码,此命令只在部分机型上适用

        tsc.addQRCode(250, 80, EEC.LEVEL_L,5,ROTATION.ROTATION_0, " www.gprinter.com.cn");

         //绘制一维条码

         tsc.add1DBarcode(20,250, BARCODETYPE.CODE128, 100, READABEL.EANBEL, ROTATION.ROTATION_0, "Gprinter");

        tsc.addPrint(1,1); // 打印标签

        tsc.addSound(2, 100); //打印标签后 蜂鸣器响


        Vector<Byte> datas = tsc.getCommand(); //发送数据

        Byte[] Bytes = datas.toArray(new Byte[datas.size()]);

        byte[] bytes = ArrayUtils.toPrimitive(Bytes);

        String str = Base64.encodeToString(bytes, Base64.DEFAULT);

        int rel;

        try {

            rel = mGpService.sendEscCommand(mPrinterIndex, str);

            GpCom.ERROR_CODE r=GpCom.ERROR_CODE.values()[rel];

            if(r != GpCom.ERROR_CODE.SUCCESS){

                Toast.makeText(getApplicationContext(),GpCom.getErrorText(r),

                        Toast.LENGTH_SHORT).show();

                  }

        } catch (RemoteException e) {

            // TODO Auto-generated catch block

            e.printStackTrace();

        }

    }
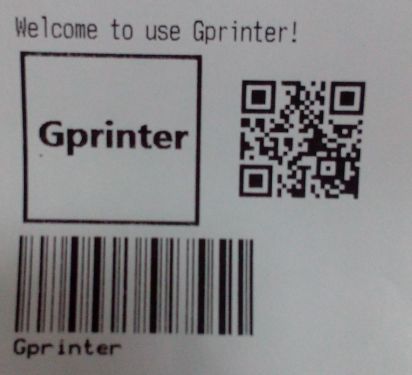 图7
图7