IIS setup on windows server 2008
1. search “server manager”
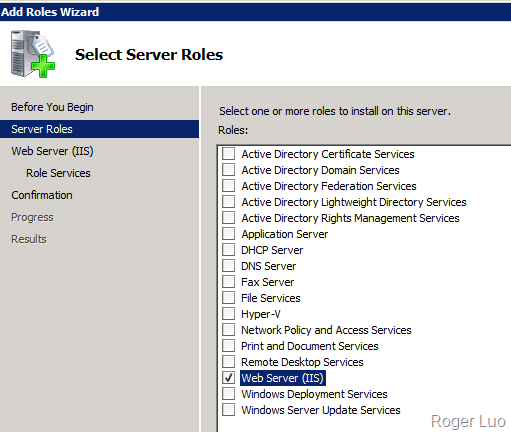
2. Choose “Roles” and then click “Add Feature”
3. choose “Web Server”
4. choose your wanted application
5. keep on clicking next button
6. basically, you will get successful message.
7. add virtual directory
right click “Default web sites” and then click “add virtual directory”
8. Fill the form for the alias name and physical path
in this example, you can access the web site on browser by input “http://localhost/Test” or “http://127.0.0.1/Test” or “http://YourIP/Test”
9. If you want to force see the files like explorer, choose the virtual directory you just added and then click the “Directory Browseing” under the “IIS” section. And “enable” it.
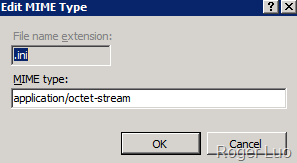
10. if you want to support more MIME type, such as you want to make .ini file could be downloaded from your virtual directory.
choose the vd and then click “MIME types” and then click “add…”, like this.
11. save and then restart your default web sites in order to make the configuration active.


