nginx系列
实验步骤:
一、安装nginx必须的依赖包
- [root@rhel6u3-7 ~]# yum -y install gcc openssl-devel pcre-devel zlib-devel //yum创建过程略,安装略
二、安装编译nginx,目前系统测试环境为rhel6.3 软件版本为nginx-1.27
- [root@rhel6u3-7 ~]# useradd nginx -s /sbin/nologin //给nginx服务器创建后台进程管理用户
- [root@rhel6u3-7 ~]# tar zxvf nginx-1.2.7.tar.gz //解压缩
- [root@rhel6u3-7 ~]# cd nginx-1.2.7
- [root@rhel6u3-7 nginx-1.2.7]# ./configure --user=nginx --group=nginx --prefix=/usr/local/nginx/ --with-http_stub_status_module --with-http_ssl_module
- // --user=nginx –group=nginx 设置允许nginx允许的用户和组为nginx
- // --prefix=/usr/local/nginx/ 设置nginx安装路径
- // --with-http_stub_status_module 安装允许状态模块
- // --with-http_ssl_module 安装ssl模块
- //更多参数请参看 ./configure --help
- …… //安装显示略,如果配置正确,最后会显示以下信息。
- Configuration summary
- + using system PCRE library
- + using system OpenSSL library
- + md5: using OpenSSL library
- + sha1: using OpenSSL library
- + using system zlib library
- nginx path prefix: "/usr/local/nginx/"
- nginx binary file: "/usr/local/nginx//sbin/nginx"
- nginx configuration prefix: "/usr/local/nginx//conf"
- nginx configuration file: "/usr/local/nginx//conf/nginx.conf"
- nginx pid file: "/usr/local/nginx//logs/nginx.pid"
- nginx error log file: "/usr/local/nginx//logs/error.log"
- nginx http access log file: "/usr/local/nginx//logs/access.log"
- nginx http client request body temporary files: "client_body_temp"
- nginx http proxy temporary files: "proxy_temp"
- nginx http fastcgi temporary files: "fastcgi_temp"
- nginx http uwsgi temporary files: "uwsgi_temp"
- nginx http scgi temporary files: "scgi_temp"
- [root@rhel6u3-7 ~]# /usr/local/nginx/sbin/nginx –V //安装完成后查看Nginx的相关环境配置信息是否正确
- nginx version: nginx/1.2.7
- built by gcc 4.4.6 20120305 (Red Hat 4.4.6-4) (GCC)
- TLS SNI support enabled
- configure arguments: --user=nginx --group=nginx --prefix=/usr/local/nginx/ --with-http_stub_status_module --with-http_ssl_module
- [root@rhel6u3-7 ~]#
- [root@rhel6u3-7 nginx-1.2.7]# make & make install //编译安装过程略
三、通过nginx自身脚本机器nginx服务器,并通过各种命令查看是否启动成功
- [root@rhel6u3-7 ~]# /usr/local/nginx/sbin/nginx -c /usr/local/nginx/conf/nginx.conf // -c指向nginx主配置文件
- [root@rhel6u3-7 ~]# lsof -i :80 //查看nginx进程号及运行情况
- COMMAND PID USER FD TYPE DEVICE SIZE/OFF NODE NAME
- nginx 4080 root 6u IPv4 21467 0t0 TCP *:http (LISTEN)
- nginx 4081 nginx 6u IPv4 21467 0t0 TCP *:http (LISTEN)
- [root@rhel6u3-7 ~]# ps -ef | grep nginx //查看nginx进程号及运行情况
- root 4080 1 0 22:24 ? 00:00:00 nginx: master process /usr/local/nginx/sbin/nginx -c /usr/local/nginx/conf/nginx.conf
- nginx 4081 4080 0 22:24 ? 00:00:00 nginx: worker process
- root 4088 1433 0 22:27 pts/0 00:00:00 grep nginx
- [root@rhel6u3-7 ~]# netstat -nltp | grep 80 //查看nginx进程监听端口
- tcp 0 0 0.0.0.0:80 0.0.0.0:* LISTEN 4080/nginx
四,测试nginx配置的默认web服务器是否能正常运行
通过linux自带命令links 测试
- [root@rhel6u3-7 ~]# links 127.0.0.1 //出现 welcome to nginx!说明nginx服务启动成功
通过windows服务器IE浏览器测试

扩展知识:
1、设置nginx开机自动启动,将nginx启动命令添加到/etc/rc.local
- [root@rhel6u3-7 ~]# echo "/usr/local/nginx/sbin/nginx -c /usr/local/nginx/conf/nginx.conf" >> /etc/rc.local
- [root@rhel6u3-7 ~]# cat /etc/rc.local | grep nginx
- /usr/local/nginx/sbin/nginx -c /usr/local/nginx/conf/nginx.conf
2、通过设置System V 脚本,使用server命令启动nginx服务
- [root@rhel6u3-7 init.d]# vim nginx //在/etc/init.d/下创建nginx启动脚本文件
- #!/bin/sh
- #
- # nginx - this script starts and stops the nginx daemon
- #
- # chkconfig: - 85 15
- # description: Nginx is an HTTP(S) server, HTTP(S) reverse \
- # proxy and IMAP/POP3 proxy server
- # processname: nginx
- # config: /etc/nginx/nginx.conf
- # config: /etc/sysconfig/nginx
- # pidfile: /var/run/nginx.pid
- # Source function library.
- . /etc/rc.d/init.d/functions
- # Source networking configuration.
- . /etc/sysconfig/network
- # Check that networking is up.
- [ "$NETWORKING" = "no" ] && exit 0
- nginx="/usr/local/nginx/sbin/nginx"
- prog=$(basename $nginx)
- NGINX_CONF_FILE="/usr/local/nginx/conf/nginx.conf"
- [ -f /etc/sysconfig/nginx ] && . /etc/sysconfig/nginx
- lockfile=/var/lock/subsys/nginx
- start() {
- [ -x $nginx ] || exit 5
- [ -f $NGINX_CONF_FILE ] || exit 6
- echo -n $"Starting $prog: "
- daemon $nginx -c $NGINX_CONF_FILE
- retval=$?
- echo
- [ $retval -eq 0 ] && touch $lockfile
- return $retval
- }
- stop() {
- echo -n $"Stopping $prog: "
- killproc $prog -QUIT
- retval=$?
- echo
- [ $retval -eq 0 ] && rm -f $lockfile
- return $retval
- killall -9 nginx
- }
- restart() {
- configtest || return $?
- stop
- sleep 1
- start
- }
- reload() {
- configtest || return $?
- echo -n $"Reloading $prog: "
- killproc $nginx -HUP
- RETVAL=$?
- echo
- }
- force_reload() {
- restart
- }
- configtest() {
- $nginx -t -c $NGINX_CONF_FILE
- }
- rh_status() {
- status $prog
- }
- rh_status_q() {
- rh_status >/dev/null 2>&1
- }
- case "$1" in
- start)
- rh_status_q && exit 0
- $1
- ;;
- stop)
- rh_status_q || exit 0
- $1
- ;;
- restart|configtest)
- $1
- ;;
- reload)
- rh_status_q || exit 7
- $1
- ;;
- force-reload)
- force_reload
- ;;
- status)
- rh_status
- ;;
- condrestart|try-restart)
- rh_status_q || exit 0
- ;;
- *)
- echo $"Usage: $0 {start|stop|status|restart|condrestart|try-restart|reload|force-reload|configtest}"
- exit 2
- esac
- [root@rhel6u3-7 init.d]# chmod 755 nginx //修改脚本文件nginx的权限
- [root@rhel6u3-7 init.d]# chkconfig --add nginx //将脚本文件加入chkconfig中
- [root@rhel6u3-7 init.d]# chkconfig --level 35 nginx on //设置nginx开机在3和5级别自动启动
- [root@rhel6u3-7 init.d]# chkconfig --list | grep nginx
- nginx 0:off 1:off 2:off 3:on 4:off 5:on 6:off
Ningx作为负载均衡器的同时也是反向代理服器,配置语法相当简单,可以按轮询、IP_hash、url_hash、权重等多种方法对后端的服务器作负载均衡,同时还支持后端服务器的健康检查。另外,它相对于LVS比较有优势的一点,由于它是基于第七层的负载均衡,是根据报头内的信息来执行负载均衡任务,所以对网络的依赖比较小,理论上只要ping得通就能够实现负载均衡;在国内,Nginx不仅作为一款性能优异的负载均衡器,它同时也是一款适用于高并发环境的WEB应用软件,在新浪、金山、迅雷在线等大型网站都得到了应用,其作为负载均衡器的优点如下: 1.配置文件非常简单:风格跟程序一样通俗易懂。 2.成本低廉:Nginx为开源软件,可以免费使用。而购买F5 BIG-IP、NetScaler等硬件负载均衡交换机则需要十多万至几十万人民币。 3.支持Rewrite重写规则:能够根据域名、URL的不同,将 HTTP 请求分到不同的后端服务器群组。 4.内置的健康检查功能:如果 Nginx Proxy 后端的某台 Web 服务器宕机了,不会影响前端访问。 5.节省带宽:支持 GZIP 压缩,可以添加浏览器本地缓存的 Header 头。 6.稳定性高:用于反向代理,宕机的概率微乎其微。特别是通过跟踪一些已上线的项目,发现在高并发的情况下,Nginx作为负器均衡器/反向代理宕机的次数几乎是零。 缺点就是目前仅仅只支持http和mail的负载均衡,不过我们可以取长被短,主要用它的支持Rewrite重写规则和稳定性高的特点,将其中间层的负载均衡.
以上引用抚琴煮酒语录!
--------------------------------------------------------------

实验目的:
1、通过Nginx反向代理服务器实现后台web服务器的快速访问。
2、通过Nginx反向代理服务器实现后台web服务器群的负载均衡及冗余备份
前期准备工作:
1、 单独在Apache上部署web(www1.rsyslog.org)服务器,并实现访问(简单介绍)
Apache下域名虚拟主机在个人主页目录上实现过程 http://dreamfire.blog.51cto.com/418026/163612
通过交互式脚本自动创建Apache虚拟主机http://dreamfire.blog.51cto.com/418026/1152672
通过DNS View实现不同区域访问域名解析http://dreamfire.blog.51cto.com/418026/1133159
DNS配置详解一 DNS相关概念理解及配置基础http://dreamfire.blog.51cto.com/418026/1091943
配置一个简单的Apache虚拟主机:
- [root@rhel6u3-4 ~]#sed -i 's/#NameVirtualHost/NameVirtualHost/' /etc/httpd/conf/httpd.conf //将#去掉,启动虚拟主机功能
- [root@rhel6u3-4 ~]# cat >> /etc/httpd/conf/httpd.conf <<endf //添加一台虚拟主机
- > <VirtualHost *:80>
- > DocumentRoot /var/local/www
- > ServerName www1.rsyslog.org
- > </VirtualHost>
- > endf
- [root@rhel6u3-4 ~]# mkdir /var/local/www1 //创建虚拟主机目录
- [root@rhel6u3-4 ~]# echo "This is www1.rsyslog.org website" >/var/local/www1/index.html //创建虚拟主机测试页
- [root@rhel6u3-4 ~]# cat /var/local/www1/index.html
- This is www1.rsyslog.org website
- [root@rhel6u3-4 ~]# /etc/rc.d/init.d/httpd restart //重启httpd服务
- Stopping httpd: [ OK ]
- Starting httpd: [ OK ]
- [root@rhel6u3-4 ~]#
- [root@rhel6u3-2 ~]# vim /var/named/view/zone/Others.rsyslog.org.zone //在DNS服务器上添加A记录
- www1 A 192.168.100.104
- [root@rhel6u3-2 ~]# /etc/rc.d/init.d/named restart //重启DNS服务器,使记录生效
- Stopping named: . [ OK ]
- Starting named: [ OK ]
- [root@rhel6u3-4 ~]# cat /etc/resolv.conf //在web服务器上添加DNS地址,进行测试
- nameserver 192.168.100.102
- [root@rhel6u3-4 ~]# nslookup www1.rsyslog.org //通过nslookup先解析域名是否OK
- Server: 192.168.100.102
- Address: 192.168.100.102#53
- Name: www1.rsyslog.org
- Address: 192.168.100.104
- [root@rhel6u3-4 ~]# links -dump http://www1.rsyslog.org //通过links命令测试网站是否能够正常访问
- This is www1.rsyslog.org website
- [root@rhel6u3-4 ~]#
2、单独在Nginx上部署web(www2.rsyslog.org)服务器,并实现访问(简单介绍)
Nginx实战基础篇一 源码包编译安装部署web服务器http://dreamfire.blog.51cto.com/418026/1140965
Nginx上虚拟主机的实现过程http://dreamfire.blog.51cto.com/418026/1141018
- //nginx搭建过程略
- [root@rhel6u3-5 ~]# vim /usr/local/nginx/conf/nginx.conf //在nginx.conf中添加一台虚拟主机
- http
- ………
- {
- server {
- listen 80;
- server_name www1.rsyslog.org ;
- location / {
- root www1;
- index index.html index.htm;
- }
- }
- …….
- }
- [root@rhel6u3-5 ~]# mkdir /usr/local/nginx/www2 //创建虚拟主机目录
- [root@rhel6u3-5 ~]# echo "This is www2.rsyslog.org website" >/usr/local/nginx/www2/index.html //创建测试页
- [root@rhel6u3-5 ~]# /etc/rc.d/init.d/nginx restart //重启nginx服务器
- nginx: the configuration file /usr/local/nginx/conf/nginx.conf syntax is ok
- nginx: configuration file /usr/local/nginx/conf/nginx.conf test is successful
- Stopping nginx: [ OK ]
- Starting nginx: [ OK ]
- [root@rhel6u3-2 ~]# vim /var/named/view/zone/Others.rsyslog.org.zone //dns服务器上添加A记录
- www2 A 192.168.100.105
- [root@rhel6u3-4 ~]# nslookup www2.rsyslog.org //测试域名是否能够正确解析
- Server: 192.168.100.102
- Address: 192.168.100.102#53
- Name: www2.rsyslog.org
- Address: 192.168.100.105
- [root@rhel6u3-4 ~]# links -dump http://www2.rsyslog.org //通过links命令测试网站是否能够正常访问
- This is www2.rsyslog.org website
1、 部署Nginx反向代理服务器,实现代理和负载均衡
Nginx的upstream目前支持5种方式的分配
1 轮询(默认)
每个请求按时间顺序逐一分配到不同的后端服务器,如果后端服务器down掉,能自动剔除。
2 weight
指定轮询几率,weight和访问比率成正比,用于后端服务器性能不均的情况。
例如:
- upstream bakend {
- server 192.168.100.104 weight=10;
- server 192.168.100.105 weight=10;
- }
3 ip_hash
每个请求按访问ip的hash结果分配,这样每个访客固定访问一个后端服务器,可以
解决session的问题。
例如:
- upstream bakend {
- ip_hash;
- server 192.168.100.104:80;
- server 192.168.100.105:80;
- }
4 fair(第三方)
按后端服务器的响应时间来分配请求,响应时间短的优先分配。
例如:
- upstream bakend {
- server 192.168.100.104:80;
- server 192.168.100.105:80;
- fair;
- }
5 url_hash(第三方)
按访问url的hash结果来分配请求,使每个url定向到同一个后端服务器,后端服务
器为缓存时比较有效。
例如:
- upstream backend {
- server 192.168.100.104:3128;
- server 192.168.100.105:3128;
- hash $request_uri;
- hash_method crc32;
每个设备的状态设置为:
1. down 表示单前的server暂时不参与负载
2. weight 默认为1.weight越大,负载的权重就越大,根据服务器性能而定
3. max_fails :允许请求失败的次数默认为1.当超过最大次数时,返回proxy_next_upstream 模块定义的错误
4. fail_timeout:max_fails次失败后,暂停的时间。
5. backup: 其它所有的非backup机器down或者忙的时候,请求backup机器。所以这台机器压力会最轻。
Nginx支持同时设置多组的负载均衡,用来给不用的server来使用。
- 安装nginx过程略
- [root@rhel6u3 ~]# vim /usr/local/nginx/conf/nginx.conf
- ……… //内容略
- http {
- …….. //内容略
- client_max_body_size 300m; //允许客户端请求的最大单个文件字节数,它出现在请求头部的Content-Length字段。(可以更改此参数达到限制用户上传文件大小的目的)
- client_body_buffer_size 128k; \\缓冲区代理缓冲客户端请求的最大字节数,可以理解为先保存到本地再传给用户。 这个指令可以指定连接请求使用的缓冲区大小,默认值:8k/16k 。如果客户端请求一个文件大于128k,则Nginx会尝试在硬盘上创建临时文件。如果硬盘满了,则会报错。
- client_body_temp_path /dev/shm/client_body_temp; \\这个指令指定连接请求试图写入缓存文件的目录路径。
- proxy_connect_timeout 600; \\跟后端服务器连接的超时时间,发起握手等候响应超时时间
- proxy_read_timeout 600; \\连接成功 _等候后端服务器的响应时间_其实已经进入后端的排队中等候处理。默认值:
- proxy_send_timeout 600; \\后端服务器回传时间_就是在规定时间内后端服务器必须传完所有的数据。设置代理服务器转发请求的超时时间,同样指完成两次握手后的时间,如果超过这个时间代理服务器没有数据转发到后端服务器,nginx将关闭连接。
- proxy_buffer_size 16k; \\代理请求缓存区_这个缓存区间会保存用户的头信息来提供Nginx进行规则处理。一般只要能保存下头信息即可。默认值:proxy_buffer_size 4k/8k 。设置从后端服务器读取的第一部分应答的缓
- 冲区大小,通常情况下这部分应答中包含一个小的应答头。
- proxy_buffers 4 32k; \\设置用于读取应答(来自后端服务器)的缓冲区数目和大小,告诉Nginx保存单个用的几个
- Buffer,最大用多大空间
- proxy_busy_buffers_size 64k; \\如果系统很忙的时候可以申请更大的proxy_buffers,官方推荐*2
- proxy_temp_file_write_size 64k; \\设置在写入proxy_temp_path时缓存临文件数据的大小,在预防一个工作进程在传递文件时阻塞太长。
- proxy_temp_path /dev/shm/proxy_temp; \\类似于http核心模块中的client_body_temp_path指令,指定一个目录来缓冲比较大的被代理请求。
- upstream rsyslog.org_pool {
- server 192.168.100.104:80 weight=4 max_fails=2 fail_timeout=30s; //为了做测试两台服务器默认性能都一样,平均负载
- server 192.168.100.105:80 weight=4 max_fails=2 fail_timeout=30s;
- } \\HTTP负载均衡模块。upstream这个字段设置一群服务器,可以将这个字段放在proxy_pass和fastcgi_pass指令中作为一个单独的实体,它们可以是监听不同端口的服务器,并且也可以是同时监听TCP和Unix socket的服务器。 服务器可以指定不同的权重,默认为1。
- server {
- listen 80;
- server_name www.rsyslog.org; //设置所有web服务器负载的共同域名
- index index.html index.htm;
- location / {
- proxy_pass http://rsyslog.org_pool/; //确定需要代理的URL,端口或socket。
- proxy_set_header Host $host;
- proxy_redirect off; \\如果需要修改从后端服务器传来的应答头中的"Location"和"Refresh"字段,可以用这个指令设置。
- proxy_set_header X-Real-IP $remote_addr; \\这个指令允许将发送到后端服务器的请求头重新定义或者增加一些字段。 这个值可以是一个文本,变量或者它们的组合。
- proxy_set_header X-Forwarded-For $proxy_add_x_forwarded_for;
- proxy_next_upstream error timeout invalid_header http_500 http_502 http_503 http_504 http_404; \\当后端服务器遇到500、502、503、504、404错误与超时,自动将请求转发给rsyslog.org_pool组的另一台服务器,达到故障转移
- }
- \\#确定在何种情况下请求将转发到下一个服务器:
- #error - 在连接到一个服务器,发送一个请求,或者读取应答时发生错误。
- #timeout - 在连接到服务器,转发请求或者读取应答时发生超时。
- #invalid_header - 服务器返回空的或者错误的应答。
- #http_500 - 服务器返回500代码。
- #http_502 - 服务器返回502代码。
- #http_503 - 服务器返回503代码。
- #http_504 - 服务器返回504代码。
- #http_404 - 服务器返回404代码。
- #off - 禁止转发请求到下一台服务器。
- }
- }
- [root@rhel6u3-2 ~]# vim /var/named/view/zone/Others.rsyslog.org.zone
- www A 192.168.100.106
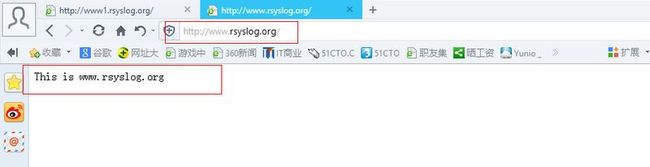
测试效果


一、创建站点目录,主页、权限
- [root@rhel6u3-7 ~]# uname -r //查看系统内核版本号 2.6.32-279.el6.i686 [root@rhel6u3-7 ~]# cat /etc/redhat-release //查看系统版本号 Red Hat Enterprise Linux Server release 6.3 (Santiago) [root@rhel6u3-7 ~]#
- [root@rhel6u3-7 nginx]# pwd
- /usr/local/nginx
- [root@rhel6u3-7 nginx]# mkdir server sites //创建server字段配置文件目录为server,站点主目录为sites
- [root@rhel6u3-7 nginx]# mkdir sites/www sites/www1 //在站点主目录中创建子站点目录
- [root@rhel6u3-7 nginx]# echo "This is www.rsyslog.org" >sites/www/index.html //创建测试主页
- [root@rhel6u3-7 nginx]# echo "This is www1.rsyslog.org" >sites/www1/index.html //创建测试主页
- [root@rhel6u3-7 nginx]# chown nginx. server/ sites/ -R //设置目前的属主和属组为nginx
二、编辑nginx主配置文件,并添加server字段以及location字段,两种方式添加。设置www.rsyslog.org 和www1.rsyslog.org 两台虚拟主机
- [root@rhel6u3-7 nginx]# vim conf/nginx.conf
- ……… //在http模块中添加server字段,其次在server字段中添加location字段即可
- server {
- listen 80; //设置虚拟主机监听端口为80
- server_name www.rsyslog.org; //设置虚拟主机域名
- location / {
- root sites/www; //设置虚拟主机主目录相对路径
- index index.html index.htm; //设虚拟主机默认主页
- }
- location /status { // 查看nginx当前的状态情况,需要模块 “--with-http_stub_status_module”支持
- stub_status on;
- access_log /usr/local/nginx/logs/www_status.log; //设置日志存放位置并命名
- auth_basic "NginxStatus"; }
- }
- include /usr/local/nginx/server/www1.rsyslog.org; //设置include语句指向www1站点server字段配置文件位置
- ……..
三、编辑网站www1.rsyslog.org的server配置文件
- [root@rhel6u3-7 ~]# cd /usr/local/nginx/server/
- [root@rhel6u3-7 server]# vim www1.rsyslog.org
- server {
- listen 80;
- server_name www1.rsyslog.org;
- location / {
- root sites/www1;
- index index.html index.htm;
- }
- location /status { // 查看nginx当前的状态情况,需要模块 “--with-http_stub_status_module”支持
- stub_status on;
- access_log /usr/local/nginx/logs/www1_status.log;
- auth_basic "NginxStatus"; }
- }
四,在DNS的区域文件中添加两条A记录指向网站主机名
有关DNS搭建及配置请参看http://dreamfire.blog.51cto.com/418026/1091943
- //在DNS的区域文件中添加两个网站的A记录
- www A 192.168.100.107
- www1 A 192.168.100.107
五、启动nginx服务,为了方便测试关闭防火墙并将selinux设置为premissive模式
- [root@rhel6u3-7 server]# /etc/rc.d/init.d/nginx restart
- nginx: the configuration file /usr/local/nginx/conf/nginx.conf syntax is ok
- nginx: configuration file /usr/local/nginx/conf/nginx.conf test is successful
- Stopping nginx: [ OK ]
- Starting nginx: [ OK ]
- [root@rhel6u3-2 ~]# /etc/rc.d/init.d/iptables stop
- [root@rhel6u3-2 ~]# setenforce 0
六、通过windows系统测试,首先将网卡DNS设置为192.168.100.102,然后通过nslookup命令解析是否成功。

通过IE浏览器访问
在网址后面加上status可以查看网站目前的运行状态

现在是我们要做一个网站 www2.rsyslor.org 要求通过https://www2.rsyslog.org进行访问.
www2.rsyslog.org 192.168.100.107
DNS 192.168.100.102
实验步骤
第一步、首先生成一对证书。
你需要使用到openssl命令,所以请确认系统已经安装过此包
RHEL6中在/etc/pki/tls/certs 目录有个脚本可以帮助我们简化证书生成的过程,所以
我们首先切换到此目录
- [root@rhel6u3-7 ~]# cd /etc/pki/tls/certs/
- [root@rhel6u3-7 certs]# make server.key //生成私钥
- umask 77 ; \
- /usr/bin/openssl genrsa -aes128 2048 > server.key
- Generating RSA private key, 2048 bit long modulus
- ..........+++
- .....................................+++
- e is 65537 (0x10001)
- Enter pass phrase:
- Verifying - Enter pass phrase:
- [root@rhel6u3-7 certs]# openssl rsa -in server.key -out server.key //除去密码以便询问时不需要密码
- Enter pass phrase for server.key:
- writing RSA key
- [root@rhel6u3-7 certs]# make server.csr //生成证书颁发机构,用于颁发公钥
- umask 77 ; \
- /usr/bin/openssl req -utf8 -new -key server.key -out server.csr
- You are about to be asked to enter information that will be incorporated
- into your certificate request.
- What you are about to enter is what is called a Distinguished Name or a DN.
- There are quite a few fields but you can leave some blank
- For some fields there will be a default value,
- If you enter '.', the field will be left blank.
- -----
- Country Name (2 letter code) [XX]:cn
- State or Province Name (full name) []:sh
- Locality Name (eg, city) [Default City]:sh
- Organization Name (eg, company) [Default Company Ltd]:rsyslog
- Organizational Unit Name (eg, section) []:rsyslog
- Common Name (eg, your name or your server's hostname) []:xiaonuo
- Email Address []:[email protected]
- Please enter the following 'extra' attributes
- to be sent with your certificate request
- A challenge password []:123.com
- An optional company name []:it
- [root@rhel6u3-7 certs]# openssl x509 -in server.csr -req -signkey server.key -days 365 -out server.crt //颁发公钥,不过由于我们并不是去CA证书中心申请的公钥,所以在使用的时候,客户端浏览器会跳出未受信任的警告。如果你在生产环境下,请去CA申请。
- Signature ok
- subject=/C=cn/ST=sh/L=sh/O=rsyslog/OU=rsyslog/CN=xiaonuo/emailAddress=unix[email protected]
- Getting Private key
- [root@rhel6u3-7 certs]#
第二步、编辑nginx主配置文件,添加ssl模块参数
- [root@rhel6u3-7 certs]# vim /usr/local/nginx/conf/nginx.conf
- include /usr/local/nginx/server/www2.rsyslog.org; //将虚拟主机单独设置,然后用include包含到主配置文件中,简化主配置文件的配置
- [root@rhel6u3-7 certs]# vim /usr/local/nginx/server/www2.rsyslog.org //注意以下配置可以在主配置文件中复制ssl模块信息
- server {
- listen 443; 监听端口为443
- server_name www2.rsyslog.org;
- ssl on; //开启ssl
- ssl_certificate /etc/pki/tls/certs/server.crt; //证书位置
- ssl_certificate_key /etc/pki/tls/certs/server.key; //私钥位置
- ssl_session_timeout 5m;
- ssl_protocols SSLv2 SSLv3 TLSv1; //指定密码为openssl支持的格式
- ssl_ciphers HIGH:!aNULL:!MD5; //密码加密方式
- ssl_prefer_server_ciphers on; //依赖SSLv3和TLSv1协议的服务器密码将优先于客户端密码
- location / {
- root sites/www2; //www2.rsyslog.org根目录的相对位置
- index index.html index.htm;
- }
- }
第三步、创建网站的目录、主页、权限。
- [root@rhel6u3-7 ~]# cd /usr/local/nginx/sites/
- [root@rhel6u3-7 sites]# mkdir www2 //创建网站根目录
- [root@rhel6u3-7 sites]# echo This is https://www2.rsyslog.org >www2/index.html //写个主测试页面
- [root@rhel6u3-7 server]# chown nginx. /usr/local/nginx/server/ -R //设置配置文件的属主和属组为nginx
- [root@rhel6u3-7 server]# chmod 600 /usr/local/nginx/server/ -R //设置配置文件的权限为600
- [root@rhel6u3-7 server]# chown nginx. /usr/local/nginx/sites/www2 –R //设置网站根目录的属主和属组为nginx
- [root@rhel6u3-7 server]# chmod 755 /usr/local/nginx/sites/www2 –R //设置网站根目录权限为755,其他人可以读取网站信息。
第四步、在DNS区域中添加主机A记录,有关DNS配置请参看http://dreamfire.blog.51cto.com/418026/1091943
- www2 A 192.168.100.107
第五步、启动nginx服务器。
- [root@rhel6u3-7 certs]# /etc/rc.d/init.d/nginx reload //平滑重启nginx保证网站不被中断
- nginx: the configuration file /usr/local/nginx/conf/nginx.conf syntax is ok
- nginx: configuration file /usr/local/nginx/conf/nginx.conf test is successful
- Reloading nginx: [ OK ]
第六步、测试网站是否能够通过https访问
将PC机网卡的DNS更改为192.168.100.102

在IE浏览器中输入https://www2.rsyslog.org 进行测试。提示安全证书不受信任,是因为证书是本机模拟的。点击“仍然继续”即可。


有时我们会有这么一种需求,就是你的网站并不想提供一个公共的访问或者某些页面不希望公开,我们希望的是某些特定的客户端可以访问。那么我们可以在访问时要求进行身份认证,就如给你自己的家门加一把锁,以拒绝那些不速之客。
实验环境:
现在公司开通了一个内部使用网站为www1.rsyslog.org,要求所有人查看网页信息之前都必须要输入内定的用户名及密码方可浏览网页
有关nginx下虚拟主机的搭建请参看http://dreamfire.blog.51cto.com/418026/1141018 ,这里使用之前搭建的虚拟主机www1.rsyslog.org进行测试。
www1.rsyslog.org 192.168.100.107
DNS1 192.168.100.102
一、查看当前系统参数
- [root@rhel6u3-2 ~]# uname –r //查看系统内核版本号
- 2.6.32-279.el6.i686
- [root@rhel6u3-2 ~]# cat /etc/redhat-release //查看系统版本号
- Red Hat Enterprise Linux Server release 6.3 (Santiago)
二、编辑虚拟主机配置文件
- [root@rhel6u3-7 ~]# vim /usr/local/nginx/conf/nginx.conf //主配置文件中http字段中添加以下语句,将虚拟主机的配置文件指向www1.rsyslog.org
- include /usr/local/nginx/server/www1.rsyslog.org;
- [root@rhel6u3-7 ~]# vim /usr/local/nginx/server/www1.rsyslog.org
- server {
- listen 80; //监听端口为80
- server_name www1.rsyslog.org; //虚拟主机网址
- location / {
- root sites/www1; //虚拟主机网站根目录
- index index.html index.htm; //虚拟主机首页
- auth_basic "secret"; //虚拟主机认证命名
- auth_basic_user_file /usr/local/nginx/passwd.db; //虚拟主机用户名密码认证数据库
- }
- location /status {
- stub_status on; //开启网站监控状态
- access_log /usr/local/nginx/logs/www1_status.log; //监控日志
- auth_basic "NginxStatus"; }
- }
三、通过htpasswd命令生成用户名及对应密码数据库文件。
- [root@rhel6u3-7 server]# htpasswd -c /usr/local/nginx/passwd.db xiaonuo //创建认证信息,xiaonuo 为认证用户名
- New password: ******* //输入认证密码
- Re-type new password: ******** //再次输入认证密码
- Adding password for user xiaonuo
- [root@rhel6u3-7 server]#
- [root@rhel6u3-7 ~]# chmod 400 /usr/local/nginx/passwd.db //修改网站认证数据库权限
- [root@rhel6u3-7 ~]# chown nginx. /usr/local/nginx/passwd.db //修改网站认证数据库属主和属组
- [root@rhel6u3-7 ~]# cat /usr/local/nginx/passwd.db //可以看到通过htpasswd生成的密码为加密格式
- xiaonuo:8eZAz7BqcrXmY
- [root@rhel6u3-7 ~]#
四、平滑重启nginx服务
- [root@rhel6u3-7 ~]# /etc/rc.d/init.d/nginx reload //平滑重启nginx服务
- nginx: the configuration file /usr/local/nginx/conf/nginx.conf syntax is ok
- nginx: configuration file /usr/local/nginx/conf/nginx.conf test is successful
- Reloading nginx: [ OK ]
五、DNS服务器上添加www1 A记录
- www1 A 192.168.100.107
六、通过IE访问www1.rsyslog.org进行测试。
别忘了将网卡首选DNS指向192.168.100.102


