iOS开发的一些奇巧淫技
iOS的一些小技巧
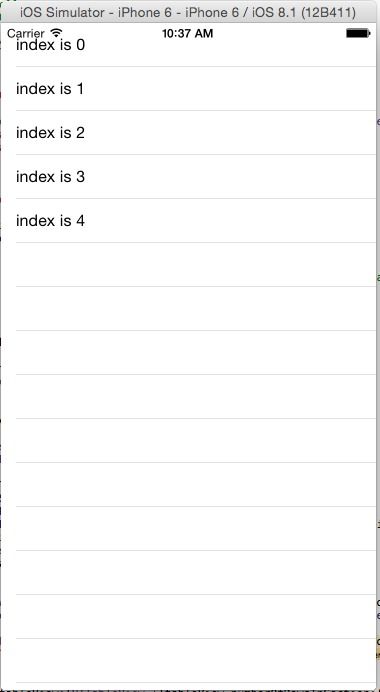
TableView不显示没内容的Cell怎么办?
类似这种,我不想让下面那些空的显示.
很简单.
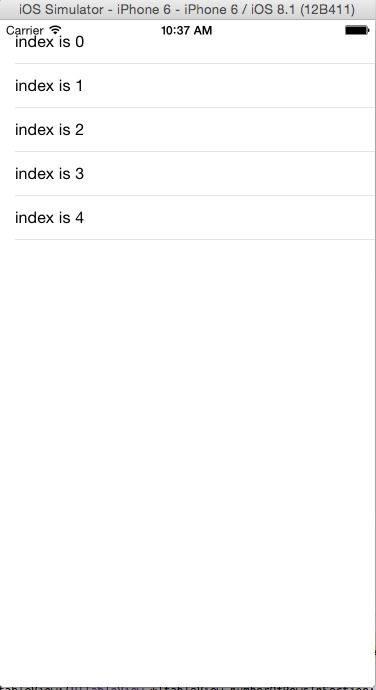
self.tableView.tableFooterView = [[UIView alloc] init];
试过的都说好.
加完这句之后就变成了这样.
自定义了leftBarbuttonItem左滑返回手势失效了怎么办?
    self.navigationItem.leftBarButtonItem = [[UIBarButtonItem alloc]
                                         initWithImage:img
                                         style:UIBarButtonItemStylePlain
                                         target:self
                                         action:@selector(onBack:)];
self.navigationController.interactivePopGestureRecognizer.delegate = (id<UIGestureRecognizerDelegate>)self;
ScrollView莫名其妙不能在viewController划到顶怎么办?
self.automaticallyAdjustsScrollViewInsets = NO;
键盘事件写的好烦躁,都想摔键盘了,怎么办?
买个结实的键盘.
使用IQKeyboardManager(github上可搜索),用完之后腰也不疼了,腿也不酸了.
为什么我的app老是不流畅,到底哪里出了问题?
如图
这个神器叫做:KMCGeigerCounter
快去github搬运吧.
怎么在不新建一个Cell的情况下调整separaLine的位置?
_myTableView.separatorInset = UIEdgeInsetsMake(0, 100, 0, 0);
怎么点击self.view就让键盘收起,需要添加一个tapGestures么?
- (void)touchesBegan:(NSSet *)touches withEvent:(UIEvent *)event
{
   [self.view endEditing:YES];
}
怎么给每个ViewController设定默认的背景图片?
使用基类啊,少年.
想在代码里改在xib里添加的layoutAttributes,但是怎么用代码找啊?
像拉button一样的拉你的约束.nslayoutattribute也是可以拉线的.
怎么像safari一样滑动的时候隐藏navigationbar?
navigationController.hidesBarsOnSwipe = Yes
导航条返回键带的title太讨厌了,怎么让它消失!
[[UIBarButtonItem appearance] setBackButtonTitlePositionAdjustment:UIOffsetMake(0, -60)
                                                     forBarMetrics:UIBarMetricsDefault];
CoreData用起来好烦,语法又臭又长,怎么办?
MagicalRecord
CollectionView 怎么实现tableview那种悬停的header?
CSStickyHeaderFlowLayout
能不能只用一个pan手势来代替UISwipegesture的各个方向?
- (void)pan:(UIPanGestureRecognizer *)sender
{

typedef NS_ENUM(NSUInteger, UIPanGestureRecognizerDirection) {
    UIPanGestureRecognizerDirectionUndefined,
    UIPanGestureRecognizerDirectionUp,
    UIPanGestureRecognizerDirectionDown,
    UIPanGestureRecognizerDirectionLeft,
    UIPanGestureRecognizerDirectionRight
};

static UIPanGestureRecognizerDirection direction = UIPanGestureRecognizerDirectionUndefined;

switch (sender.state) {

    case UIGestureRecognizerStateBegan: {

        if (direction == UIPanGestureRecognizerDirectionUndefined) {

            CGPoint velocity = [sender velocityInView:recognizer.view];

            BOOL isVerticalGesture = fabs(velocity.y) > fabs(velocity.x);

            if (isVerticalGesture) {
                if (velocity.y > 0) {
                    direction = UIPanGestureRecognizerDirectionDown;
                } else {
                    direction = UIPanGestureRecognizerDirectionUp;
                }
            }

            else {
                if (velocity.x > 0) {
                    direction = UIPanGestureRecognizerDirectionRight;
                } else {
                    direction = UIPanGestureRecognizerDirectionLeft;
                }
            }
        }

        break;
    }

    case UIGestureRecognizerStateChanged: {
        switch (direction) {
            case UIPanGestureRecognizerDirectionUp: {
                [self handleUpwardsGesture:sender];
                break;
            }
            case UIPanGestureRecognizerDirectionDown: {
                [self handleDownwardsGesture:sender];
                break;
            }
            case UIPanGestureRecognizerDirectionLeft: {
                [self handleLeftGesture:sender];
                break;
            }
            case UIPanGestureRecognizerDirectionRight: {
                [self handleRightGesture:sender];
                break;
            }
            default: {
                break;
            }
        }
        break;
    }

    case UIGestureRecognizerStateEnded: {
        direction = UIPanGestureRecognizerDirectionUndefined;
        break;
    }

    default:
        break;
}

}
拉伸图片的时候怎么才能让图片不变形?
UIImage *image = [[UIImage imageNamed:@"xxx"] stretchableImageWithLeftCapWidth:10 topCapHeight:10];
(刚才有人提醒这个已经deprecated了哈,现在的方法叫resizableImageWithCapInsets).
怎么播放GIF的时候这么卡,有没有好点的库?
FlipBoard出品的太适合你了。https://github.com/Flipboard/FLAnimatedImage
怎么一句话添加上拉刷新?
https://github.com/samvermette/SVPullToRefresh
[tableView addPullToRefreshWithActionHandler:^{
// prepend data to dataSource, insert cells at top of table view
// call [tableView.pullToRefreshView stopAnimating] when done
} position:SVPullToRefreshPositionBottom];
怎么把tableview里cell的小对勾的颜色改成别的颜色?
_mTableView.tintColor = [UIColor redColor];
本来我的statusbar是lightcontent的,结果用UIImagePickerController会导致我的statusbar的样式变成黑色,怎么办?
- (void)navigationController:(UINavigationController *)navigationController willShowViewController:(UIViewController *)viewController animated:(BOOL)animated { [[UIApplication sharedApplication] setStatusBarStyle:UIStatusBarStyleLightContent]; }
怎么把我的navigationbar弄成透明的而不是带模糊的效果?
[self.navigationBar setBackgroundImage:[UIImage new] forBarMetrics:UIBarMetricsDefault]; self.navigationBar.shadowImage = [UIImage new]; self.navigationBar.translucent = YES;
怎么改变uitextfield placeholder的颜色和位置?
继承uitextfield,重写这个方法- (void) drawPlaceholderInRect:(CGRect)rect { [[UIColor blueColor] setFill]; [self.placeholder drawInRect:rect withFont:self.font lineBreakMode:UILineBreakModeTailTruncation alignment:self.textAlignment]; }


