ubuntu14.04安装/卸载gitlab 8
注:我使用的是gitlab installer, 这里有通过.deb包的方式:http://my.oschina.net/u/160089/blog/421168
环境:ubuntu14.04.3 LTS + Gitlab 8.1.4
首先下载run文件:https://bitnami.com/stack/gitlab/installer#, 最好用md5sum校验一下文件是否损坏。
md5sum bitnami-gitlab-8.1.4-1-linux-x64-installer.run
chmod +x bitnami-gitlab-8.1.4-1-linux-x64-installer.run
./bitnami-gitlab-8.1.4-1-linux-x64-installer.run
一路点下一步就行了。。
但往往我们的目标服务器是没有图形界面的。。
通过执行./bitnami-gitlab-8.1.4-1-linux-x64-installer.run --help可以看到安装时有很多可选参数,
其中--mode text就是在命令行下安装gitlab
切换到root用户,su - root
./bitnami-gitlab-8.1.4-1-linux-x64-installer.run --mode text除了指定--mode还有很多其它选项,比如指定端口号:--apache_server_port 9000 (默认为80端口,装好后可以更改,但很麻烦)
完整的安装过程如下:
root@cyper-ubuntu:/home/cyper/Downloads# ./bitnami-gitlab-8.1.4-1-linux-x64-installer.run
-------------------------------------------------------------
Welcome to the Bitnami Gitlab Stack Setup Wizard.

-------------------------------------------------------------------
Select the components you want to install; clear the components you do not want
to install. Click Next when you are ready to continue.

PhpPgAdmin [Y/n] :y

GitLab : Y (Cannot be edited)

Is the selection above correct? [Y/n]: y

----------------------------------------------------------------------------
Installation folder

Please, choose a folder to install Bitnami Gitlab Stack

Select a folder [/opt/gitlab-8.1.4-1]:

----------------------------------------------------------------------------
Create Admin account

Bitnami Gitlab Stack admin user creation

Email Address [[email protected]]: [email protected]

Login [user]: gitlab

Password :
Please confirm your password :
----------------------------------------------------------------------------
Hostname that will be used to create internal URLs. If this value is incorrect,
you may be unable to access your Gitlab installation from other computers. It is
advisable to use a Domain instead of an IP address for compatibility with
different browsers.

Domain [127.0.1.1]: 172.168.1.103

Do you want to configure mail support? [y/N]: y

----------------------------------------------------------------------------
Configure SMTP Settings

This is required so your application can send notifications via email.

Default email provider:

[1] GMail
[2] Custom
Please choose an option [1] : 1

----------------------------------------------------------------------------
Configure SMTP Settings

This data is stored in the application configuration files and may be visible to
others. For this reason, it is recommended that you do not use your personal
account credentials.

GMail address []: [email protected]

GMail password :
Re-enter :
----------------------------------------------------------------------------
Setup is now ready to begin installing Bitnami Gitlab Stack on your computer.

Do you want to continue? [Y/n]: y

----------------------------------------------------------------------------
Please wait while Setup installs Bitnami Gitlab Stack on your computer.

 Installing
 0% ______________ 50% ______________ 100%
 #########################################

----------------------------------------------------------------------------
Setup has finished installing Bitnami Gitlab Stack on your computer.

Info: To access the Bitnami Gitlab Stack, go to
http://172.168.1.103:80 from your browser.
Press [Enter] to continue:
root@cyper-ubuntu:/home/cyper/Downloads#
安装时会选择安装目录,默认为/opt/gitlab-8.1.4-1,smtp设置我选择的默认的gmail (稍后可以在配置文件production.rb中修改)。
smtp相关的配置文件在:
properties.ini
以及
apps/gitlab/htdocs/config/environments/production.rb (以这个rb文件为准)
  # config.action_mailer.delivery_method = :sendmail
  # Defaults to:
  # # config.action_mailer.sendmail_settings = {
  # #   location: '/usr/sbin/sendmail',
  # #   arguments: '-i -t'
  # # }
  config.action_mailer.perform_deliveries = true
  config.action_mailer.raise_delivery_errors = true
  config.action_mailer.delivery_method = :smtp
  config.action_mailer.smtp_settings = {
    :address => "smtp.gmail.com",
    :port => "587",
    :domain => "smtp.gmail.com",
    :authentication => :plain,
    :user_name => "[email protected]",
    :password => "secret",
    :enable_starttls_auto => true
  }
可以通过tail来监控日志:
find . -name production.log
tail -f apps/gitlab/htdocs/log/*.log
#禁用gravatar
vi apps/gitlab/htdocs/config/gitlab.yml
  ## Gravatar
  ## For Libravatar see: http://doc.gitlab.com/ce/customization/libravatar.html
  gravatar:
    enabled: true                 # Use user avatar image from Gravatar.com (default: true)
    # gravatar urls: possible placeholders: %{hash} %{size} %{email}
    # plain_url: "http://..."     # default: http://www.gravatar.com/avatar/%{hash}?s=%{size}&d=identicon
    # ssl_url:   "https://..."    # default: https://secure.gravatar.com/avatar/%{hash}?s=%{size}&d=identicon
把true改为false
#重启./ctlscript.sh restart
也可以只重启部分服务,比如./ctlscript.sh restart apache 然后可以通过http://ip:80访问
#卸载
cd /opt/gitlab-8.1.4-1
sudo chmod +x uninstall
sudo sh -c './uninstall' (如果是root用户则直接./uninstall)
#测试
接下来就是创建project,导入ssh key开始把玩:
➜  mygit  $ git clone [email protected]:uniquejava/test.git
Cloning into 'test'...
warning: You appear to have cloned an empty repository.
Checking connectivity... done.
➜  mygit  $
#来张图:
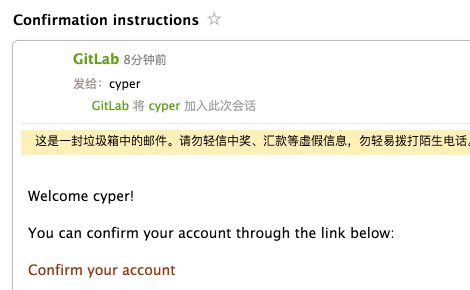
1. 注册新用户能收到激活邮件 (不过在垃圾箱。。)
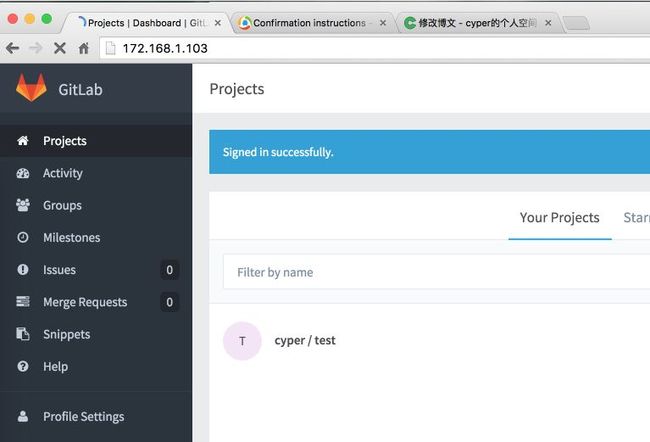
2. 首页。。
http://www.cnblogs.com/haochuang/p/4221860.html
http://devtian.me/2015/03/05/gitlab-cooperation-tool-1/
https://community.bitnami.com/t/gitlab-doesnt-send-emails-smtp-method-no-errors-in-log/25543/8
