Gitlab6.0 搭建试用
前段时间给项目搞了一个git环境,最近又要有web管理界面,经朋友介绍有个gitlab可以试试,是仿照github做的,而且是开源的,所以打算试用一下。关于gitlab的介绍参看:http://gitlab.org/
下面是具体的安装过程,安装环境 ubuntu12.04 IP:10.1.6.39 FQDN:guol.gitlab.com
gitlab的最新版是gitlab6,使用的很多软件版本都比较新:
ruby 1.9.3+ 默认版本是1.9.1
git 1.7.10+ 默认版本是1.7.9.5
redis 2.0+
MySQL or PostgreSQL
apt-get -y update
apt-get -y upgrade
2 安装相关依赖包
apt-get install -y build-essential zlib1g-dev libyaml-dev libssl-dev libgdbm-dev libreadline-dev libncurses5-dev libffi-dev curl redis-server checkinstall libxml2-dev libxslt-dev libcurl4-openssl-dev libicu-dev3 检查python版本,不支持python3,python版本>2.5,ubuntu12.04默认是python2.7
python --version4 ubuntu12.04的ruby版本是ruby1.9.1,不符合要求,所以需要源码安装ruby
mkdir /tmp/ruby && cd /tmp/ruby
curl --progress ftp://ftp.ruby-lang.org/pub/ruby/2.0/ruby-2.0.0-p247.tar.gz | tar xz
cd ruby-2.0.0-p247/
./configure
make
make install
5 ubuntu12.04的git版本是1.7.9.5不符合gitlab版本要求,所以源码安装git1.8.3
参考:http://my.oschina.net/guol/blog/136793
需要执行:cp /usr/local/bin/git /usr/bin/ 因为在后面检查环境的时候是在/usr/bin/底下查找git程序
6 安装bunlder,一个安装ruby包的包系统
gem install bundler --no-ri --no-rdoc
7 给系统添加git账号
adduser --disabled-login --gecos 'GitLab' git8 切换到git用户,开始安装相关包
su - git
cd /home/git/
git clone https://github.com/gitlabhq/gitlab-shell.git
cd gitlab-shell/
git checkout v1.7.1
cp config.yml.example config.yml
vi config.yml
   gitlab_url: "http://guol.gitlab.com/"
./bin/install
9 使用root用户安装后端mysql数据库
apt-get install -y mysql-server mysql-client libmysqlclient-dev初始化数据库,修改/etc/mysql/my.cnf使之监听10.1.6.39端口,并建立相关库
mysql -uroot -p
  CREATE USER 'gitlab'@'localhost' IDENTIFIED BY 'guol';
  CREATE DATABASE IF NOT EXISTS `gitlabhq_production` DEFAULT CHARACTER SET `utf8` COLLATE `utf8_unicode_ci`;
  GRANT SELECT, LOCK TABLES, INSERT, UPDATE, DELETE, CREATE, DROP, INDEX, ALTER ON `gitlabhq_production`.* TO 'gitlab'@'localhost';
10 切换回git用户,克隆gitlab源代码
su - git
git clone https://github.com/gitlabhq/gitlabhq.git gitlab
cd gitlab
git checkout 6-1-stable
11 配置gitlab
su - git
cd gitlab
cp config/gitlab.yml.example config/gitlab.yml
vi config/gitlab.yml
   host: 10.1.6.39
chown -R git log/
chown -R git tmp/
chmod -R u+rwX  log/
chmod -R u+rwX  tmp/
mkdir /home/git/gitlab-satellites
mkdir tmp/pids/
mkdir tmp/sockets/
chmod -R u+rwX  tmp/pids/
chmod -R u+rwX  tmp/sockets/
mkdir public/uploads
chmod -R u+rwX  public/uploads
cp config/unicorn.rb.example config/unicorn.rb
vi config/unicorn.rb
   listen "10.1.6.39:8080", :tcp_nopush => true  timeout 600
git config --global user.name "GitLab"
git config --global user.email "gitlab@localhost"
git config --global core.autocrlf input
cp config/database.yml.mysql config/database.yml
vi config/database.yml
   username: gitlab
   password: "guol"
   host: localhost
cp config/resque.yml.example config/resque.yml
vi config/resque.yml
   production: redis://10.1.6.39:6379
12 安装Gems
cd /home/git/gitlab
gem install charlock_holmes --version '0.6.9.4'
#更换Gemfile中的ruby源,加快包的安装速度
vi Gemfile
   source "http://ruby.taobao.org"
bundle install --deployment --without development test postgres aws
13 初始化数据库,回复yes
su - git
cd gitlab
bundle exec rake gitlab:setup RAILS_ENV=production

只有出现以上图,才表示初始化ok
14 安装启动脚本,root执行
cd /home/git/gitlab
cp lib/support/init.d/gitlab /etc/init.d/
chmod +x /etc/init.d/gitlab
15 检查应用环境相关信息
su - git
cd gitlab
bundle exec rake gitlab:env:info RAILS_ENV=production

16 启动gitlab
/etc/init.d/gitlab restart

17 再次检查应用环境
su - git
cd gitlab
bundle exec rake gitlab:check RAILS_ENV=production

18 安装nginx,并配置
apt-get install -y nginx
cd /home/git/gitlab
cp lib/support/nginx/gitlab /etc/nginx/sites-available/
ln -s /etc/nginx/sites-available/gitlab /etc/nginx/sites-enabled/gitlab
配置/etc/nginx/sites-enabled/gitlab
#修改servername
server_name guol.gitlab.com
重启nginx
19 在浏览器中输入guol.gitlab.com,用户名和密码就是第13步的结果
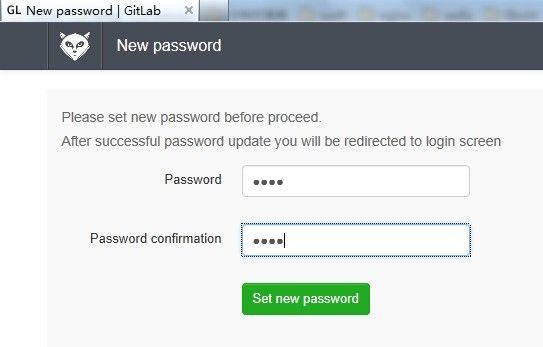
在第一次用默认的密码登陆后,会要求立即修改密码:
20 公司中多个人使用,我打算使用LDAP认证
修改/home/git/gitlab/config/gitlab.yml的ladp代码段如下:
  ## LDAP settings
  ldap:
    enabled: true
    host: 'bdc.guol-ex.com'
    base: 'dc=guol-ex,dc=com'
    port: 389
    uid: 'sAMAccountName'
    method: 'plain' # "ssl" or "plain"
    bind_dn: '[email protected]'
    password: 'guol@123'
    allow_username_or_email_login: true
重启gitlab服务
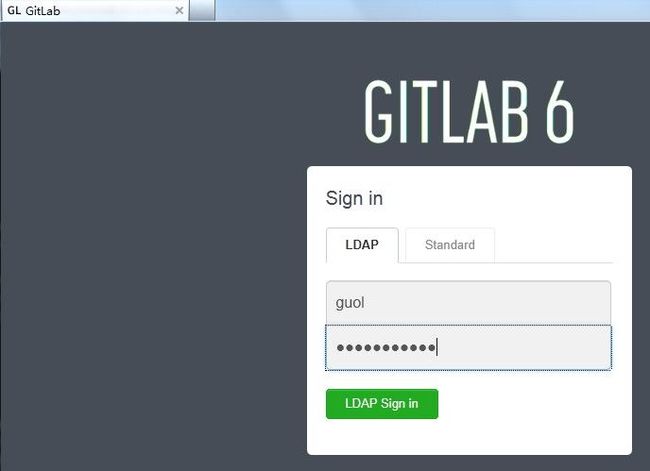
/etc/init.d/gitlab restart在浏览器输入guol.gitlab.com,如下:
参考官方安装文档:https://github.com/gitlabhq/gitlabhq/blob/master/doc/install/installation.md 其中有坑![]()


