tastypie Django REST API developement 1)
Read by linux/GNU commands
Let's follow and start from here:http://django-tastypie.readthedocs.org/en/latest/tutorial.html#creating-resources
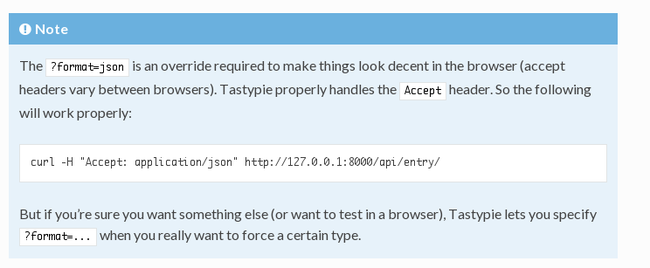
According to tastypie's concept, Tastypie properly handles the Accept header.
So we can use linux/GNU commands to do some fancy things!
Bash script to get what we want.
And let's go and check it out.
it could be a fancy stuff.
Also we could see more from a bunch of other URLs available.
At this point, a bunch of other URLs are also available. Try out any/all of the following (assuming you have at least three records in the database):
Safe API
However, if you try sending a POST/PUT/DELETE to the resource, you find yourself getting “401 Unauthorized” errors. For safety, Tastypie ships with the authorization class (“what are you allowed to do”) set to ReadOnlyAuthorization. This makes it safe to expose on the web, but prevents us from doing POST/PUT/DELETE. Let’s enable those:
# myapp/api.py
from tastypie.authorization import Authorization
from tastypie.resources import ModelResource
from myapp.models import Entry


class EntryResource(ModelResource):
    class Meta:
        queryset = Entry.objects.all()
        resource_name = 'entry'
        authorization= Authorization()
Warning
This is now great for testing in development but VERY INSECURE. You should never put aResource like this out on the internet. Please spend some time looking at the authentication/authorization classes available in Tastypie.
Database to URL handling friendly
Creating More Resources
In order to handle our user relation, we’ll need to create a UserResource and tell the EntryResource to use it. So we’ll modify myapp/api.py to match the following code:
# myapp/api.py
from django.contrib.auth.models import User
from tastypie import fields
from tastypie.resources import ModelResource
from myapp.models import Entry


class UserResource(ModelResource):
    class Meta:
        queryset = User.objects.all()
        resource_name = 'user'


class EntryResource(ModelResource):
    user = fields.ForeignKey(UserResource, 'user')

    class Meta:
        queryset = Entry.objects.all()
        resource_name = 'entry'
We simply created a new ModelResource subclass called UserResource. Then we added a field toEntryResource that specified that the user field points to a UserResource for that data.
Now we should be able to get all of the fields back in our response. But since we have another full, working resource on our hands, we should hook that up to our API as well. And there’s a better way to do it.
Adding To The Api
Tastypie ships with an Api class, which lets you bind multiple Resources together to form a coherent API. Adding it to the mix is simple.
We’ll go back to our URLconf (urls.py) and change it to match the following:
# urls.py
from django.conf.urls.defaults import *
from tastypie.api import Api
from myapp.api import EntryResource, UserResource

v1_api = Api(api_name='v1')
v1_api.register(UserResource())
v1_api.register(EntryResource())

urlpatterns = patterns('',
    # The normal jazz here...
    (r'^blog/', include('myapp.urls')),
    (r'^api/', include(v1_api.urls)),
)
Note that we’re now creating an Api instance, registering our EntryResource and UserResourceinstances with it and that we’ve modified the urls to now point to v1_api.urls.
This makes even more data accessible, so if we start up the runserver again, the following URLs should work:
- http://127.0.0.1:8000/api/v1/?format=json
- http://127.0.0.1:8000/api/v1/user/?format=json
- http://127.0.0.1:8000/api/v1/user/1/?format=json
- http://127.0.0.1:8000/api/v1/user/schema/?format=json
- http://127.0.0.1:8000/api/v1/user/set/1;3/?format=json
- http://127.0.0.1:8000/api/v1/entry/?format=json
- http://127.0.0.1:8000/api/v1/entry/1/?format=json
- http://127.0.0.1:8000/api/v1/entry/schema/?format=json
- http://127.0.0.1:8000/api/v1/entry/set/1;3/?format=json
Additionally, the representations out of EntryResource will now include the user field and point to an endpoint like /api/v1/users/1/ to access that user’s data. And full POST/PUT delete support should now work.
But there’s several new problems. One is that our new UserResource leaks too much data, including fields like email, password, is_active and is_staff. Another is that we may not want to allow end users to alter User data. Both of these problems are easily fixed as well.
URL pattern => Server Side => Database Collected => JSON Response
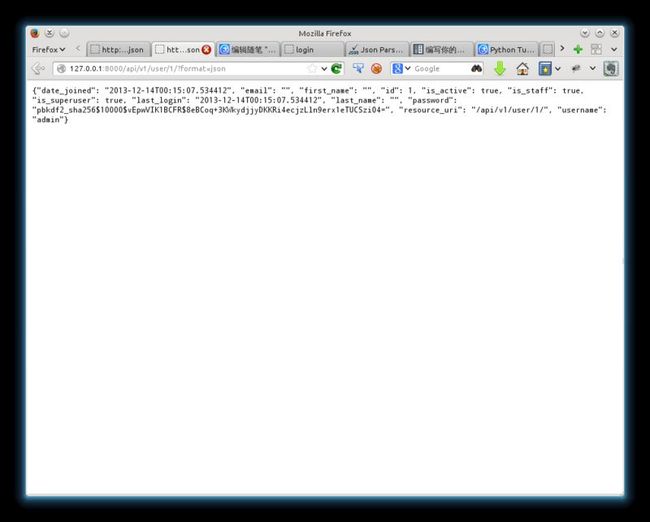
Let's now open this page,
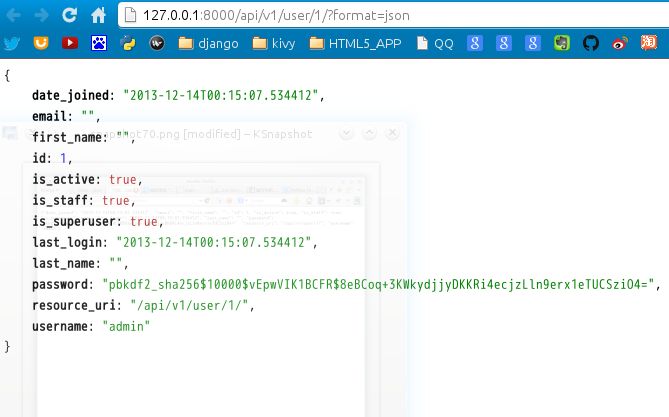
http://127.0.0.1:8000/api/v1/user/1/?format=json
and it looks like this:
There is a good plugin in chrome which can make your JSON look better
https://chrome.google.com/webstore/detail/jsonview/chklaanhfefbnpoihckbnefhakgolnmc
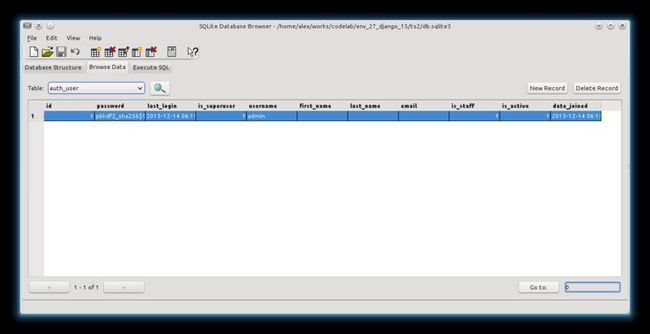
Now let's go to the data base and compare what those are.
see the relationship in-between them.
in the database file " db.sqlite3 " ,
let's see
all the user's data of user id=1 , are displayed in JSON format
database column name represent JSON data key (IMPORTANT)


