Apache2与Weblogic9整合-Ubuntu10
环境说明
Apache版本: Apache httpd-2.0.64
weblogic版本: weblogic server92 linux32
操作系统: Linux Ubuntu 10.04
一.安装weblogic与apache
1.weblogic安装
注意安装的时候要选中插件,这样才能有插件bea/weblogic81/server/lib/linux/i686/mod_wl_20.so;
Weblogic的安装并建立domain
安装上之后,先建议一个domain,然后部署一个web应用程序。我的weblogic的第一个domain是base_domain,
然后端口号是7001,部署了一个叫做testPic的工程.可以通过http://localhost:7001/testPic访问,
显示静态页面,加载JavaEye图片;如下图一:

2.Apache安装
安装编译Apache如下命令:
greatwqs@ubuntu:~/soft$ tar -zxvf httpd-2.0.64.tar.gz
greatwqs@ubuntu:~/soft$ cd httpd-2.0.64
greatwqs@ubuntu:~/soft/httpd-2.0.64$ ./configure --prefix=/opt/apache --enable-rewrite=shared
--enable-expires=shared --enable-deflate=shared --enable-cache=shared
--enable-headers=shared --enable-mem-cache=shared
--enable-disk-cache=shared --enable-static-ab
--enable-vhost-alias=shared --enable-env=shared --enable-http=static
--with-mpm=worker --enable-nonportable-atomics=yes --enable-static-support
greatwqs@ubuntu:~/soft/httpd-2.0.64$ make
greatwqs@ubuntu:~/soft/httpd-2.0.64$ make install
注意:编译的时候一定要加上
greatwqs@ubuntu:~/soft/httpd-2.0.64$ ./configure
--prefix=/usr/local/apache --enable-rewrite=shared
--enable-expires=shared --enable-deflate=shared --enable-cache=shared
--enable-headers=shared --enable-mem-cache=shared
--enable-disk-cache=shared --enable-static-ab
--enable-vhost-alias=shared --enable-env=shared --enable-http=static
--with-mpm=worker --enable-nonportable-atomics=yes --enable-static-support
通过上面的操作,httpd-2.0.64已经安装到 /usr/local/apache目录中了。
说明:./configure --prefix=/opt/apache --enable-rewrite=shared
--enable-expires=shared --enable-deflate=shared --enable-cache=shared
--enable-headers=shared --enable-mem-cache=shared
--enable-disk-cache=shared --enable-static-ab
--enable-vhost-alias=shared --enable-env=shared --enable-http=static
--with-mpm=worker --enable-nonportable-atomics=yes --enable-static-support为自己的个性编译;
一般可以采用下面的这种编译Apache:
greatwqs@ubuntu:~/soft/httpd-2.0.64$ ./configure --prefix=/usr/local/apache --enable-module=so
--enable-rule=SHARED_CORE
二.Weblogic的部署
Apache与weblogic进行整合的时候.
1.Apache可以充当前端控制器的作用(配置集群,不同的服务发送到不同的weblogic服务器);
2.还可以缓解weblogic服务器的压力(Apache HTTP Server可以解析静态的页面元素:
CSS,JS,图片,HTML,而把动态的页面:jsp,DO连接交给weblogic进行处理)
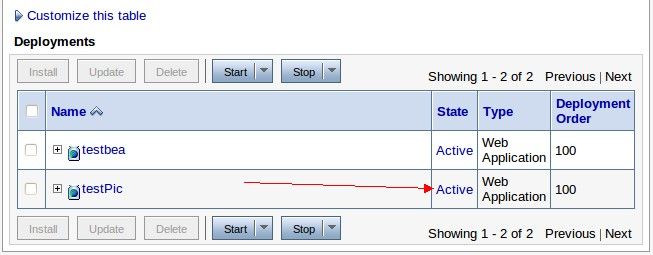
进入weblogic管理控制台,部署testPic应用:
这里的index.jsp为动态的,在页面中JavaEye的图片可以通过配置Apache httpd.conf用Apache解析.
如下图weblogic部署:见下图二:
三. 配置Apache
1. 到/usr/local/apache/bin目录下面,然后执行 ./httpd –l
如果能看到mod_so.c表明当前的Apache HTTP Server是动态加载的模式,
可以和WebLogic进行整合,否则要重新编译Aapache
2. 手工将weblogic安装目录下bea/weblogic81/server/lib/linux/i686/mod_wl_20.so
拷贝到/usr/local/apache/modules目录下;
如果是自己的PC机选择MOD_WL为:bea/weblogic81/server/lib/linux/i686/mod_wl_20.so,
注意:在不同CPU上,不同的Apache版本的这个文件不同;
3. 配置Apache httpd.conf文件;
末尾添加如下内容:
##################################################################
################ GREATWQS install ##############################
##################################################################

#
# Listen: Allows you to bind Apache to specific IP addresses and/or
# ports, instead of the default. See also the <VirtualHost>
# directive.
#
# Change this to Listen on specific IP addresses as shown below to
# prevent Apache from glomming onto all bound IP addresses (0.0.0.0)
#
#Listen 12.34.56.78:80
#我监听的是2010端口,如果你这里选择80端口,后面的<VirtualHost *:2010> 2010也要换到80端口
Listen 2010

ServerName localhost:80

# LoadModule rewrite_module modules/mod_rewrite.so

# GREATWQS UPDATE
# Load weblogic config file and module
LoadModule weblogic_module modules/mod_wl_20.so

# <IfModule mod_weblogic.c>
# Include conf/Weblogic.conf
# </IfModule>

# those description is working!
<VirtualHost *:2010>
     # 这里是配置静态文件,因为这里的简单测试index.jsp中含有
     # 静态文件JavaEye的图片,这里要有Apache解析.见下图三静态图片文件的存放!
     DocumentRoot "/opt/apache/apache_wl"
     ServerPath /
     DirectoryIndex index.jsp    index.html
     Options -FollowSymLinks +SymLinksIfOwnerMatch
#     AllowOverride None
     <Location>
       <IfModule mod_weblogic.c>
#     Debug       ON
#     DebugConfigInfo       On
#      WLLogFile /tmp/wlproxy.log
#      这里应该是集群中的某个地址,这里采用本地.
         WebLogicHost localhost
         WebLogicPort 7001
         MatchExpression *.jsp
         MatchExpression *.do
         MatchExpression *.dos
#         MatchExpression *.css
#         MatchExpression *.html
#         MatchExpression *.js
#         MatchExpression *.jpg
#         MatchExpression *.gif
         DynamicServerList OFF
         KeepAliveEnabled ON
         KeepAliveSecs 5
       </IfModule>
    </Location>
</VirtualHost>

#
# DocumentRoot: The directory out of which you will serve your
# documents. By default, all requests are taken from this directory, but
# symbolic links and aliases may be used to point to other locations.
#
DocumentRoot "/opt/apache/apache_wl"

##################################################################
###############   end   ##########################################
##################################################################
配置小说明:这里的配置我集合到了一起,与httpd.conf的配置对应进行更新!
直接黏贴到httpd.conf文件后会出现重复.Apache静态文件丢放,见配置红色字体,对应如下图:
四. 启动weblogic与Apache
1. 启动weblogic 使testPic项目状态到Active;见图二.
现在查看weblogic的测试连接:
http://localhost:7001/testPic/index.jsp
见图四:

2. 启动Apache 命令如下;
greatwqs@ubuntu:/opt/apache/bin$ sudo ./httpd -k stop
[sudo] password for greatwqs:
greatwqs@ubuntu:/opt/apache/bin$ sudo ./httpd -k start
greatwqs@ubuntu:/opt/apache/bin$
现在查看Apache的测试连接:
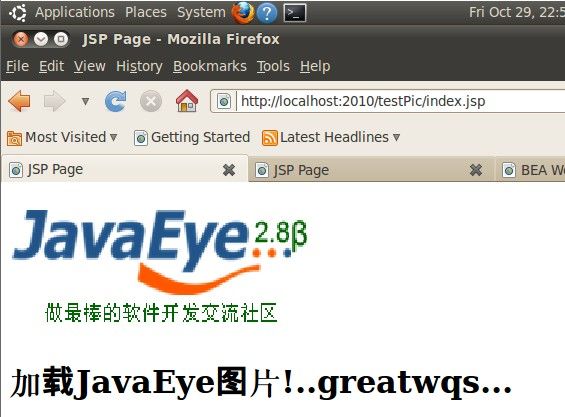
http://localhost:2010/testPic/index.jsp
见图五
:
上面是我的简单整合,为将来的某一天翻一翻!..
[email protected] 于 2010-10-30

