s
vmware 11
http://www.52pojie.cn/forum.php?mod=viewthread&tid=310179
VMware Workstation 11.0.0 注册码/key :1F04Z-6D111-7Z029-AV0Q4-3AEH8
https://download3.vmware.com/software/wkst/file/VMware-workstation-full-11.0.0-2305329.exe
https://download3.vmware.com/software/wkst/file/VMware-workstation-full-11.1.0-2496824.exe 64bit
vmware 10
http://3.jsyd1.crsky.com/software1/VMware_workstation_full-v10.0.4.zip
VMware10.0安装Mac OS X 10.9超详细教程
http://blog.sina.com.cn/s/blog_6c8f0fa10101eyc3.html
VMware虚拟机安装Mac OS
http://jingyan.baidu.com/article/e5c39bf5876c8b39d760331a.html
[教程] 如何提取原版镜像中的installESD.dmg文件
http://bbs.pcbeta.com/forum.php?mod=viewthread&tid=1323656
修改Mac OS X Lion 10.7.4虚拟机的密码
http://blog.sina.com.cn/s/blog_4ca83f830101b55k.html
开机时,按住ALT键,相当于mac book pro的Option键,原始镜像光盘去更改密码,ok
其它所需软件:
1.系统:用的是论坛里网友做的懒人版是.cdr文件(真接把.cdr改为.iso就是镜像文件了) 点击进入
(也可以去下原版镜像dmg文件,有7z打开提取里面的InstallESD.dmg,然后用UltraISO转化为ISO镜像文件也可以安装,本人亲试成功)
2.mac补丁unlock-all-v120.zip 点击进入 // 作用是创建虚拟机才会有Mac OS选项
3.VMware Tools darwin6.iso 点击进入 // (可设置全屏)
http://softwareupdate.vmware.com/cds/vmw-desktop/fusion/7.1.1/2498930/packages/com.vmware.fusion.tools.darwin.zip.tar
vmware 8 key
http://downloads.vmware.com/cn/d/info/desktop_end_user_computing/vmware_workstation/8_0
http://download.csdn.net/detail/enstin/3617813#comment
VMware-Workstation-8-Keygen.rar
MV4YN-0L38Q-2ZK60-XUA7K-AAZ18
JC6AP-D4H0P-TZ131-4A2QM-8CNP7
0U6UU-6AJDL-RZTK9-230Q0-8ARJQ
JG2TD-DJL95-FZZZ8-DU1NH-33GH7
Vmware vClound / vSphere / vFusion
在VMWare虚拟机中安装虚拟机教程
http://www.langzui.com/post/295.html
在VMware虚拟机中运行虚拟机
http://wangchunhai.blog.51cto.com/225186/127783
http://tech.ddvip.com/2009-06/1244951446123743.html
在EXSI中跑VMWARE7
http://www.usefulshare.com/lion/vmware7inexsi.html
会报如下的错误
Running VMware Workstation in a virtual machine requires the outer virtual machine to be configured for running a VMware ESX guest operating system. You may not power on a virtual machine until the outer virtual machine is reconfigured.
出现这个问题意思你不能在 vm 虚拟机里再运行一个 虚拟机 系统,
解块方法:打开真实机创建的虚拟机的vmx文件,例如:Windows Server 2003 Enterprise Edition.vmx
在文件中加上下面行:
monitor_control.restrict_backdoor = “true”
以上摘自相约二零零七的百度博客
我发现,如果这么做,确实可以跑在EXSI中用VMWARE运行虚拟机了,不过也有了几个问题
1 EXSI中的VMWARE TOOLS 不能用过了
2 VMWARE7 不能自己创建新的虚拟机了
解决办法:(猜测,未经证实)
1 先按照如上方法修改VMX文件
2 安装VMWARE TOOLS
3 安装VMWARE 7
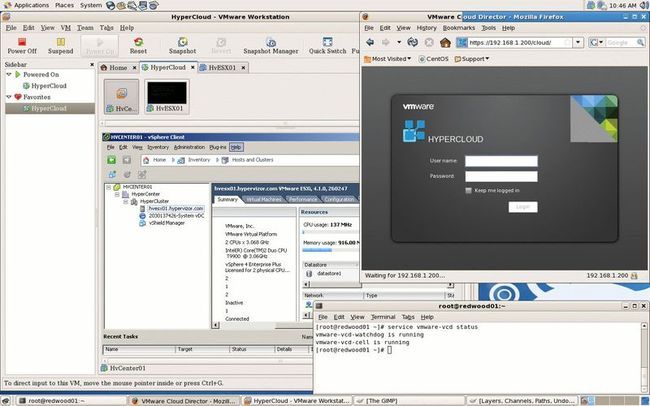
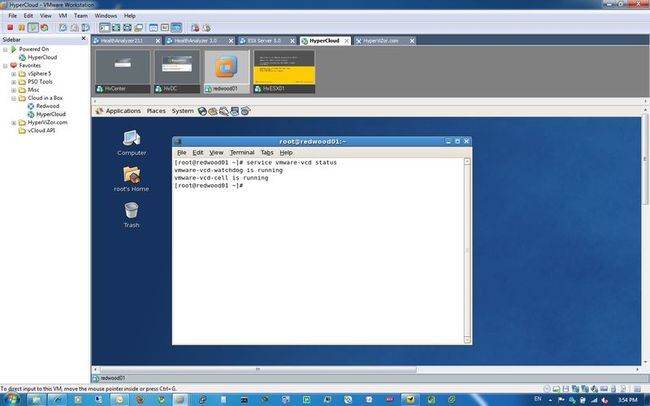
VMware vClound Director
http://www.tudou.com/programs/view/FYkrElN799I/


service vmware-vcd status
service vmware-vcd restart
service vmware-vcd start
service vmware-vcd stop
VMware Fusion (Mac OS X 10.6.3)
lindowsmatoMacBook-Pro:isoimages lindows$ pwd
/Library/Application Support/VMware Fusion/isoimages
lindowsmatoMacBook-Pro:isoimages lindows$ ls -l
total 590144
-r--r--r-- 1 root wheel 131334144 5 21 17:54 antivirus.iso
-rw-r--r-- 1 root wheel 13094912 5 21 17:54 darwin.iso
-rw-r--r-- 1 root wheel 256 5 21 17:54 darwin.iso.sig
-rw-r--r-- 1 root wheel 105801728 5 21 17:55 linux.iso
-rw-r--r-- 1 root wheel 256 5 21 17:55 linux.iso.sig
-r--r--r-- 1 root wheel 451 5 21 17:52 tools-key.pub
-rw-r--r-- 1 root wheel 51904512 5 21 17:55 windows.iso
-rw-r--r-- 1 root wheel 256 5 21 17:55 windows.iso.sig
vSphere docs
http://vmsky.com/
VMware vSphereV4.0 正式版全套授权注册机keygen算号器
http://www.cc5f.com/thread-970-1-1.html
VMware ESX Server 4(vSpere)测试记录
http://wangchunhai.blog.51cto.com/225186/172048
大名鼎鼎VMware vSphereV4.0 正式版SN+真正keygen(算号器)
http://www.hrzj.org/thread-3998-1-1.html
如何在VMware ESX下打开复制的VM
http://www.ixpub.net/thread-930641-1-1.html
http://server.it168.com/a2009/0807/620/000000620165.shtml
Windows环境下VMware虚拟机的自启动与自动关机
http://win.chinaunix.net/bbs/archiver/tid-30603.html
http://blog.vsharing.com/hug_funs/A1010796.html
开机就自动启动VMware并启动虚拟系统
http://os.rdxx.com/Linux/LinuxApply/2008/11/2117551619522.shtml
linux挂载windows上的共享文件
http://lym6520.iteye.com/blog/356625
vSphere install guide
http://www.vmware.com/support/pubs/vs_pages/vsp_pubs_esx40_vc40.html
http://www.vmware.com/pdf/vsphere4/r40/vsp_40_esx_server_config.pdf
http://www.vmware.com/pdf/vsphere4/r40/vsp_40_esx_vc_installation_guide.pdf
vsp_40_u1_esx_vc_installation_guide_cn.pdf
http://d.download.csdn.net/down/2247233/snowred_bai
云层下的Hypervisor 解构VMware ESX4
http://smb.pconline.com.cn/zxpc/0906/1689932_1.html
vSphere download
I:\unix\os\vmware_vSphere\>dir /d
[.]
[..]
[云计算操作系统].VMware.vSphere.v4-MAGNiTUDE-DISK1.iso
[云计算操作系统].VMware.vSphere.v4-MAGNiTUDE-DISK2.iso
[云计算操作系统].VMware.vSphere.v4-MAGNiTUDE-DISK3.iso
[云计算操作系统].VMware.vSphere.v4-MAGNiTUDE.nfo
新建 文本文档.sh
I:\unix\os\vmware_vSphere\>type "新建 文本文档.sh"
? DISK1: Hypervisor VMware ESX 4.0 ?
? DISK2: Management Server VMware vCenter 4 ?
? DISK3: VMware Data Recovery and VMware vShield Zones
------------------------------------------------------------------
http://www.verycd.com/topics/2748942/
ed2k://|file|%5B%E4%BA%91%E8%AE%A1%E7%AE%97%E6%93%8D%E4%BD%9C%E7%B3%BB%E7%BB%9F%5D.VMware.vSphere.v4-MAGNiTUDE-DISK1.iso|835770368|77f7f6efb2bed3e97c0f170b7c93c79f|h=vvuaws7cv4t2bqg6mr35avebgai23mmn|/
ed2k://|file|%5B%E4%BA%91%E8%AE%A1%E7%AE%97%E6%93%8D%E4%BD%9C%E7%B3%BB%E7%BB%9F%5D.VMware.vSphere.v4-MAGNiTUDE-DISK2.iso|1887889408|0d40a3d705345948bad85c1acee933bb|h=bztcrvh46vn4y4hpcwlv7niajmvujnhq|/
ed2k://|file|%5B%E4%BA%91%E8%AE%A1%E7%AE%97%E6%93%8D%E4%BD%9C%E7%B3%BB%E7%BB%9F%5D.VMware.vSphere.v4-MAGNiTUDE-DISK3.iso|796512256|35f191a024a51ae729895152eeceb1d4|h=etrpmefa3ode4fgi5hdsw5od3z4rskav|/
ed2k://|file|%5B%E4%BA%91%E8%AE%A1%E7%AE%97%E6%93%8D%E4%BD%9C%E7%B3%BB%E7%BB%9F%5D.VMware.vSphere.v4-MAGNiTUDE.nfo|7612|b869720d6bc37567d1ab052865dda370|h=23x67mxh3frx5akyapzjm6ndzf3tg5xx|/
Vmware ESX key
http://zhidao.baidu.com/question/142182435.html
VMware Workstation ACE v6.0.1 序列号
ELRWX-32886-H2J4C-4WXZ2
PLTHD-TWXA0-W20FV-4M8QQ
P8TKE-QRPF0-W804Z-4MDQQ
ERRKD-G4D6C-M04DV-4YDZ3
http://d.download.csdn.net/down/1465542/iOracle
http://dldx.csdn.net/fd.php?i=835614655428967&s=9f70a5c31d9b475d45e214e4060d36e3
VMware worksation ACE Edition 6.x for windows注册码
V152H-VY468-2AMFZ-4YDXK
M8505-DPR01-U0MDC-4M9N6
D3NMT-94NA4-4856V-4WRQ3
Vmware docs
http://www.jackfeng.com/tag/vmware/
XenServer、Hyper-V、vSphere最新测试
http://server.chinabyte.com/226/11145726.shtml
http://dl.iteye.com/topics/download/f2bc2854-96fe-3edf-982a-62d1df7486c6
Vmware Download
vmware 7.0 中文语言包
http://cachefile28.rayfile.com/zh-cn/download/7a324c9435de3029f399f6ecba0f1870/VMware%207.0%20CN.rar
Workstation for Linux 64-bit Bundled installation file with Tools
https://download2.vmware.com/software/wkst/VMware-Workstation-Full-7.0.1-227600.x86_64.bundle ?HashKey=b1e78184e760ba5b93a61caf16fd076d&AuthKey=1268375196_9716b34a690adfa03fd055bb97fcee15
Vmware 7.0.0 build-203739
http://www.dinyuan.cn/bbs/viwthread.php?tid=2139
cd-key : CY552-00E10-M85YZ-ZQY7E-MQKA4
\\172.17.25.101\MySoftWare\VMware\VMware-workstation-full-7.0.0-203739 [1D41979E].exe
\\172.17.25.101\MySoftWare\VMware\VMware_Workstation_7.0_CN_Lite [91FD19BD].exe
\\172.17.25.101\MySoftWare\VMware\VMware_7.0_CN--解压后直接覆盖至安装目录.rar
\\172.17.25.101\MySoftWare\VMware\VMware.Workstation.v7.0.0.203739.Keymaker-EMBRACE
Workstation for 32-bit and 64-bit Windows
Version 7.0 | 203739 - 10/27/09 512 MB installation file for 32-bit and 64-bit
Windows with Tools
DownURL
- https://www.vmware.com/tryvmware/p/download.php?p=workstation&lp=1&a=DOWNLOAD_FILE&baseurl=http://download2.vmware.com/software/wkst/&filename=VMware -workstation-full-7.0.0-203739.exe
复制代码
--------------------------------------------------------------------------------
Workstation for 32-bit Linux
Version 7.0 | 203739 - 10/27/09 271 MB bundle installation file for 32-bit
Linux with Tools md5sum: a4286d08c2b302f1d3a164dcdc36c884
DownURL
- https://www.vmware.com/tryvmware/p/download.php?p=workstation&lp=1&a=DOWNLOAD_FILE&baseurl=http://download2.vmware.com/software/wkst/&filename=VMware-Workstation-Full-7.0.0-203739.i386.bundle
复制代码
--------------------------------------------------------------------------------
Workstation for 64-bit Linux
Version 7.0 | 203739 - 10/27/09 277 MB bundle installation file for 64-bit
Linux with Tools md5sum: 7514a86f0b52db696612349a2acaebbc
DownURL
- https://www.vmware.com/tryvmware/p/download.php?p=workstation&lp=1&a=DOWNLOAD_FILE&baseurl=http://download2.vmware.com/software/wkst/&filename=VMware-Workstation-Full-7.0.0-203739.x86_64.bundle
复制代码
Vmware 虚拟机快捷方式
Ctrl + Alt + Enter //Vmware 全屏显示
Vmware + Windows XP EN 安装异常
please insert the disk labeled:
Windows XP Professional Server Pack 3 CD into Driver A:
* Press ENTER when ready.
解决:
D:\Program Files\VMware\VMware Workstation\vmware.exe--VM--Settings--CD/DVD(IDE)--Use ISO image file:I:\os\WINDOWSXPSP3英文纯净版8IN1.iso -- ok
Vmware-Tools download
https://softwareupdate.vmware.com/cds
Vmware-Tools setup
http://dl.iteye.com/topics/download/fdb93b11-bcbd-3efb-9a5d-8f115a7dbece
C:\Program Files\VMware\VMware Workstation\linux.iso
linux-gwiw:/home/lindows/Desktop/vmware-tools-distrib # ./vmware-install.pl
You have a version of VMware Tools installed. Continuing this install will
first uninstall the currently installed version. Do you wish to continue?
(yes/no) [yes]
、、、
Enjoy,
--the VMware team
linux-gwiw:/home/lindows/Desktop/vmware-tools-distrib #
Vmware Q/A
Could not get vmci driver version: The handle is invalid.
You have an incorrect version of driver "vmci.sys". Try reinstalling VMware Workstation.
Module DevicePowerOn power on failed.
http://communities.vmware.com/thread/241969
http://spininfo.homelinux.com/news/virtualization/HttpServer?page=5415
http://lycos.dropcode.net/gregarius/VMware_Communities_:_Thread_List_-_Desktop_Products/2009/11/11/Win7_64_cannot_host_Workstation_plus_be_a_guest_in_Fusion
http://yangguang534957.blog.51cto.com/753116/153669
Could not open /dev/vmmon: No such file or directory.
Please make sure that the kernel module `vmmon' is loaded.
给vmWare上的linux增加磁盘空间
red hat linux as4下挂载NTFS文件系统
http://www.luwanwan.com/2009/09/26/expandlinuxspace/
VMware下linux磁盘空间扩容
http://www.luwanwan.com/2009/09/26/expandlinuxspace/
给vmWare上的linux增加磁盘空间
http://chenhua-1984.iteye.com/blog/609930
有时,由于在虚拟机上的磁盘空间不够用,我们需要给磁盘扩从空间。
比如,vmWare装在C盘:C:\Program Files\VMware\VMware Workstation>
虚拟机装在F盘:F:\redhat5.1\tmp.vmdk
关闭虚拟机的电源,然后
在windows的 环境下,进入dos窗口。然后进入C盘VmWare的安装目录。执行如下命令

这样等待一些时间就好了。
Redhat Enterprise linux 5挂载新的硬盘 精简步骤+详细过程
http://624569.blog.51cto.com/614569/211251
Redhat Enterprise linux 5 挂载新的硬盘 精简步骤
步骤
一、在 vm 下新加一个硬盘, linux 重启 [root@localhost ~]# reboot
二、在 /dev/sdb 下新建磁盘,保持设置
[root@localhost dev]# fdisk /dev/sdb
Command (m for help): n
Command action
e extended
p primary partition (1-4)
p
Partition number (1-4): 1
First cylinder (1-1044, default 1):
Using default value 1
Last cylinder or +size or +sizeM or +sizeK (1-1044, default 1044):
Using default value 1044
Command (m for help): w // 保存生效
三、格式化磁盘区间
[root@localhost dev]# mkfs.ext3 /dev/sdb1
四、加载到系统启动项(重启磁盘自动挂载)
[root@localhost dev]# mkdir /mnt/sdb1
[root@localhost dev]# mount /dev/sdb1 /mnt/sdb1
[root@localhost dev]# reboot
Redhat Enterprise linux 5
挂载新的硬盘
详细过程(...)
first name:avatar
famliy name:etang
mail:[email protected]
https://www.vmware.com/cn/tryvmware/np/download.php?p=workstation-w
http://coolszy.iteye.com/blog/452484
虚拟机上网分为以下情况
【1】
物理机与虚拟机之间进行通信,但是虚拟机不能连接互联网
虚拟机--编辑--虚拟网络设置--自动桥接--勾选自动选择一块...--确定
选择虚拟机系统设置--以太网卡--网桥
进入虚拟机--网路邻居--设置IP地址--192.168.0.2(主机为1)
【2】
物理机与虚拟机之间进行通信,同时虚拟机能连接互联网
编辑--虚拟网络设置--自动桥接--去掉勾选自动选择一块...--确定
选择虚拟机设置--以太网卡--NAT
进入虚拟机--网路邻居--自动获取IP地址
【3】
主机为ADSL,虚拟机上网
右击“宽带连接”--“属性”--“高级”--Internet连接共享,选择“VMwareNetwork Adapter VMnet1”,确定。
虚拟机网络设置为NAT
进入操作系统,进入网络连接,把本地连接 设置为自动获取ip地址
VMWare网络连接透析 zz
http://www.twt.edu.cn/blog/user/s/sunjingna/article/1138.html
无论在什么条件下,只要主机能上网,才用NAT技术,都可以使虚拟机访问internet;
只有在主机网卡处在一个可以访问internet的局域网中的时候,虚拟机才能通过bridge访问internet;
Host-only技术只用于主机和虚拟机互访,于访问internet无关。
VMware Workstation(虚拟机) V6.0.2 Build 59824 汉化版
http://70.duote.net/ha_vmware.exe
序列号:JHXUR-G0M88-GA44V-4MRN6
VMware Workstation V6.5 Build 91182
http://70.duote.net/vmwareworkstation.exe
cd-key:8RWM4-369AJ-D25DA-4WWN3
Workstation for Windows 32位 and 64位 版本 6.5.2 | 156735 - 03/31/09
https://www.vmware.com/cn/tryvmware/np/download.php?p=workstation-w&a=DOWNLOAD_FILE&baseurl=http://download2.vmware.com/software/wkst/&filename=VMware-workstation-6.5.2-156735.exe
https://download2.vmware.com/software/wkst/VMware-workstation-6.5.2-156735.exe?HashKey=0cf260609c980ce202ebfdc1b6aa9180&ext=.exe&AuthKey=1250773506_c75900a572700b8cc962f5bdc7a1e69e&ext=.exe
wmware Tools
D:\Program Files\VMware\VMware Workstation\linux.iso
D:\Program Files\VMware\VMware Workstation\windows.iso
wmware Tools for Operating System Drivers
http://www.vmsky.com/dl/VMware/Workstation/2009/02/10/31.html
ftp://down:[email protected]:2136/uploads/soft/vmware%20workstaion/linux.rar
ftp://down:[email protected]:2136/uploads/soft/vmware%20workstaion/windows.rar
VMware vSphere
https://www.vmware.com/cn/tryvmware/np/activated.php?p=vsphere&lp=1
VMware ESX 4.0
VMware ESXi 4.0 Installable 可安装文件
VMware vCenter Server 4 及其模块
VMware Data Recovery 和 VMware vShield Zones
VMWare vSphere setup
http://smb.pconline.com.cn/zxpc/0906/1689932_3.html
VMware vSphere 体系结构包含以下组件:
- 一个基本管理程序,可为 VMware ESX 或 VMware ESXi Installable,安装在每一台计划用于托管虚拟机的物理服务器上。
- 一个名为 VMware vCenter Server 的管理服务器实例,可用于实现多台主机的集中式管理
<!-- Section Head Start -->
借助 VMware vCenter Server,可对 VMware ESX 和 ESXi 主机及其虚拟机进行集中化管理。此下载包包括 VMware vCenter Server、VMware vCenter Update Manager 和 VMware vCenter Converter Enterprise 插件,以及用于访问 vCenter Server 的应用程序 VMware vSphere Client。了解更多信息 。
http://download2.vmware.com/software/vi/VMware-VIMSetup-all-4.0.0-162902.zip?HashKey=6cb6d74ec9422bcd0dbd1ec6c598a13a&AuthKey=1250766952_ccaafd590190d83a3902a1a5021179c7
http://download2.vmware.com/software/vi/VMware-VIMSetup-all-4.0.0-162902.iso?HashKey=2a2bb33827b7d2d644b925cf32cb3a00&AuthKey=1250766958_3e63123649fba44f3253deec4c691ed4
http://opensource.csdn.net/project/tag/114
终端服务器/虚拟机 共有 21 个项目 —— 第 1 页
http://www.xuniji.com
Linux 下的虚拟机全集
http://www.itkhl.com/Article/Hospital/itkhl-59975.html
1. VMware
http://www.vmware.com
2. VirtualBox
http://www.virtualbox.org
VirtualBox是由Innotek公司开发的虚拟软件
3. QEMU
http://fabrice.bellard.free.fr/qemu
QEMU既是一个虚拟软件,又是一个仿真器。
4. Xen
http://xen.org
vmware
vmware ubuntu 8.10
问题:
Could not create named IPC listener pipe \\.\pipe\VMWARE\control-fd.1328: 修订级别未知。
Module VUI initialization failed.
Cannot find a valid peer process to connect to。
解决:
http://www.blogjava.net/alwayscy/archive/2008/09/08/227655.html
因为没有建立"__vmware_user__",以用户帐户里建立一下这个用户名就可以了
问题:
vmware ubuntu 9.04 网络连接桥接不通,桥接网关为内网
场景:有线网卡无网关,无线网卡有网关,解决内网共享外网互连
解决:先关闭无线网络,再开启即可
图文并茂,VMware 6.5.1for linux下载安装、注册机、VM tools及虚拟系统应用安装教程
http://forum.ubuntu.org.cn/viewtopic.php?f=65&t=190749
ubuntu9.04安装vmware-workstation 6.5.2
http://www.ubuntuchina.com/viewthread.php?tid=7055
http://hi.baidu.com/yingwu780108/blog/item/be2a1ffb461a796c024f5641.html
VMware Workstation 6.5.2 Latest Released Version: 6.5.2 | 04/02/09 | 156735
http://www.vmware.com/downloads/eula.do
Workstation for Linux 32-bit
RPM Installation file for 32-bit Linux ( 374 MB )
Linux 32-bit .rpm
(md5sum:69b039c848f6b2c94948928d8e9057bb)
(sha1sum:37ca77ef550db932cf7b078fcbd6fa0155e3411e)
Workstation for Linux 32-bit
Bundled Installation file for 32-bit Linux ( 336 MB )
Linux 32-bit . bundle
(md5sum:5d4ccf9c23701d09a671f586a9bb4190)
(sha1sum:d508111adf479d82049c323b1d0b82200c0ab4dd)
download
https://download2.vmware.com/software/wkst/VMware-Workstation-6.5.2-156735.i386.rpm?HashKey=e07802296500e5362df8fc903b12ea12&AuthKey=1247554473_8c9b4ba0531c9eff9d140eaef60c69f8
https://download2.vmware.com/software/wkst/VMware-Workstation-6.5.2-156735.i386.bundle?HashKey=158131c9d42505a82220d1f2e4e2f840&AuthKey=1247554487_6b824e6e825f37d5ea0c6a495e893d0c
http://www.ubuntuchina.com/viewthread.php?tid=7055
[虚拟工作站].vmware6-keygen.exe
http://www.verycd.com/topics/2721522/
ed2k://|file|%5B%E8%99%9A%E6%8B%9F%E5%B7%A5%E4%BD%9C%E7%AB%99%5D.vmware6-keygen.exe|260096|599e25012cf64ddcfcafb27851e4118d|h=RB7KHGQBXTZVMQJZSPIUV623NQCMQEXK|
cd-key:7U5F8-KPE0N-W054V-4PEXL
user name:lindows
company:lindows.iteye.com
Type:VMware Workstation 6.0(Windows)
cd-key:UU8WJ-8Y3FC-J244G-4YEXQ
user name:lindows
company:lindows.iteye.com
Type:VMware Workstation 6.0(Linux i386 and 64)
vmware setup in ubuntu 9.04
lindows@lindows-desktop:~$sudo mkdir /opt/vmware
lindows@lindows-desktop:~$sudo chmod 755 /opt/vmware
lindows@lindows-desktop:~$chmod 755 /home/lindows/VMware-Workstation-6.5.2-156735.i386.bundle
lindows@lindows-desktop:~$sudo /home/lindows/VMware-Workstation-6.5.2-156735.i386.bundle
[sudo] password for lindows:
Extracting VMware Installer...done.
Launching a SCIM daemon with Socket FrontEnd...
Loading simple Config module ...
Creating backend ...
Loading socket FrontEnd module ...
Starting SCIM as daemon ...
GTK Panel of SCIM 1.4.7
GTK Panel of SCIM 1.4.7
GTK Panel of SCIM 1.4.7
GTK Panel of SCIM 1.4.7
GTK Panel of SCIM 1.4.7
ok!
RHEL 5.3 x64 VirtualBox x86-64 安装
[root@b2cbbstest soft]# rpm -ivh VirtualBox-4.1-4.1.4_74291_rhel5-1.x86_64.rpm
warning: VirtualBox-4.1-4.1.4_74291_rhel5-1.x86_64.rpm: Header V4 DSA signature: NOKEY, key ID 98ab5139
error: Failed dependencies:
libSDL-1.2.so.0()(64bit) is needed by VirtualBox-4.1-4.1.4_74291_rhel5-1.x86_64
[root@b2cbbstest soft]# whereis yum
yum: /usr/bin/yum /etc/yum.conf /etc/yum /usr/share/man/man8/yum.8.gz
[root@b2cbbstest soft]# cat /etc/yum.respo.d/lindows.repo
[base]
name=remote rpm
baseurl=http://192.168.134.16/pub/rhel5/Server
gpgcheck=0
[root@b2cbbstest soft]# yum install SDL.x86_64
[root@b2cbbstest soft]# yum install SDL-devel.x86-64
[root@b2cbbstest soft]# yum list | grep SDL
Repository base is listed more than once in the configuration
This system is not registered with RHN.
RHN support will be disabled.
SDL.x86_64 1.2.10-8.el5 installed
SDL-devel.x86_64 1.2.10-8.el5 installed
SDL.i386 1.2.10-8.el5 base
SDL-devel.i386 1.2.10-8.el5 base
[root@b2cbbstest soft]# rpm -ivh VirtualBox-4.1-4.1.4_74291_rhel5-1.x86_64.rpm
warning: VirtualBox-4.1-4.1.4_74291_rhel5-1.x86_64.rpm: Header V4 DSA signature: NOKEY, key ID 98ab5139
Preparing... ########################################### [100%]
1:VirtualBox-4.1 ########################################### [100%]
Creating group 'vboxusers'. VM users must be member of that group!
No precompiled module for this kernel found -- trying to build one. Messages
emitted during module compilation will be logged to /var/log/vbox-install.log.
Stopping VirtualBox kernel modules [ OK ]
Uninstalling old VirtualBox DKMS kernel modules [ OK ]
Trying to register the VirtualBox kernel modules using DKMS [FAILED]
(Failed, trying without DKMS)
Recompiling VirtualBox kernel modules [FAILED]
(Look at /var/log/vbox-install.log to find out what went wrong)
[root@b2cbbstest soft]#
virtualbox 共享文件夹
http://huzhangsheng.blog.163.com/blog/static/347877842008114113510802/
我是在 win2003 下安装 virtualbox ,在 virtualbox 官网找到了共享文件夹设置方法:
1)在 virtualbox 中设置 ubuntu 虚拟机的共享文件夹,点击添加,并选择 一个 window2003 下文件夹,我是选择路径:d:\tmp ,共享名:tmp
2)运行 ubuntu ,用 sudo 命令在 /mnt 下建立一个新文件夹 cd /mnt sudo mkdir /mnt/Share sudo mount -t \vboxsf Share /mnt/Share 这样,windows 下的 d:\tmp 文件夹就变成了 ununtu 下的 /mnt/Share ,win2003 和 ubuntu 就可以通过这个共享文件夹交换文件,usb 移动硬盘不需要了。
openVZ
开放源代码版本的Virtuozzo:OpenVZ
http://wenson.javaeye .com/blog/42957
六大虚拟化技术架构、性能、应用分析-OpenVZ
http://wenson.javaeye .com/blog/42944
OpenVZ加入Ubuntu共推开源桌面虚拟化
http://www.wangchao.net.cn/bbsdetail_1632055.html
OpenVZ和Ubuntu Linux 的开发人员周二将发布一款Ubuntu虚拟机,它可以让管理员在几分钟内配置好一个特殊的Ubuntu系统.
OpenVZ是一个开源工程,由Parallels(原名SWSoft)支持,它类似于商业虚拟化软件 Virtuozzo,提供系统级别的虚拟化技术 ,但是主机和客户机都必须是Linux .
OpenVZ的用户可以下载模板快速定制桌面和服务器系统,例如定义Web服务器的任务和桌面模板等.
Virtual PC V2007 正式版
http://duote.com/soft/273.html
http://71.duote.com/virtualpc.exe
Virtual PC 2007虚拟机上安装Ubuntu 8.10桌面版
http://www.renhaibo.com/archives/86.html
VirtualBox
http://www.virtualbox.org/wiki/Downloads
http://dlc.sun.com/virtualbox/vboxdownload.html#windows
http://dlc-cdn-rd.sun.com/c1/virtualbox/2.0.4/VirtualBox-2.0.4-38406-Win_x86.msi?e=1226673525&h=5f4c63618747d8f09a7f58997d0bc6f4
http://dlc-cdn-rd.sun.com/c1/virtualbox/2.0.4/virtualbox-2.0_2.0.4-38406_Ubuntu_intrepid_i386.deb?e=1226673531&h=2c60916180ea199c35a9b5d48e52549d
Sun xVM VirtualBox
http://www.virtualbox.org/wiki/Linux_Downloads
http://dlc-cdn-rd.sun.com/c1/virtualbox/2.0.4/virtualbox-2.0_2.0.4-38406_Ubuntu_hardy_i386.deb?e=1226743065&h=236f52a7ecae6175351db9e9e2faa842
Ctrl键+F键
屏幕分辨率改成800x600。
Debian-based Linux distributions: Add one of the following lines according to your distribution to your /etc/apt/sources.list :
deb http://download.virtualbox.org/virtualbox/debian intrepid non-freedeb http://download.virtualbox.org/virtualbox/debian hardy non-freedeb http://download.virtualbox.org/virtualbox/debian gutsy non-freedeb http://download.virtualbox.org/virtualbox/debian dapper non-freedeb http://download.virtualbox.org/virtualbox/debian lenny non-freedeb http://download.virtualbox.org/virtualbox/debian etch non-freedeb http://download.virtualbox.org/virtualbox/debian sarge non-freedeb http://download.virtualbox.org/virtualbox/debian xandros4.0-xn non-free
VirtualBox
http://wenq.org/index.cgi?BitmapSong
http://www.187299.com/archives/tag/virtualbox
http://blog.csdn.net/ppp_10001/archive/2010/01/30/5272577.aspx
redhat linux 5.4 x86_64 VirtualBox 中文乱码
装了 VirtualBox-3.1-3.1.2_56127_rhel5-1.x86_64.rpm 中文乱码
再装了wqy-bitmapfont-0.8.1-7.noarch.rpm 解决
CentOS5.2系统的语言为zh_CN.UTF-8,VirtualBox2.2.0安装好后,打开是乱码,这是因为没有文泉驿字体。
http://wenq.org/index.cgi?BitmapSong,这里有文泉驿字体的所有版本
本例中用wqy-bitmapfont-0.8.1-7.noarch.rpm
wget http://jaist.dl.sourceforge.net/sourceforge/wqy/wqy-bitmapfont-0.8.1-7.noarch.rpm
rpm -Uvh wqy-bitmapfont-0.8.1-7.noarch.rpm
安装好后,重新打开VirtualBox,这时的中文就正常了。
KVM
私有云 - KVM虚拟机 NBU备份数据库速度特别慢排查 / 14031655 / 15010025315
http://wiki.cns*****.com/pages/viewpage.action?pageId=17926012
背景: 最近数据库管理部将一些数据库的server从vmware虚拟机环境迁移到了KVM.
KVM虚拟机通过nbu备份/恢复数据库速度只有15M左右,迁移之前vmware的机器传输速度大概100M左右(基本将网络跑满)。于是数据库工程师怀疑是KVM网络性能差导致。
排查与解决:
由于备份带库没有IP地址,没有办法直接访问,所以只能在类似网络环境中找机器排查。
scp 虚拟机到虚拟机 速度大概35M左右。
scp 虚拟机到物理机 速度大概45M左右。
scp 物理机到物理机,速度大概100M左右。
尝试将虚拟机从bridage改成网桥模式,速度依旧。
iperf测试,发现虚拟机到虚拟机速度为100M左右。于是排除网桥性能差。
针对数据库开发同事纠结的scp速度慢问题,google之,后来查到ssh所用的算法能极大的影响传输速度,更改成scp -c arcfour,速度提升到90M左右,也基本上将网络跑满了。
参考: http://www.neuhalfen.name/2009/02/04/scp_performance_gain_by_using_right_algorithm/
至此,排除KVM虚拟机网络性能差导致NBU速度慢问题,请数据库开发同事联系NBU工程师查找问题原因。
Power VM
Xen ConVirt
使用convirt管理基于kvm的虚拟机 - 安装篇
http://towerhe.iteye.com/blog/986440
http://www.oschina.com/project/ConVirt
http://www.convirture.com/index.php
ConVirt 是一个直观的、图形化的虚拟机管理工具,可以对虚拟机的整个生命周期进行管理。
http://www.galileocomputing.de/download/artikel/353/convirt.jpg

convirt 2.0安装配置-xen集中管理平台
http://cnctblog.com/2010/07/176.html
xen 集中管理工具
convirt 主页
http://www.convirture.com/
convirt简介
convirt2.0是一款使用python和jquery结合编写的其于web的集中管理xen服务的程序。该程序在xen 社区项目,管理项目中被使用的量很高,convirt开发有开源版本与企业版本,企业版拥有服务支持,并增强了xen动态资源调整的功能,此次介绍的的为convirt2.0开源版。
convirture tm有自己的wiki和论谈,相关问题可以查看与询问
http://www.convirture.com/wiki
http://www.convirture.com/forums
生产环境
redhat AS5U5 安装xen服务
convirt2.0的安装过程
获得 convirt2.0
wget –no-cache http://www.convirture.com/downloads/convirt/2.0/convirt-install-2.0.tar.gz
convirt-install-2.0.tar.gz是convirt的安装脚本,convirture组织在这个包里写了一个安装脚本来初始化系统环境变量,安装需要的各种组件,所以你一定要把保正你的convirt服务器能够正常Internet。
[root@xencms ~]# tar -zxvf convirt-install-2.0.tar.gz
这是一个非常好的安装脚本实例,在这里先不分析各个function的调用,我想利用以后文章单独分析。
/root/convirt-install/install/cms/scripts
初始化系统环境
./install_dependencies
在初始化的过程中最重要的一项是mysql的设置
Enter current password for root (enter for none):
由于测试机之前没有安装mysqld服务,是由convirt-install中的脚本来完成的,所以初始密码为空。
Set root password? [Y/n] y
此处一定要设置mysql密码因为convirt初始化mysql时密码是写到程序中的,password要设置为”convirt”。
Running mysql_secure_installation.
Current root password for fresh installation is blank. So simple press enter.
NOTE: RUNNING ALL PARTS OF THIS SCRIPT IS RECOMMENDED FOR ALL MySQL
SERVERS IN PRODUCTION USE! PLEASE READ EACH STEP CAREFULLY!
In order to log into MySQL to secure it, we’ll need the current
password for the root user. If you’ve just installed MySQL, and
you haven’t set the root password yet, the password will be blank,
so you should just press enter here.
Enter current password for root (enter for none):
OK, successfully used password, moving on…
Setting the root password ensures that nobody can log into the MySQL
root user without the proper authorisation.
Set root password? [Y/n] y
New password:
Re-enter new password:
Password updated successfully!
Reloading privilege tables..
… Success!
By default, a MySQL installation has an anonymous user, allowing anyone
to log into MySQL without having to have a user account created for
them. This is intended only for testing, and to make the installation
go a bit smoother. You should remove them before moving into a
production environment.
Remove anonymous users? [Y/n] y
… Success!
Normally, root should only be allowed to connect from ‘localhost’. This
ensures that someone cannot guess at the root password from the network.
Disallow root login remotely? [Y/n] y
… Success!
By default, MySQL comes with a database named ‘test’ that anyone can
access. This is also intended only for testing, and should be removed
before moving into a production environment.
Remove test database and access to it? [Y/n] y
- Dropping test database…
… Success!
- Removing privileges on test database…
… Success!
Reloading the privilege tables will ensure that all changes made so far
will take effect immediately.
Reload privilege tables now? [Y/n] y
… Success!
Cleaning up…
All done! If you’ve completed all of the above steps, your MySQL
installation should now be secure.
Thanks for using MySQL!
Stopping MySQL: [ OK ]
Starting MySQL: [ OK ]
Prerequsite for ConVirt Management Server (CMS) installed.
mysql初始化成功,
install_dependencies的整个初始化过程被我记录到了dependencies.log中,用于之后的分析。有兴趣可以下载后看一下。
安装 convrit软件
./install_convirt
ConVirt Setup Done…
cd /root/convirt
./convirt-ctl start
convirt已经安装完成了,convirt日志,在这个过程中convirt会能过ssh-keygen 生成root用户的key文件,生成的这个key文件在以后的多服务器控制和VNC端口转发都会用到。
[root@xencms .ssh]# ls
cms_id_rsa cms_id_rsa.pub
[root@xencms .ssh]# pwd
/root/.ssh
启动convirt服务
cd /root/convirt
./convirt-ctl start
使用netstat -nl我们应该看到8081端口,如果服务不能正常启动,在/root/convirt目录下有两个日志文件
[root@xencms convirt]# cat convirt.log
[root@xencms convirt]# cat paster.log
convirt.log中记录的是convirt程序的运行日志
paster.log向是一个http的acsess日志,convirt使用的是tg2env做为http服务。
[root@xencms convirt]# netstat -nlp
tcp 0 0 10.0.121.8:8081 0.0.0.0:* LISTEN 10053/python
convirt安装完毕
访问http://IP:8081默认管理员admin密码admin
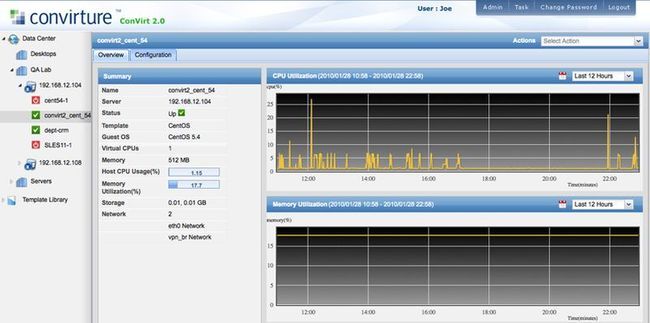
看一下我们正在使用中的界面,如下图:
管理其他的xen-server ,添加server 需要输入root密码和使用sshkey来进行添加,之后提示添加成功,没次重启xen-server的时候在convirt管理平台都会提示一个错误Exception: remote_exec_cmd :Could not create channel,连不上xen-server服务器,这是需要注意的是,要在convirt管理平台上重启这个管理平台即可。
end


