Micro Service工具集之Swagger:可测试的样式化API文档
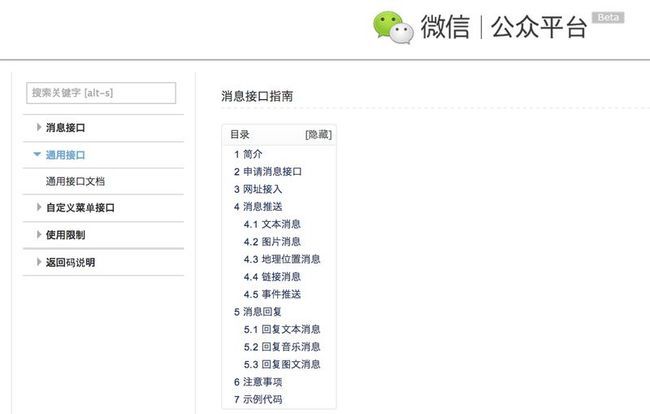
在我之前的一篇博文中,介绍了Yammer开发团队贡献的开源微服务开发框架DropWizard(http://ningandjiao.iteye.com/blog/1766498),有了服务之后,开发者最关心的事情是什么呢? 就是有人用你的服务。而开发者使用一个服务之前,首先需要知道的是该服务的API,目前几乎所有的开放平台都是把API以文档的形式放在网站上,如下:


不知道有没有开发人员和我一样,有时对一些API说明的理解比较模糊,总想着能直接验证一下自己的理解就好了,而不是需要去项目写测试代码来验证自己的想法。即API文档应具备直接执行能力。 Swagger就是这样的一个利器,其实,Swagger本身的目标比上面描述的要大很多:“Swagger is a specification and complete framework implementation for describing, producing, consuming, and visualizing RESTful web services. ”。但是,本文中只想聊聊如何通过Swagger为已有项目的生成具备执行能力的样式化API文档。
为已存在的项目添加Swagger(以DropWizard为例)
首先,为项目引入Swagger依赖包
然后,把Swagger加入DropWizard的Service中:
接着,给开放API的Resource类加上API Annotation,这样上一步配置的Scanner就能够扫描到该Resource开放的API了。
在Swagger Annotation中:
再接着,为项目的Model对象添加Swagger Annotation,这样Swagger Scanner可以获取更多关于Model对象的信息。
通过上面的步骤,项目已经具备了提供Swagger格式的API信息的能力,接下来,我们把这些信息和Swagger UI集成,以非常美观,实用的方式把这些API信息展示出来。
和Swagger UI的集成
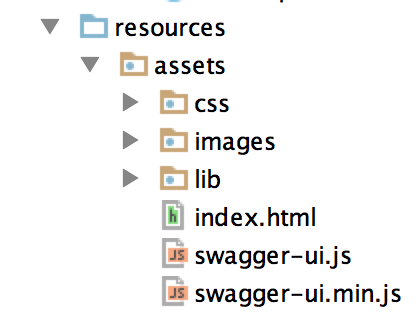
首先,从github(https://github.com/wordnik/swagger-ui)上下载Swagger-UI, 把该项目dist目录下的内容拷贝到项目的resources的目录assets下。

然后,修改index.html, 把Swagger UI对象中的URL替换为自己的API路径。
最后,为了能访问到该页面,还需要在Service的Initialize方法中,添加AssetsBundle,
最后的效果图:


不知道有没有开发人员和我一样,有时对一些API说明的理解比较模糊,总想着能直接验证一下自己的理解就好了,而不是需要去项目写测试代码来验证自己的想法。即API文档应具备直接执行能力。 Swagger就是这样的一个利器,其实,Swagger本身的目标比上面描述的要大很多:“Swagger is a specification and complete framework implementation for describing, producing, consuming, and visualizing RESTful web services. ”。但是,本文中只想聊聊如何通过Swagger为已有项目的生成具备执行能力的样式化API文档。
为已存在的项目添加Swagger(以DropWizard为例)
首先,为项目引入Swagger依赖包
'com.wordnik:swagger-jaxrs_2.9.1:1.3.0'
然后,把Swagger加入DropWizard的Service中:
private void initSwaggerConfig(Environment environment) {
        // Swagger Resource
        environment.addResource(new ApiListingResourceJSON());

        // Swagger providers
        environment.addProvider(new ApiDeclarationProvider());
        environment.addProvider(new ResourceListingProvider());

        // Swagger Scanner, which finds all the resources for @Api Annotations
        ScannerFactory.setScanner(new DefaultJaxrsScanner());

        // Add the reader, which scans the resources and extracts the resource information
        ClassReaders.setReader(new DefaultJaxrsApiReader());

        //Config API information. this information will show on the Swagger UI page
        SwaggerConfig config = ConfigFactory.config();
        config.setApiVersion("0.1");
        config.setApiPath("/api/api-docs"); //Swagger UI 默认把API信息显示在base_path/api-docs下
        config.setBasePath("http://localhost:9090/api");
        config.setInfo(Option.apply(new ApiInfo("DropWizard Demo Swagger UI",
                "This is just a demo to show how to integrate Swagger UI with a dropwizard project.",
                null,
                "[email protected]",
                null,
                null)));
    }
接着,给开放API的Resource类加上API Annotation,这样上一步配置的Scanner就能够扫描到该Resource开放的API了。
@Path("/helloWorld")
@Api(value = "/helloWorld", description = "Greeting API", position = 1)
@Produces(APPLICATION_JSON)
public class HelloWorldResource {
    private final String template;
    private final String defaultName;
    private final AtomicLong counter;

    public HelloWorldResource(String template, String defaultName) {
        this.template = template;
        this.defaultName = defaultName;
        this.counter = new AtomicLong();
    }

    @GET
    @Path("/{name}")
    @ApiOperation(value = "Greeting by Name",
            notes = "Say hello to the people",
            response = SayingRepresentation.class,
            position = 0)
    @ApiResponses(value = {
            @ApiResponse(code = 400, message = "No Name Provided")
    })
    @Produces(APPLICATION_JSON)
    @Timed
    public SayingRepresentation sayHello(@ApiParam(value = "name for greeting", required = true) @PathParam("name") String name) {
        return new SayingRepresentation(counter.incrementAndGet(), String.format(template, name != null ? name : defaultName))
                ;
    }
}
在Swagger Annotation中:
- @API表示一个开放的API,可以通过description简要描述该API的功能。
- 在一个@API下,可有多个@ApiOperation,表示针对该API的CRUD操作。在ApiOperation Annotation中可以通过value,notes描述该操作的作用,response描述正常情况下该请求的返回对象类型。
- 在一个ApiOperation下,可以通过ApiResponses描述该API操作可能出现的异常情况。
- @ApiParam用于描述该API操作接受的参数类型
再接着,为项目的Model对象添加Swagger Annotation,这样Swagger Scanner可以获取更多关于Model对象的信息。
@ApiModel(value = "A SayingRepresentation is a representation of greeting")
@JsonSerialize(include = JsonSerialize.Inclusion.NON_NULL)
public class SayingRepresentation {
    private long id;
    @ApiModelProperty(value = "greeting content", required = true)
    private String content;

    public SayingRepresentation(long id, String content) {
        this.id = id;
        this.content = content;
    }

    public long getId() {
        return id;
    }

    public String getContent() {
        return content;
    }
}
通过上面的步骤,项目已经具备了提供Swagger格式的API信息的能力,接下来,我们把这些信息和Swagger UI集成,以非常美观,实用的方式把这些API信息展示出来。
和Swagger UI的集成
首先,从github(https://github.com/wordnik/swagger-ui)上下载Swagger-UI, 把该项目dist目录下的内容拷贝到项目的resources的目录assets下。

然后,修改index.html, 把Swagger UI对象中的URL替换为自己的API路径。
 window.swaggerUi = new SwaggerUi({
      url: "/api/api-docs",
      dom_id: "swagger-ui-container",
最后,为了能访问到该页面,还需要在Service的Initialize方法中,添加AssetsBundle,
public void initialize(Bootstrap<HelloWorldConfiguration> bootstrap) {
        //指定配置文件的名字
        bootstrap.setName("helloWorld");
        bootstrap.addBundle(new AssetsBundle("/assets", "/", "index.html"));
    }
最后的效果图:

