JIRA5.0.2与Crowd2.4.2应用集成
新版本jira、crowd集成与以往有些不一样,首先就是配置文件的修改没有以前多了,然后就是在jira内需要 设置一个应用目录,记得这个简单的地方也许就不好找。这篇文章你就多看点吧。的确写的很不好,不过如果你以前对jira有大致的了解,那看我很不好的文采 文章,就能相对简单了。
1. 创建Directories,一般把Name改写,直接默认就可以了

2. 添加组、用户等信息,应该就不用说了,如果不清楚,可以查看《Jira与crowd通信设置 》 http://kinggoo.com/app-jira-crowd-confluence-ldap.htm 或者看下面的简单步骤。
记得,如果是jira与crowd集成那还需要在jira内设置开外部密码、外部用户管理,以及API(当然这是以前的做法了)
1) 一些配置的修改:
|
1
2
3
|
cp
/
usr
/
local
/
crowd
/
client
/
crowd
-
integration
-
client
-
2.4.2.jar
/
usr
/
local
/
jira
/
atlassian
-
jira
/
WEB
-
INF
/
lib
/
cp
/
usr
/
local
/
crowd
/
client
/
conf
/
crowd
.properties
/
usr
/
local
/
jira
/
atlassian
-
jira
/
WEB
-
INF
/
classes
/
cp
/
usr
/
local
/
crowd
/
client
/
conf
/
crowd
-
ehcache
.xml
/
usr
/
local
/
jira
/
atlassian
-
jira
/
WEB
-
INF
/
classes
/
|
1. 修改配置文件crowd.properties
|
1
2
3
4
5
6
7
8
9
|
[
root
@
kinggoo
conf
]
# vim ~/guanli/jira/atlassian-jira/WEB-INF/classes/crowd.properties
application
.name
kinggoo
-
jira
#在crowd中建立应用名称(小写)
application
.password
arij
#在crowd中建立这个应用时的密码
application
.login
.url
http
:
//localhost:8095/crowd/console/
crowd
.server
.url
http
:
//localhost:8095/crowd/services/
session
.isauthenticated
session
.isauthenticated
session
.tokenkey
session
.tokenkey
session
.validationinterval
0
session
.lastvalidation
session
.lastvalidation
|
2. 查看配置文件propertyset.xml
看此文件内是否有添加下面内容,如无,则添加
|
1
|
<
propertyset
name
=
"crowd"
class
=
"com.atlassian.crowd.integration.osuser.CrowdPropertySet"
/
>
|
3. 修改配置文件seraph-config.xml
|
1
2
3
4
5
6
7
8
9
10
11
|
<
!
--
CROWD
:
START
-
If
enabling
Crowd
SSO
integration
uncomment
the
following
JIRAAuthenticator
and
comment
out
the
DefaultAuthen
ticator
below
--
>
去掉此处注释
<
authenticator
class
=
"com.atlassian.crowd.integration.seraph.v22.JIRAAuthenticator"
/
>
<
!
--
CROWD
:
END
--
>
<
--
--
--
--
--
--
--
--
--
- 下面是添加注释的
--
--
--
--
--
--
--
>
<
!
--
CROWD
:
START
-
The
authenticator
below
here
will
need
to
be
commented
out
for
Crowd
SSO
integration
--
>
<
! —在此处添加此处注释
<
authenticator
class
=
"com.atlassian.jira.security.login.JiraOsUserAuthenticator"
/
>
--
>
<
!
--
CROWD
:
END
--
>
|
好如果都配置完毕,那就请重启jira服务吧!启动好后如果后台日志没问题
Jira内创建目录:
a) 使用安装jira时创建的帐号登陆jira,接着点击页面右上角的Administrators,这时会让你再次输入密码;
b) 在页面USER标签里找到User Directories 并点击进入;
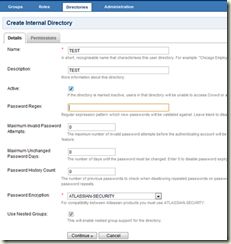
c) 再次点击Add Directories 空件,如图第一、第二个图是点击后样式。
d) 我现在选择,Crowd的下拉菜单。当然,如果你直接就做的ldap的那你可以选择;
e) 不多说,看图,同事间隔是亮点
f) 配置好后,保存,这时你在看你的用户,是不是已经从crowd内同步过来了
随便拿个帐号实验一下,在crowd内添加修改等!


