Spring3 MVC REST + JPA2 (Hibernate 3.6.1) 构建投票系统 - 2.Spring MVC REST
前言 :本文只阐述如何使用Spring MVC做REST应用,至于Spring如何实现,或者应用的易用性和时候合理暂且不作深入讨论。
Spring 3 MVC REST使用的是Spring提供的org.springframework.web.servlet.DispatcherServlet来完成Controller的跳转控制,在Web.xml需要做如下配置
    <!-- 声明名字为vote的DispatcherServlet
    这个名字相当重要,Spring会解析WEB-INF下的{servlet-name}-Servlet.xml文件 -->
    <servlet>
        <servlet-name>vote</servlet-name>
        <servlet-class>org.springframework.web.servlet.DispatcherServlet</servlet-class>
        <load-on-startup>1</load-on-startup>
    </servlet>

    <!-- 声明vote servlet 的范围 -->
    <servlet-mapping>
        <servlet-name>vote</servlet-name>
        <url-pattern>/</url-pattern>
    </servlet-mapping>

    <!-- Filter the resource for SPRING 3 -->
    <servlet-mapping>
        <servlet-name>default</servlet-name>
        <url-pattern>*.css</url-pattern>
        <url-pattern>*.gif</url-pattern>
        <url-pattern>*.js</url-pattern>
        <url-pattern>*.png</url-pattern>
    </servlet-mapping>
由于这里定义了DispatcherServlet的名字为vote,于是我们在WEB-INF目录下创建一个vote-servlet.xml文件
这个文件就是Spring初始化是读取并解析的开始
<?xml version="1.0" encoding="UTF-8"?>
<beans xmlns="http://www.springframework.org/schema/beans"
	xmlns:xsi="http://www.w3.org/2001/XMLSchema-instance"
	xmlns:p="http://www.springframework.org/schema/p"
	xmlns:context="http://www.springframework.org/schema/context"
	xmlns:mvc="http://www.springframework.org/schema/mvc"
	xmlns:util="http://www.springframework.org/schema/util"
	xsi:schemaLocation="http://www.springframework.org/schema/beans http://www.springframework.org/schema/beans/spring-beans-3.0.xsd
		http://www.springframework.org/schema/context http://www.springframework.org/schema/context/spring-context-3.0.xsd
		http://www.springframework.org/schema/mvc http://www.springframework.org/schema/mvc/spring-mvc-3.0.xsd
		http://www.springframework.org/schema/util http://www.springframework.org/schema/util/spring-util-3.0.xsd">

	<mvc:annotation-driven />
	<!-- Auto scan, declare the location path -->
	<context:component-scan base-package="ben.vote" />
	<!-- Support @AspectJ tag-->
	<!-- <aop:aspectj-autoproxy/> -->

	<!-- Using annontation -->
	<bean class="org.springframework.web.servlet.mvc.annotation.AnnotationMethodHandlerAdapter" />

	<!-- 总错误处理-->
	<bean id="exceptionResolver" class="org.springframework.web.servlet.handler.SimpleMappingExceptionResolver">
		<property name="defaultErrorView">
			<value>/error/error</value>
		</property>
		<property name="defaultStatusCode">
			<value>500</value>
		</property>
		<property name="warnLogCategory">
			<value>org.springframework.web.servlet.handler.SimpleMappingExceptionResolver</value>
		</property>
	</bean>


	<!-- Resolve the view, declare the prefix and suffix -->
	<bean class="org.springframework.web.servlet.view.InternalResourceViewResolver"
		p:prefix="/view" p:suffix=".jsp"/>

</beans>
- Spring IoC配置我们采用annotation来管理
- Spring扫描的package我们声明为ben.vote,也就是说这个package下的class我们都会去扫描是否有声明为Controller
- 默认的视图将放在/view目录下,后缀为.jsp
完成这一步我们基本上完成了Spring MVC REST需要配置的内容,接下来我们开始编写我们第一个Controller,这里我们用一个RestDemo来完成:
package ben.vote.demo;

import org.springframework.stereotype.Controller;
import org.springframework.web.bind.annotation.RequestMapping;
import org.springframework.web.bind.annotation.RequestMethod;

@Controller
public class RestDemo {
	@RequestMapping(value="/demo", method=RequestMethod.GET)
	public String demo(){
		return "/demo/view";
	}
}
另外需要在/view/demo目录下添加一个view页面
<%@ page contentType="text/html;charset=UTF-8" language="java"%>
<%@ page import="java.lang.Exception"%>
<!DOCTYPE html PUBLIC "-//W3C//DTD HTML 4.01 Transitional//EN" "http://www.w3.org/TR/html4/loose.dtd">
<html>
<head>
<%@include file="../include/INC.HEADER.jspf" %>
</head>
<body>
	<div class="titlebar">
		<span class="title">Vote</span>
		<span class="sub-title"> - Demo</span>
	</div>
	<hr/>
	<div>Demo view</div>
</body>
</html>
项目的文件大致如下
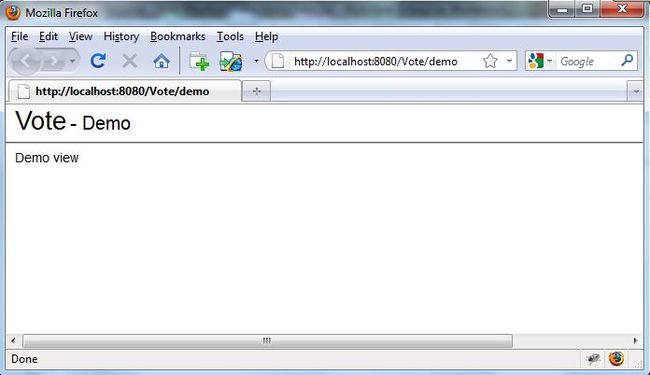
我们将这个项目部署到tomcat并启动服务器,访问链接http://localhost:8080/Vote/demo,如果看到如下页面,说明我们Spring MVC REST配置成功了
完整项目的文件请参考附件Vote.rar,依赖包这里就不作提供,大家可以google一下基本上知道需要哪些jar了
以上基本上描述了如何构建Spring MVC REST的web项目,需要配置的地方不多,只需要稍微调试调试就可以做到了。

