断续续学习,待到完全沉淀后再慢悠悠的做好记录。
这篇是angularJs中的directive,本文主要研究directive中的require、link、scope,不涉及基本属性。目录如下:
内置指令
自定义指令
指令实例
属性解释
编译过程
(一)内置指令
在angularJs应用中,到处可见指令(内置)。如:ng-app(标记angularJs开始管理的范围)、ng-controller(controller管理边界)、ng-model(双向数据绑定)、ng-repeat(遍历且克隆)、ng-class(自定义class样式)等。具体所有内置指令可见源码。
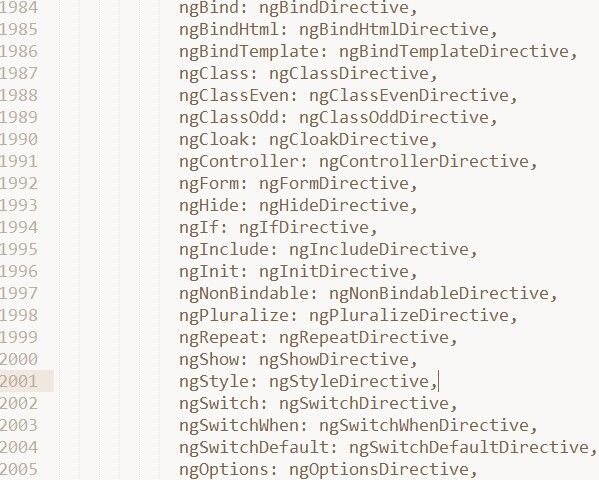
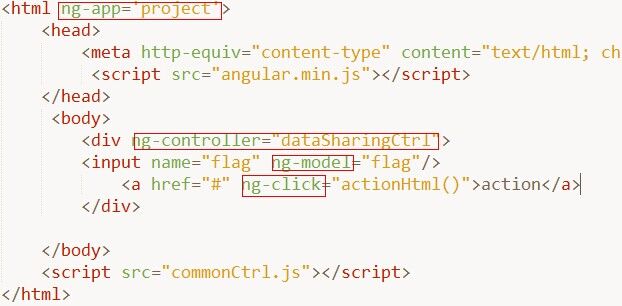
内置指令,在使用时只需根据需求找出对应的指令,添加在html应用该指令的位置即可。如下图是最基本的应用:
(二)自定义指令
在编写自定义指令之前,你必须使用过angularJs一段时间,且对于指令(directive)也做过系列的学习,否则你会无从下手。
这时,你需先明白以下三点概念。
指令的解释:
本身就是个替换的过程 {compile(编译--负责编译与替换)和link(链接--进行数据绑定)}
自定义指令的使用情景:
1.需修改DOM(无内置指令支持时)
2.需自定义标签
自定义指令的作用:
把我们自定义的语义化标签替换成浏览器能够认识的HTML标签
假设以上OK,那下面便是coding部分了。最近感悟:看三千行代码,不如敲一个实例(不指copy)。
(三)指令示例
3.1----------helloDirective
directive的定义同controller、service一样,通过module创建。
var appModule = angular.module('project', []);
appModule.directive('demoDirective', ['', function(){
    // Runs during compile
    return {
        // name: '',
        // priority: 1,
        // terminal: true,
        // scope: {}, // {} = isolate, true = child, false/undefined = no change
        // controller: function($scope, $element, $attrs, $transclude) {},
        // require: 'ngModel', // Array = multiple requires, ? = optional, ^ = check parent elements
        // restrict: 'A', // E = Element, A = Attribute, C = Class, M = Comment
        // template: '',
        // templateUrl: '',
        // replace: true,
        // transclude: true,
        // compile: function(tElement, tAttrs, function transclude(function(scope, cloneLinkingFn){ return function linking(scope, elm, attrs){}})),
        link: function($scope, iElm, iAttrs, controller) {

        }
    };
}]);
还是先列出helloWord应用。
<html ng-app='project'>
	<head>
        <meta http-equiv="content-type" content="text/html; charset=utf-8" />
    </head>
    <body>
        <hello>
            <br/>
	    <sapn>content</sapn><br/>
	</hello>
    </body>
    <script src="angular.min.js"></script>
    <script src="demoStep1Direc.js"></script>
</html>
var appModule = angular.module('project', []);

appModule.directive('hello', function() {
    return {
        restrict: 'EA',
        template: '<div>Hi directive<sapn ng-transclude></sapn></div>',
        replace: true,
        transclude: true,
        priority: 0,
        scope: true
    };
});
在chrome中运行如下图:
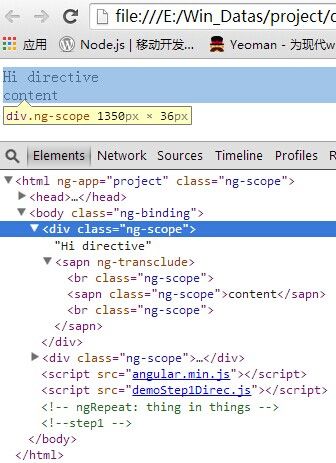
你会发现,在html中<hello>这个自定义标签,已变成<div>,即html标签。这都是directive中的template与replace属性的功劳,解释:
如replace 为true,则将模版(template)内容替换当前的HTML元素,并将原来元素的属性、class一并迁移。
说到template,就得提到另一个templateUrl。同template类似。加载url(*.html)。注:此模板加载是异步,compilation/linking都被搁置,待加载完后执行。
3.2------------------addBook
综合示例,包含tansclude、directive中scope作用域、controller在多指令中共享。
下面html代码中定义了两个input,用于用户输入bookInfo。
<html ng-app='project'>
    <head>
        <meta http-equiv="content-type" content="text/html; charset=utf-8" />
         <script src="angular.min.js"></script>
    </head>
     <body ng-controller='books.list' >
     书名:<input type="text" ng-model="bookName" value="" required/>
     作者:<input type="text" ng-model="bookAuthor" value="" />
        <add></add>
        <edit>
            <div info book-List="bookList" demo-Name="单向绑定"></div>
        </edit>
    </body>
    <script src="demoCtrl.js"></script>
</html>
其中
<add></add>
是个自定义指令,用于保存。
demoCtrl.js-service :
初次进入页面时的book测试数据,与add、delete操作方法。
appModule.service('bookService', ['$rootScope',
  function($rootScope) {
    return {
      books: [{
        name: 'javaScript编程艺术',
        author: '艺术'
      }, {
        name: 'AngularJS in Action',
        author: 'Action'
      }, {
        name: 'The Beginner’s guide to AngularJS',
        author: 'AngularJS'
      }],
      addBook: function(book) {
        this.books.push(book);
        $rootScope.$broadcast('books.update');
      },
      removeBook: function(book) {
        this.books.splice(book, 1);
        $rootScope.$broadcast('books.update');
      }

    }
  }
]);
addDirective
appModule.controller('books.list', ['$scope', 'bookService',
  function(scope, bookService) {
    scope.bookName = "", scope.bookAuthor = "";
    //监听值改变,就将bookList填充
    scope.$on('books.update', function(event) {
      scope.bookList = bookService.books;
    });
    scope.bookList = bookService.books;
  }
]);

appModule.directive('add', function(bookService) {
  return {
    restrict: 'EA',
    replace: true,
    transclude: true,
    template: '<input ng-transclude type="button" value="addBook"/>',
    link: function(scope, element, attrs) {
      element.bind("click", function() {
        bookService.addBook({
          name: scope.bookName,
          author: scope.bookAuthor
        });
        scope.$apply(); //通知angularJs进行双向绑定
      });
    }
  }
});
上述add指令中,对当前元素进行绑定点击事件,即添加用户输入的图书信息。在click事件里调用公共的 service里的addBook()。
这时我们需将图书展示在页面中。
<div info book-List="bookList" demo-Name="单向绑定"></div>
其中info也是个directive,里面替换的便是图书列表数据。后面两个属性在下面阐释。
appModule.directive('edit', function(bookService) {
  return {
    restrict: 'EA',
    replace: true,
    transclude: true,
    template: '<div ng-transclude></div>',
    controller: function() {
      this.removeBook = function(param) {
        bookService.removeBook(param);
      }
    }
  }
});

appModule.directive('info', function(bookService) {
  return {
    restrict: 'EA',
    replace: true,
    require: '^edit',
    scope: {
      demoName: '@',
      bookList: '='
    },
    template: '<ul ng-repeat="bk in bookList">' +
      '<li ng-mousedown="showEdit()">{{bk.name}}' +
      '<span ng-show="bFlag">    ' +
      '<input type="button" value="delete"ng-mousedown="deleteBook(this.bk)"/></span></li>' +
      '<li>{{bk.author}}</li></ul>',
    link: function(scope, element, attrs, editCtrl) {
      scope.bFlag = false;
      scope.showEdit = function(param) {
        scope.bFlag = !scope.bFlag;
      },
      scope.deleteBook = function(param) {
        editCtrl.removeBook(scope);
      }
    }
  }
});
上指令中涉及的scope作用域,在此说明。 属性解释-scope
scope: {
      demoName: '@',
      bookList: '='
    }
参考下图中scope取值说明:

在此demo中,定义了一个单向绑定demoName:<div info book-List="bookList" demo-Name="单向绑定"></div>
bookList为一个双向绑定:<div info book-List="bookList" demo-Name="单向绑定"></div>,其中bookList为父scope中的变量,指定[=],达到双向绑定
属性解释-require 通过require让多个指令共享ctrl数据
在上述代码中,infodirective通过require属性指定,共享editdirective中的controller。require属性分别有:
 可看到,在infodirective中的link函数参数里便加入了editCtrl的引用,在下面的deleteBook函数中接着调用该ctrl的方法。editCtrl.removeBook(scope)。
在editdirective中的controller里,通过this对外暴露该接口,使得共享该ctrl的可以直接使用。
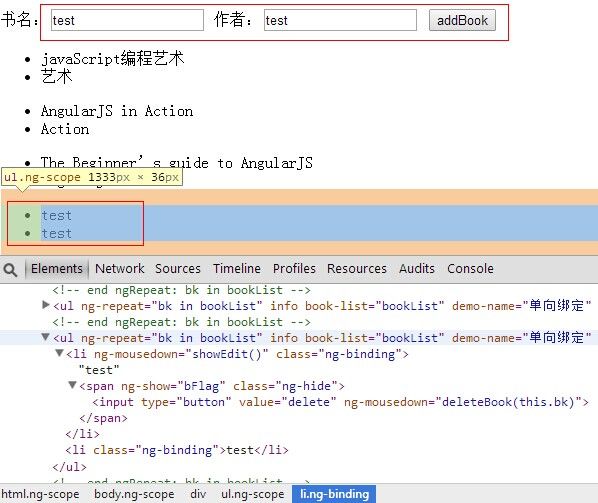
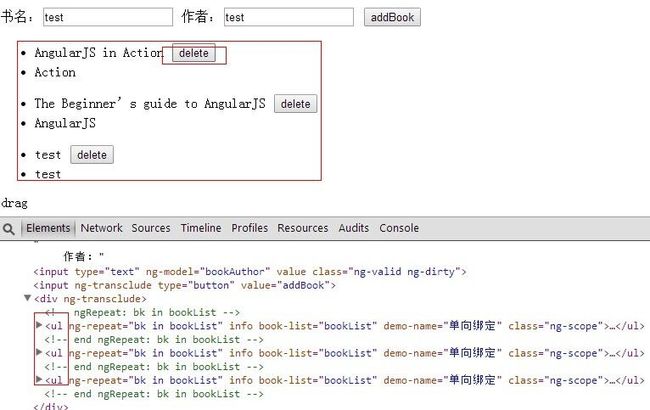
到这里,上张效果图。addBook
deleteBook
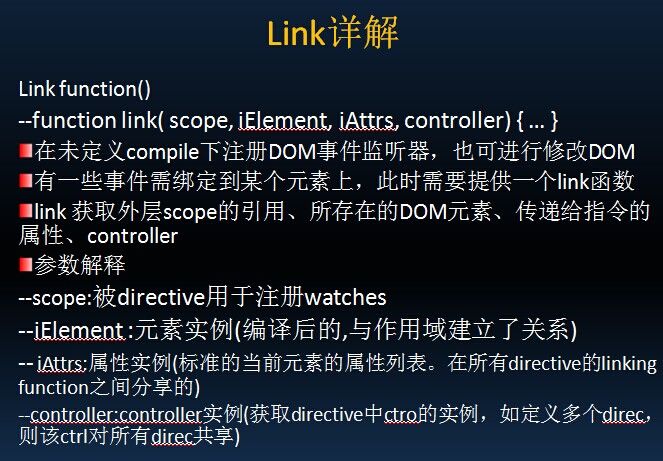
属性解释-link
最后,附上指令的编译流程。从网友博客中看到,结合自己理解。
<1>.ng框架在页面载入完后根据ng-app划定的作用域来调用$compile服务进行编译。
清点作用域内的DOM元素:看哪些元素上使用了指令(如<div ng-modle=”m”></div>)或哪些元素本身就是个指令(如<mydierc></mydirec>),
或使用了插值指令( {{}}也是一种指令,叫interpolation directive),列好清单。
根据指令的优先级(priority)排列,还根据指令的配置参数(template,repalce,transclude等)进行转换DOM。
<2>.开始按顺序执行指令的compile函数,该函数内可访问DOM节点进行DOM转换。执行完后返回link(这些link会被$compile汇总,即合体)。
<3>.把view和scope链接起来(即数据绑定)在DOM上注册监听器动态修改scope中的数据,或用$watchs监听scope中的变量来修改DOM,从而双向绑定。
<4>.指令中的link函数在compile函数执行后返回link,但若compile一开始就未配置,就无从返回link。
这时$compile就用当前指令配置的link执行,故此link可访问scope/DOM。
---------------------------------------------分割线-------------------------------------------
写在落尾处,手执键盘,实在杂乱,只差全贴图而不言,望后续更有耐心。假有看官略瞟一二,实属在下荣幸,另,文章杂乱还请多多海涵。


