java学习——画图板
[size=large][/size]
姗姗迟来的画图板总结啊~~其实早就想写了,但是本来是想通过画图板来练习我参数传递的本领的,但因为各阶段的学习及学校的一些事就耽误了这么长时间了。。这次来做个总结的开头吧,之后有时间定会慢慢再完善的。
先让大家看看我的成果~
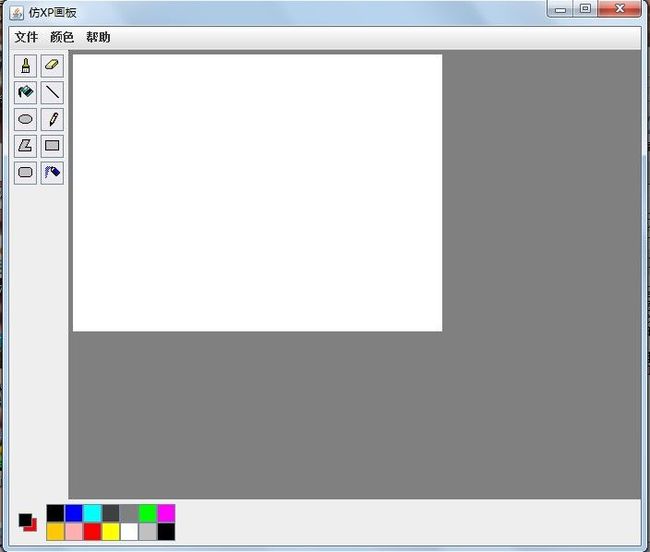
大家可以看到画板实现了较多的功能,直线、矩形、多边形、椭圆、铅笔、橡皮等功能都实现了,还有14种颜色可以供我们使用。
下面来为大家简略讲解下我的画图板制作课程:
一、界面的生成
首先,当然是先实例化一个窗体对象出来,设置好窗体的各种属性:标题、大小、背景颜色等。
接着,我们可以看到,在整个的窗体上大致分成了三部分。其实这就是三个面板对象,分别是工具栏面板、画图面板、颜色面板。然后我们可以看到,在颜色面板的左下方,还有一个很小的取色面板,就相当于现实生活中画家手中的那个取色板,用左键点某个颜色,取色板后面的小按钮就会变为该颜色,如果是用右键点某个颜色,取色板前面的小按钮就会变为该颜色。还有上面有一行菜单栏,但里面具体的选项功能我都没有实现出来...很是惭愧...下面我附上这一块的代码,应该能详细描述下这些功能是怎么实现的。
下面是工具栏面板类的代码:
接着是颜色面板类的代码:
二、监听器的添加
我觉得画图板的最大难点就是在于这一块了,监听器对于之前添加上的面板和窗体来说,就像赋予了它们生命,使它们能动起来。这里会用到两种监听器,一种是动作监听器,是添加到工具栏上各种工具按钮上和颜色面板上各种颜色按钮上。还有另一种是鼠标监听器,鼠标监听器主要是用于拿鼠标绘图时,各种图形的绘制的实现。动作监听器已经在上面两个颜色面板和工具栏面板里实现了,下面我们来看看鼠标监听器和画图面板类的代码。
大家可以看到,鼠标监听器里的各种图形的绘制方法可以说就是画图板的大脑了,都是关键,大家可以仔细研究下。
另外还有一个难点在于画图板的重绘,我会再细细道来的~
姗姗迟来的画图板总结啊~~其实早就想写了,但是本来是想通过画图板来练习我参数传递的本领的,但因为各阶段的学习及学校的一些事就耽误了这么长时间了。。这次来做个总结的开头吧,之后有时间定会慢慢再完善的。
先让大家看看我的成果~
大家可以看到画板实现了较多的功能,直线、矩形、多边形、椭圆、铅笔、橡皮等功能都实现了,还有14种颜色可以供我们使用。
下面来为大家简略讲解下我的画图板制作课程:
一、界面的生成
首先,当然是先实例化一个窗体对象出来,设置好窗体的各种属性:标题、大小、背景颜色等。
接着,我们可以看到,在整个的窗体上大致分成了三部分。其实这就是三个面板对象,分别是工具栏面板、画图面板、颜色面板。然后我们可以看到,在颜色面板的左下方,还有一个很小的取色面板,就相当于现实生活中画家手中的那个取色板,用左键点某个颜色,取色板后面的小按钮就会变为该颜色,如果是用右键点某个颜色,取色板前面的小按钮就会变为该颜色。还有上面有一行菜单栏,但里面具体的选项功能我都没有实现出来...很是惭愧...下面我附上这一块的代码,应该能详细描述下这些功能是怎么实现的。
package Simple_Draw;

import java.awt.BorderLayout;
import java.awt.Graphics;

import javax.swing.JFrame;
import javax.swing.JMenu;
import javax.swing.JMenuBar;
import javax.swing.JMenuItem;
import javax.swing.UIManager;

/**
 * 主函数类
 *
 * @author 王成威
 *
 */
public class Draw_xp extends JFrame {


	/**
	 * 主函数
	 *
	 * @param args
	 */
	public static void main(String args[]) {
		Draw_xp dp = new Draw_xp();
		dp.showFrame();
	}

	private void showFrame() {
		this.setTitle("仿XP画板");
		this.setSize(700, 600);
		this.setDefaultCloseOperation(3);
		this.setLocationRelativeTo(null);

		// 创建工具面板对象
		Tool_panel tpl = new Tool_panel();
		this.add(tpl, BorderLayout.WEST);

		Color_panel cpl = new Color_panel();
		this.add(cpl, BorderLayout.SOUTH);

		Draw_panel dpl = new Draw_panel(tpl);
		this.add(dpl, BorderLayout.CENTER);

		// 调用创建菜单栏的方法,获取到菜单栏的对象
		JMenuBar jmb = createMenuBar();
		// 将菜单栏的对象设置为窗体的菜单栏
		this.setJMenuBar(jmb);

		this.setVisible(true);
/**
	 * 创建菜单栏的方法
	 *
	 * @return 返回JMenuBar的对象
	 */
	private JMenuBar createMenuBar() {
		// 实例化一个JMenuBar的对象
		JMenuBar jmb = new JMenuBar();
		// 菜单项的数组
		String[] arrayMenu = { "文件", "颜色", "帮助" };
		// 菜单子项的数组
		String[][] arrayMenuItem = { { "新建", "保存", "打开", "退出" }, { "编辑颜色" },
				{ "帮助主题", "关于画图" } };
		// 根据数据循环来创建菜单栏
		for (int i = 0; i < arrayMenu.length; i++) {
			// 实例化一个JMenu的对象
			JMenu menu = new JMenu(arrayMenu[i]);
			// 将menu添加到jmb对象中
			jmb.add(menu);
			for (int j = 0; j < arrayMenuItem[i].length; j++) {
				// 实例化JMenuItem的对象
				JMenuItem jmi = new JMenuItem(arrayMenuItem[i][j]);
				// 将jmi对象添加到menu中
				menu.add(jmi);
			}
		}
		return jmb;
	}
下面是工具栏面板类的代码:
package Simple_Draw;

import java.awt.Color;
import java.awt.Dimension;
import java.awt.FlowLayout;
import java.awt.Graphics;
import java.awt.GridLayout;
import java.awt.Image;
import java.awt.event.ActionEvent;
import java.awt.event.ActionListener;

import javax.swing.Icon;
import javax.swing.ImageIcon;
import javax.swing.JButton;
import javax.swing.JPanel;

/**
 * 工具类
 *
 * @author 王成威
 *
 */
public class Tool_panel extends JPanel {
	//声明一个存储用户选择的图形属性
	public String shape_command = "line";
	private Graphics g;

	// 构造方法
	public Tool_panel() {
		show();// 调用方法
	}

	// 制作工具栏的方法
	public void show() {
		// 实例化一个JPanel对象,充当容器来添加工具。
		JPanel panel = new JPanel();
		// 设置面板的布局为网格布局
		panel.setLayout(new GridLayout(5, 2, 4, 4));
		// 定义一个数组。
		String[] array = { "brush.jpg", "easer.jpg",
				"fillRect.jpg", "line.jpg", "oval.jpg",
				"pencil.jpg", "polygon.jpg", "rect.jpg",
				"roundrect.jpg", "spray.jpg" };
		// 循环创建按钮对象
		for (int i = 0; i < array.length; i++) {
			// 实例化一个ImageIcon的对象
		//	ImageIcon image = new ImageIcon(array[i]);
			Icon image = new ImageIcon(this.getClass().getResource(
					array[i]));
			// 实例化按钮对象,并设置按钮的图标
			JButton btn = new JButton(image);
			// 设置按钮的大小
			btn.setPreferredSize(new Dimension(25, 25));
			//获取到唯一的动作命令(截取图片的名字)(这里特别再注意下是怎么弄的,这是专门用于截取图片动作命令的方法)
			String fileName = array[i].substring(array[i].indexOf("/")+1, array[i].lastIndexOf(".jpg"));
			//设置按钮的动作命令值
			btn.setActionCommand(fileName);
			//设置按钮的动作命令监听器方法,绑定事件处理类的对象tool_listener
			btn.addActionListener(tool_listener);
			// 将按钮添加到面板上
			panel.add(btn);
			// 设置Tool_panel的布局为流式布局布局
			this.setLayout(new FlowLayout());
		}
		// 将panel添加到Tool_panel上
		this.add(panel);
		// 设置工具栏颜色
		this.setBackground(null);
	}
	/**
	 * 使用匿名内部类来实现动作事件处理接口add
	 */
	private ActionListener tool_listener = new ActionListener() {
		/**
		 * 事件处理方法
		 */
		public void actionPerformed(ActionEvent e) {
			//将按钮上的动作命令值获取到,存储到属性shape_command中
			shape_command =e.getActionCommand();
		}
	};
}
接着是颜色面板类的代码:
package Simple_Draw;

/**
 * 颜色类
 */
import java.awt.Color;
import java.awt.Dimension;
import java.awt.FlowLayout;
import java.awt.GridLayout;
import java.awt.event.MouseAdapter;
import java.awt.event.MouseEvent;

import javax.swing.JButton;
import javax.swing.JPanel;

public class Color_panel extends JPanel {
	//定义存储前景色和背景色的颜色属性
	public Color bcolor = Color.WHITE,fcolor = Color.BLACK;
	/**
	 * 构造方法(构造方法里面不能实例化对象)
	 */
	public Color_panel() {
		init();// 调用显示的方法
	}

	// 将颜色栏显示的方法
	private void init() {
		// 实例化一个panelFB对象
		JPanel panelFB = new JPanel();
		// 设置面板大小
		panelFB.setPreferredSize(new Dimension(30, 30));
		// 设置面板布局为空布局
		panelFB.setLayout(null);

		// 创建两个按钮(这里必须要定义为final类型,要控制其不能改变)
		final JButton btnF = new JButton();
		final JButton btnB = new JButton();

		// 设置颜色按钮的位置和大小。setBounds,记住,去查询下。
		btnF.setBounds(5, 5, 15, 15);
		btnB.setBounds(10, 10, 15, 15);
		// 设置颜色按钮的颜色
		btnF.setBackground(Color.black);
		btnB.setBackground(Color.red);
		// 将颜色按钮添加到面板上
		panelFB.add(btnF);
		panelFB.add(btnB);
		// 将可换颜色面板添加到总的颜色面板上
		this.add(panelFB);

		/**
		 * 实例化一个MouseAdapter抽象类的对象(匿名内部类)
		 */
		MouseAdapter ma = new MouseAdapter(){
			/**
			 * 鼠标按下时执行的方法
			 */
			public void mousePressed(MouseEvent e) {
				//获取到事件源对象 按钮(什么意思?问熊哥)
				JButton btn = (JButton)e.getSource();
				//判断当前点击的是否是左键,如果是则改变背景色,条件是e.getButton()返回的值是否为1
				if(e.getButton() == 1){
					//获取到按钮上的颜色了
					fcolor = btn.getBackground();
					//改变背景色按钮上的颜色
					btnF.setBackground(fcolor);
				}else if(e.getButton() == 3){//表示点击了右键
					//获取到按钮上的颜色了
					bcolor = btn.getBackground();
					//改变背景色按钮上的颜色
					btnB.setBackground(bcolor);
				}

			}
		};

		// 创建一个 可选颜色面板的对象
		JPanel panel1 = new JPanel();

		Color[] array = {Color.BLACK,Color.BLUE,Color.CYAN,Color.DARK_GRAY,
				Color.GRAY,Color.GREEN,Color.LIGHT_GRAY,Color.MAGENTA,Color.ORANGE,
				Color.PINK,Color.RED,Color.YELLOW,Color.WHITE,new Color(150,200,130),
				new Color(100,120,130),new Color(150,125,130),new Color(150,125,130),new Color(150,125,130),
				new Color(150,125,130),new Color(150,90,130),new Color(150,160,130),new Color(150,175,130),
				new Color(150,190,130),new Color(150,125,120),new Color(160,125,130),
				new Color(180,100,130),new Color(150,125,160),new Color(150,125,160) };

		for (int i = 0; i < array.length; i++) {
			// 创建颜色按钮对象
			JButton jbn = new JButton();
			// 设置颜色按钮大小,颜色
			jbn.setPreferredSize(new Dimension(20, 20));
			jbn.setBackground(array[i]);
			//给按钮添加鼠标监听器方法,绑定事件处理类的对象
			jbn.addMouseListener(ma);
			// 将按钮添加到可选颜色面板对象上
			panel1.add(jbn);

		}

		// 设置可选颜色面板上的布局为网格布局
		panel1.setLayout(new GridLayout(2, 14));
		// 设置为从左至右的流式布局
		this.setLayout(new FlowLayout(FlowLayout.LEFT));
		// 设置背景颜色
		this.setBackground(null);
		// 将可选颜色面板添加到颜色面板上
		this.add(panel1);

	}
}
二、监听器的添加
我觉得画图板的最大难点就是在于这一块了,监听器对于之前添加上的面板和窗体来说,就像赋予了它们生命,使它们能动起来。这里会用到两种监听器,一种是动作监听器,是添加到工具栏上各种工具按钮上和颜色面板上各种颜色按钮上。还有另一种是鼠标监听器,鼠标监听器主要是用于拿鼠标绘图时,各种图形的绘制的实现。动作监听器已经在上面两个颜色面板和工具栏面板里实现了,下面我们来看看鼠标监听器和画图面板类的代码。
package Simple_Draw;

import java.awt.Color;
import java.awt.Dimension;
import java.awt.FlowLayout;
import java.awt.Graphics;

import javax.swing.JPanel;

public class Draw_panel extends JPanel{

	// 创建一个面板对象
	public JPanel panel = new JPanel();
	public Tool_panel tp;
	/**
	 * 构造方法
	 */
	public Draw_panel(Tool_panel tp) {   //括号里面的参数到底什么时候要加,起了什么作用?为什么这里ab不用加进?!
		this.tp=tp;
		init();// 调用初始化面板的方法
	}

	private void init() {
		// 设置Draw_panel的布局为流式布局布局
		this.setLayout(new FlowLayout(FlowLayout.LEFT));
		//设置背景颜色
		this.setBackground(Color.GRAY);
		//设置背景颜色大小
		panel.setBackground(Color.WHITE);
		panel.setPreferredSize(new Dimension(400,300));
		// 将panel添加到Draw_panel上
		this.add(panel);
	}
	public void paint(Graphics g){
		super.paint(g);
		for(int i=1;i<MyMouseListener.array.length/4||i<MyMouseListener.array1.length/4;i++){
		    g.drawLine(MyMouseListener.array[4*i-4],MyMouseListener.array[4*i-3] ,MyMouseListener.array[4*i-2],MyMouseListener.array[4*i-1]);
		    g.drawOval(MyMouseListener.array1[4*i-4], MyMouseListener.array1[4*i-3],Math.abs(MyMouseListener.array1[4*i-4]-MyMouseListener.array1[4*i-2]), Math.abs(MyMouseListener.array1[4*i-3]-MyMouseListener.array1[4*i-1]));
		}


		for(int i=1;i<MyMouseListener.array2.length/4;i++){
				g.drawLine(MyMouseListener.array2[4*i-4],MyMouseListener.array2[4*i-3] ,MyMouseListener.array2[4*i-2],MyMouseListener.array2[4*i-1]);

			}
		}

}
package Simple_Draw;

/**
 * 鼠标监听器类
 */
import java.awt.BasicStroke;
import java.awt.Color;
import java.awt.Graphics;
import java.awt.Graphics2D;
import java.awt.event.MouseAdapter;
import java.awt.event.MouseEvent;
import java.util.Random;

import javax.swing.JPanel;

public class MyMouseListener extends MouseAdapter {

	// 定义一些基本属性

	private Graphics g;
	private int x1, y1, x2, y2,x3,y3,x4,y4,i=1;
	private Tool_panel tp ;
	private Color_panel cp;
	private Color color = Color.BLACK;
	static int array[]=new int[10000];
	static int array1[]=new int[10000];//熊哥说静态的,不需要实例化对象。再问下是什么意思。
	static int array2[]=new int[10000];
	public static boolean flag;
	/**
	 * 构造方法
	 */
	public MyMouseListener(Tool_panel tp ,Color_panel cp,JPanel panel){
		this.tp = tp;
		this.cp = cp;
		this.g = panel.getGraphics();
	}

	public void mousePressed(MouseEvent e) {
		// 获得x1,y1的坐标
		x1 = e.getX();
		y1 = e.getY();
		//判断当前点击的是否是左键
		if(e.getButton() == 1){
			color = cp.fcolor;
		}else if(e.getButton() == 3){
			color = cp.bcolor;
		}

	}

	public void mouseReleased(MouseEvent e) {
		x2 = e.getX();
		y2 = e.getY();

		//设置图形的颜色
		g.setColor(color);
		//判断是否是直线
		if(tp.shape_command.equals("line")){
			array[4*i-4]=x1;
			array[4*i-3]=y1;
			array[4*i-2]=x2;
			array[4*i-1]=y2;
			i++;
			g.drawLine(x1, y1, x2, y2);
		}else if(tp.shape_command.equals("oval")){
			array1[4*i-4]=x1;
			array1[4*i-3]=y1;
			array1[4*i-2]=x2;
			array1[4*i-1]=y2;
			i++;
			if(x1<x2&&y1<y2){
				g.drawOval(x1, y1,Math.abs(x1-x2), Math.abs(y1-y2));
			}else if(x1>x2&&y1>y2){
				g.drawOval(x2, y2, Math.abs(x1-x2), Math.abs(y1-y2));
			}else if (x1>x2&&y1<y2){
				g.drawOval(x2,y1, Math.abs(x1-x2), Math.abs(y1-y2));
			}else if(x1<x2&&y1>y2){
				g.drawOval(x1, y2,Math.abs(x1-x2) , Math.abs(y1-y2));
			}
		}else if(tp.shape_command.equals("rect")) {
			if(x1<x2&&y1<y2){
		g.drawRect(x1, y1,Math.abs(x1-x2), Math.abs(y1-y2));
			}else if(x1>x2&&y1>y2){
				g.drawRect(x2, y2, Math.abs(x1-x2), Math.abs(y1-y2));
			}else if(x1>x2&&y1<y2){
				g.drawRect(x2, y1, Math.abs(x1-x2), Math.abs(y1-y2));
			}else if(x1<x2&&y1>y2){
				g.drawRect(x1, y2, Math.abs(x1-x2), Math.abs(y1-y2));
			}
		}else if(tp.shape_command.equals("roundrect")){
			if(x1<x2&&y1<y2){
				g.drawRoundRect(x1, y1,Math.abs( x2-x1), Math.abs(y2-y1),10,10);
					}else if(x1>x2&&y1>y2){
						g.drawRoundRect(x2, y2, Math.abs(x1-x2), Math.abs(y1-y2),10,10);
					}else if(x1>x2&&y1<y2){
						g.drawRoundRect(x2, y1, Math.abs(x1-x2), Math.abs(y1-y2),10,10);
					}else if(x1<x2&&y1>y2){
						g.drawRoundRect(x1, y2, Math.abs(x1-x2), Math.abs(y1-y2),10,10);
					}
		}

	}

	public void mouseDragged(MouseEvent e){
		//设置设置图形颜色
				g.setColor(color);
			    if(tp.shape_command.equals("brush")){
					x2=e.getX();
					y2=e.getY();
					//设置线条粗细
					Graphics2D g2d =  (Graphics2D)g;
					//将Graphics类型的g对象强制转换为Graphics2D的对象
					//调用Graphics2D设置线条粗细的方法来设置线条的粗细
					g2d.setStroke(new BasicStroke(8));
					//绘制粗线条
					g2d.drawLine(x1, y1, x2, y2);
					//将直线结束点的坐标作为下一条线的开始点
					x1=x2;
					y1=y2;
					g2d.setStroke(new BasicStroke(1));
				}else if(tp.shape_command.equals("easer")){
					//设置图形颜色
					g.setColor(Color.WHITE);
					//g.setColor(cp.getColor());
					x2=e.getX();
					y2=e.getY();
				//将Graphics类型的g对象强制装换为Graphics2D的对象
					Graphics2D g2d = (Graphics2D)g;
					//调用Graphics2D设置线条粗细的方法来设置线条的粗细
					g2d.setStroke(new BasicStroke(8));
					//绘制粗线条
					g2d.drawLine(x1, y1, x2, y2);
					//将直线结束点的坐标作为下一条直线的开始点
					x1=x2;
					y1=y2;
					//重新设置线条的粗细
					g2d.setStroke(new BasicStroke(1));
				}else if(tp.shape_command.equals("pencil")){
//					设置图形的颜色
//				    g.setColor(cp.getColor());
					array2[4*i-4]=x1;
					array2[4*i-3]=y1;

					x3=e.getX();
					y3=e.getY();
					//绘制线条
				    g.drawLine(x1, y1, x3, y3);
				    //将直线的结束点的坐标作为下一条直线的开始点
				    x1=x3;
					y1=y3;
					array2[4*i-2]=x1;
					array2[4*i-1]=y1;
					i++;
				}else if(tp.shape_command.equals("spray")){//如果是喷枪
					//获取坐标值
					x2=e.getX();
					y2=e.getY();
					//实例化一个随机数对象
					Random rand = new Random();
					//循环画多个点
					for(int i=0;i<20;i++){
						//随机生成新的x和y点,用来绘制不同的点
						int x = rand.nextInt(8);
						int y = rand.nextInt(8);
						//开始绘制点
						g.drawLine(x2+x, y2+y, x2+x, y2+y);
					}
				}
				else if(tp.shape_command.equals("polygon")){//如果是多边形
					//获取坐标
					x4=e.getX();
					y4=e.getY();
					if(flag==true){
						g.drawLine(x1, y1, x2, y2);
						x3=x2;
						y3=y2;
						x4=x1;
						y4=y1;
						flag=false;
					}else if(flag==false){
						if(e.getClickCount()==2){
							g.drawLine(x3,y3,x4,y4);
							flag=true;
						}else{
							g.drawLine(x3,y3,x2,y2);
							x3=x2;
							y3=y2;
						}
					}
				}
	}
}
大家可以看到,鼠标监听器里的各种图形的绘制方法可以说就是画图板的大脑了,都是关键,大家可以仔细研究下。
另外还有一个难点在于画图板的重绘,我会再细细道来的~