网络就是力量--在线处理照片之常用处理篇
摄影、后期处理、在网络相册中分享照片……成为时下青年人最喜欢的休闲方式之一。不过数码照片的后期处理通常需要大家掌握一点点的图像工具使用技能,这就难住了很多人。
现在网络上有形形色色的在线照片处理网站,大家不用在本机安装任何图像处理软件就可以轻松方便地的优化数码照片,并生成各种创意作品,深受网友的喜爱,下面我们来看看它们究竟能帮助我们完成那些后期处理工作。
这个在线照片创意处理的专题分为四个部分:照片常用处理篇、娱乐游戏篇、创意设计篇、实用制作篇。
今天我们介绍在线照片处理的常用处理部分,包括在线处理照片、制作证件照、添加照片边框、制作相册、添加边框等。
■在线处理照片
地址:pxn8.com
Pxn8是国外的一家照片在线处理网站,用户可把自己的照片上传到网站上使用其工具美化它。该网站的图片制作界面,左边是功能菜单,右边的照片预览窗口。且功能菜单根据图片处理的步骤,分为1.2.3选项。
1.照片上传
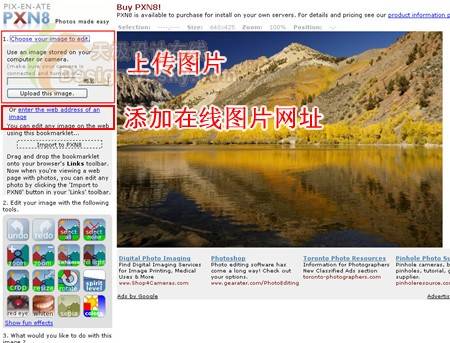
在网页中选择“Choose your image to edit”按钮可从本地上传照片到Pxn8网站,或则选择“enter the web address of an image”输入地址照片的网址.
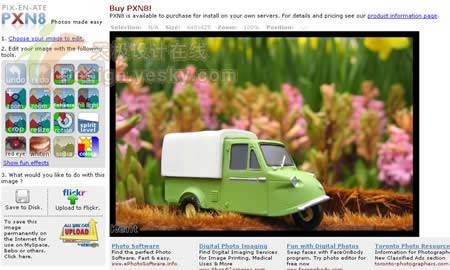
笔者试用时发现上传功能不是很稳定(或许是国外网站访问速度不稳定),建议大家选择直接添加照片网址。添加网址后,在页面中可得到显示出照片图片。
2.在线编辑
现在可以使用网站的图像编辑工具对照片在线处理了,例如要裁减照片上的画面,用<nobr><a oncontextmenu="return false;" target="_blank" style="border-bottom: 1px dotted rgb(102, 0, 255); text-decoration: none; color: rgb(102, 0, 255); background-color: transparent;" class="iAs" onclick="return true;return kwC();" onmouseover="return true;kwE(event,-8);" onmousemove="return true;kwM(-8);" onmouseout="return true;kwL(event);">鼠标</a></nobr>可在照片上选择一块区域,然后选择页面左边的“Crop”按钮裁剪照片,这样就能得到自己所需要的照片画面。如果不需要裁剪画面图像,可选择其它工具,例如旋转、缩放图像工具编辑照片。
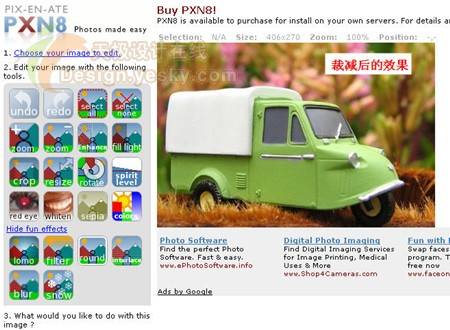
点开网页左边的“fun effects”菜单,可看到一组图像特效工具,我们可以使用它们美化为照片添加图像特效。例如选择“Lomo”效果,此时会弹出一个参数设置面板,稍微调节一下面板参数,点击“Apply”按钮应用设置
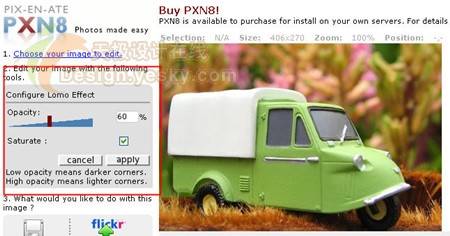
稍等一会网站就会自动根据你的设置处理图像,并将图像显示出来。
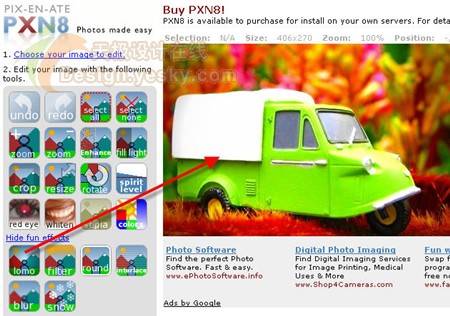
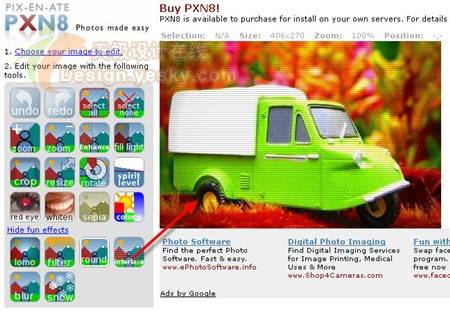
接下来还可选择其它图像特效继续编辑,例如给照片添加抽线效果(interlace),在参数设置面板中设定抽线的颜色和线条粗细程度,点击“Apply”按钮得到抽线效果图。图像编辑结束后,可选择将它保存到磁盘或者上传到Flickr相册中保存。
■在线制作证件照
地址:www.epassportphoto.com/
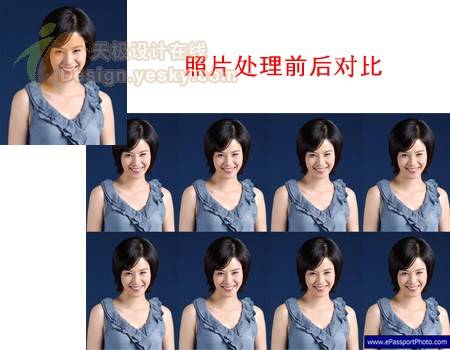
epassportphoto网站是非常“专业”的证件制作网站,设计结束后还可选择发送给<nobr><a oncontextmenu="return false;" target="_blank" style="border-bottom: 1px dotted rgb(102, 0, 255); text-decoration: none; color: rgb(102, 0, 255); background-color: transparent;" class="iAs" onclick="return true;return kwC();" onmouseover="return true;kwE(event,-1);" onmousemove="return true;kwM(-1);" onmouseout="return true;kwL(event);">数码影像</a></nobr>馆打印(不过这是国外的业务哦!)。
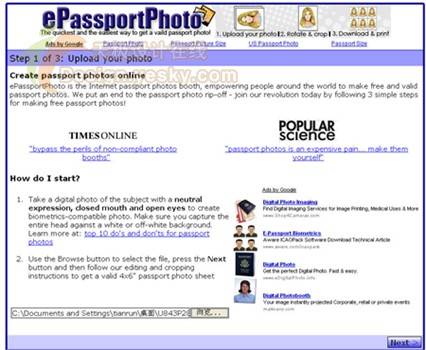
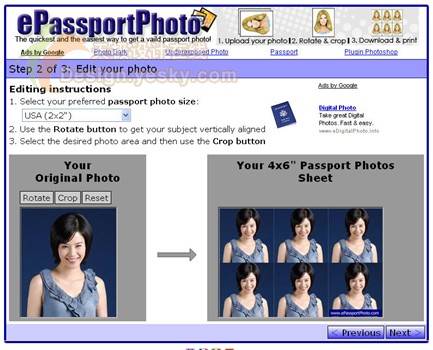
在网站界面可看到设计证件照片只需要3个步骤。第一步是载入照片,点击“浏览”按钮从本地选择照片后,点击“Next”按钮进入下一步。
第二步是选择<nobr><a oncontextmenu="return false;" target="_blank" style="border-bottom: 1px dotted rgb(102, 0, 255); text-decoration: none; color: rgb(102, 0, 255); background-color: transparent;" class="iAs" onclick="return true;return kwC();" onmouseover="return true;kwE(event,-8);" onmousemove="return true;kwM(-8);" onmouseout="return true;kwL(event);">证件</a></nobr>照片的张数和规格,最后点击按钮生成证件照,选择下载即可。
■在线添加照片边框、制作相册
地址:www.myalbummaker.com
数码照片后期处理时,大家最喜欢给照片添加各种漂亮的边框,现在MyAlbumMaker网站就给网友提供了<nobr><a oncontextmenu="return false;" target="_blank" style="border-bottom: 1px dotted rgb(102, 0, 255); text-decoration: none; color: rgb(102, 0, 255); background-color: transparent;" class="iAs" onclick="return true;return kwC();" onmouseover="return true;kwE(event,-3);" onmousemove="return true;kwM(-3);" onmouseout="return true;kwL(event);">免费</a></nobr>的照片边框处理服务。它不仅可为单张照片设计边框,还可为多张照片设计边框创建相册。在网站首页选择“Get Started”按钮,可看到创建单张照片还是相册选项的按钮。
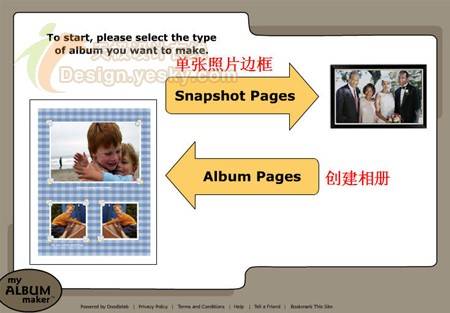
1.单张照片边框
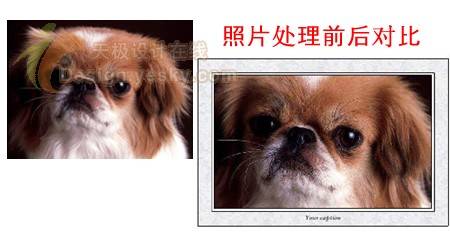
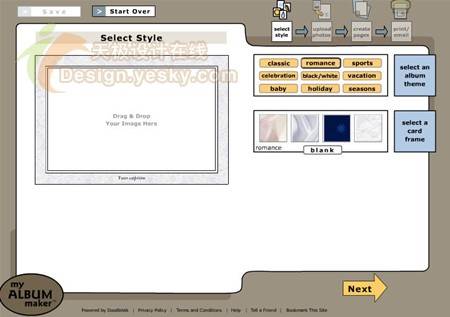
选择“Snapshot Pages”进入单张<nobr><a oncontextmenu="return false;" target="_blank" style="border-bottom: 1px dotted rgb(102, 0, 255); text-decoration: none; color: rgb(102, 0, 255); background-color: transparent;" class="iAs" onclick="return true;return kwC();" onmouseover="return true;kwE(event,-6);" onmousemove="return true;kwM(-6);" onmouseout="return true;kwL(event);">相片</a></nobr>制作页面,第一步选择边框样式,MyAlbumMaker网站提供了多种风格的样式可选,选定之后点击“Next”下一步。
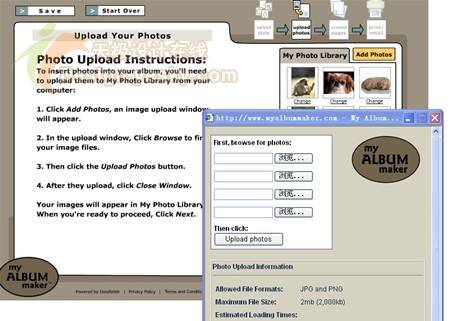
接着开始上传照片(),MyAlbumMaker<nobr><a oncontextmenu="return false;" target="_blank" style="border-bottom: 1px dotted rgb(102, 0, 255); text-decoration: none; color: rgb(102, 0, 255); background-color: transparent;" class="iAs" onclick="return true;return kwC();" onmouseover="return true;kwE(event,-7);" onmousemove="return true;kwM(-7);" onmouseout="return true;kwL(event);">网站</a></nobr>支持同时上传4张照片。
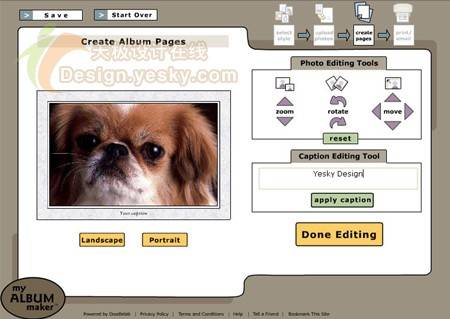
下一步,将上传后的照片挑选一张拖动到边框模板上,此时还可使用工具对照片的尺寸、方向进行简单的调节,还可在相框上输入文字。
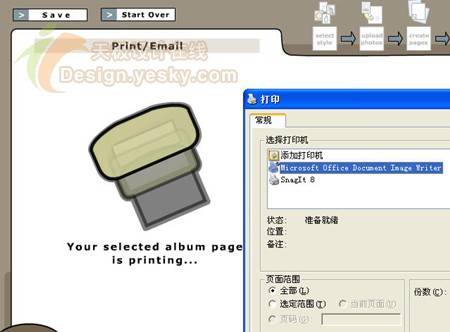
最后一步,可把设计好的照片打印或发送<nobr><a oncontextmenu="return false;" target="_blank" style="border-bottom: 1px dotted rgb(102, 0, 255); text-decoration: none; color: rgb(102, 0, 255); background-color: transparent;" class="iAs" onclick="return true;return kwC();" onmouseover="return true;kwE(event,-1);" onmousemove="return true;kwM(-1);" onmouseout="return true;kwL(event);">电子邮件</a></nobr>,如果计算机上安装了虚拟打印机,选择打印功能后直接输出照片即可。
 2.制作相册
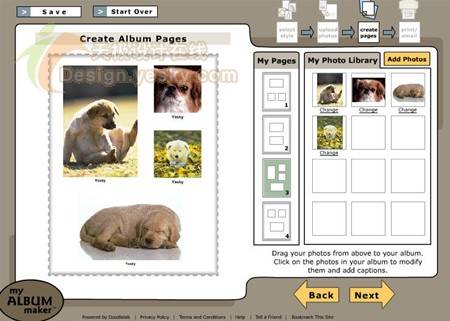
在网站开始页面中选择“Album Pages”可以把多张照片制作一本<nobr><a oncontextmenu="return false;" target="_blank" style="border-bottom: 1px dotted rgb(102, 0, 255); text-decoration: none; color: rgb(102, 0, 255); background-color: transparent;" class="iAs" onclick="return true;return kwC();" onmouseover="return true;kwE(event,-4);" onmousemove="return true;kwM(-4);" onmouseout="return true;kwL(event);">相册</a></nobr>。

制作相册和单张照片处理的方式一样,只是在挑选模板时可选择的风格有所不同。
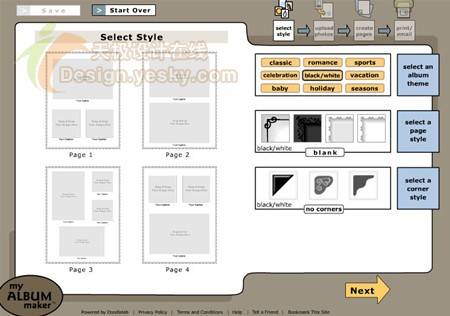
把照片添加到模板上时,根据需要把照片添加到模板不同的位置上。其他步骤按照设计单张照片的边框操作即可。
■在线制作照片大头贴
图片仓库 地址:pic.sdodo.com

图片仓库是一个国内的照片在线制作<nobr><a oncontextmenu="return false;" target="_blank" style="border-bottom: 1px dotted rgb(102, 0, 255); text-decoration: none; color: rgb(102, 0, 255); background-color: transparent;" class="iAs" onclick="return true;return kwC();" onmouseover="return true;kwE(event,-6);" onmousemove="return true;kwM(-6);" onmouseout="return true;kwL(event);">网站</a></nobr>,它提供的图像处理工具有很多,DIY大头贴是其中一项功能。

选择“大头贴DIY”功能进入后可看到关于该功能使用说明书,了解了功能说明后选择“开始制作”按钮进入具体的制作界面。

1.载入照片
在制作界面先选择“<nobr><a oncontextmenu="return false;" target="_blank" style="border-bottom: 1px dotted rgb(102, 0, 255); text-decoration: none; color: rgb(102, 0, 255); background-color: transparent;" class="iAs" onclick="return true;return kwC();" onmouseover="return true;kwE(event,-4);" onmousemove="return true;kwM(-4);" onmouseout="return true;kwL(event);">相片</a></nobr>”功能,页面下方即可切换成相应的工具选项,此时选择“上传”按钮可从本地上传照片到图片仓库网站。
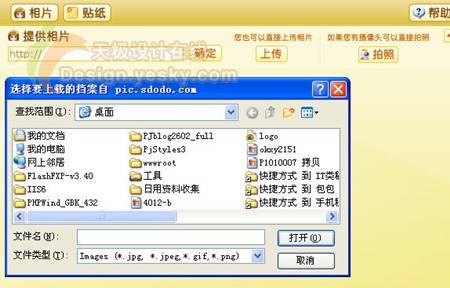
稍等一会照片就被送到图片仓库中了,此时图片下方还会出现一组图片的编辑工具,大家可以用它们对照片的画面进行裁减、旋转等简单的处理。

2.添加边框
在图像制作页面选择“<nobr><a oncontextmenu="return false;" target="_blank" style="border-bottom: 1px dotted rgb(102, 0, 255); text-decoration: none; color: rgb(102, 0, 255); background-color: transparent;" class="iAs" onclick="return true;return kwC();" onmouseover="return true;kwE(event,-5);" onmousemove="return true;kwM(-5);" onmouseout="return true;kwL(event);">相纸</a></nobr>”功能可以给照片添加边框效果,在照片应用了边框图像之后再用图像编辑工具调节照片的尺寸、大小更好!
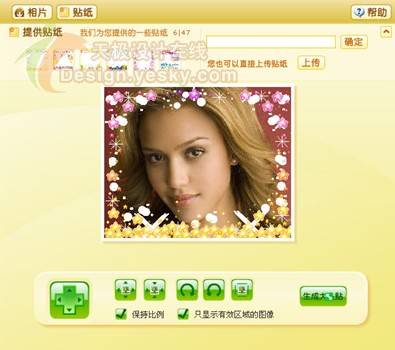
如果自己有设计好的照片边框,也可以上传到图片仓库来使用。设计结束后,点击“生成大头贴”按钮就可以把照片变身为大头贴图像了,最后将它下载保存即可.
