Laravel大型项目系列教程(五)之文章和标签管理
小编心语:马上就到情人节了,小编不禁仰天长啸,情人节让我一个人过,圣诞节还让我一个人过,元旦也让我一个人过,有本事考试你也让我一个人过啊......地球太可怕,无数的程序猿和程序媛等待被救援,俺还是回火星吧......
一、前言
本节教程将大概完成文章和标签管理以及标签关联。
二、Let's go
1.文章管理
首先创建管理后台文章列表视图:
$ php artisan generate:view admin.articles.list
修改views/admin/articles/list.blade.php:
@extends('_layouts.default')

@section('main')
<div class="am-g am-g-fixed blog-g-fixed">
  <div class="am-u-sm-12">
    <table class="am-table am-table-hover am-table-striped ">
    <thead>
    <tr>
      <th>Title</th>
      <th>Tags</th>
      <th>Author</th>
      <th>Managment</th>
    </tr>
    </thead>
    <tbody>
    @foreach ($articles as $article)
    <tr>
      <td><a href="{{ URL::route('article.show', $article->id) }}">{{{ $article->title }}}</a></td>
      <td>
      @foreach ($article->tags as $tag)
        <span class="am-badge am-badge-success am-radius">{{ $tag->name }}</span>
      @endforeach
      </td>
      <td><a href="{{ URL::to('user/' . $article->user->id . '/articles') }}">{{{ $article->user->nickname }}}</a></td>
      <td>
        <a href="{{ URL::to('article/'. $article->id . '/edit') }}" class="am-btn am-btn-xs am-btn-primary"><span class="am-icon-pencil"></span> Edit</a>
        {{ Form::open(array('url' => 'article/' . $article->id, 'method' => 'DELETE', 'style' => 'display: inline;')) }}
          <button type="button" class="am-btn am-btn-xs am-btn-danger" id="delete{{ $article->id }}"><span class="am-icon-remove"></span> Delete</button>
        {{ Form::close() }}
      </td>
    </tr>
    @endforeach
    </tbody>
  </table>
  </div>
</div>
<div class="am-modal am-modal-confirm" tabindex="-1" id="my-confirm">
  <div class="am-modal-dialog">
    <div class="am-modal-bd">
    </div>
    <div class="am-modal-footer">
      <span class="am-modal-btn" data-am-modal-cancel>No</span>
      <span class="am-modal-btn" data-am-modal-confirm>Yes</span>
    </div>
  </div>
</div>
<script>
  $(function() {
    $('[id^=delete]').on('click', function() {
      $('.am-modal-bd').text('Sure you want to delete it?');
      $('#my-confirm').modal({
        relatedTarget: this,
        onConfirm: function(options) {
          $(this.relatedTarget).parent().submit();
        },
        onCancel: function() {
        }
      });
    });
  });
</script>
@stop
在nav.blade.php中增加一个Articles的超链接:
<li class="{{ (isset($page) and ($page == 'articles')) ? 'am-active' : '' }}"><a href="{{ URL::to('admin/articles') }}">Articles</a></li>
创建一个管理员控制器,在app/controllers下创建一个名为AdminController.php的文件,修改:
class AdminController extends \BaseController {

    public function articles()
    {
        return View::make('admin.articles.list')->with('articles', Article::with('user', 'tags')->orderBy('created_at', 'desc')->get())->with('page', 'articles');
    }
}
在Route::group(array('prefix' => 'admin')中增加:
Route::get('articles', 'AdminController@articles');
管理文章可以重用上节教程写的业务逻辑,修改下ArticleController.php,把destroy()中最后的Redirect::to('home')改成Redirect::back(), 再修改一下home.blade.php,加一个是否是管理员的判断,这样当点击作者跳转到用户主页时,除了作者自己管理员也能操作文章:
@if ($user->id == Auth::id() or Auth::user()->is_admin)
现在点击导航栏的Articles,就会出现所有的文章:
这样管理员就可以操作所有的文章了。
我们还可以再修改下admin/users/list.blade.php,当点击用户列表的昵称时也会跳转到用户主页:
<a href="{{ URL::to('user/' . $user->id . '/articles') }}">{{{ $user->nickname }}}</a>
现在访问用户列表页面:
2.显示标签列表
创建一个标签列表视图:
$ php artisan generate:view admin.tags.list
修改admin/tags/list.blade.php:
@extends('_layouts.default')

@section('main')
<div class="am-g am-g-fixed blog-g-fixed">
  <div class="am-u-sm-12">
      <table class="am-table am-table-hover am-table-striped ">
      <thead>
      <tr>
        <th>TagName</th>
        <th>ArticleCount</th>
        <th>CreateDateTime</th>
        <th>Managment</th>
      </tr>
      </thead>
      <tbody>
        @foreach ($tags as $tag)
        <tr>
          <td>{{{ $tag->name }}}</td>
          <td>{{ $tag->count }}</td>
          <td>{{ $tag->created_at->format('Y-m-d H:i') }}</td>
          <td>
            <a href="{{ URL::to('tag/'. $tag->id . '/edit') }}" class="am-btn am-btn-xs am-btn-primary"><span class="am-icon-pencil"></span> Edit</a>
            {{ Form::open(array('url' => 'tag/' . $tag->id, 'method' => 'DELETE', 'style' => 'display: inline;')) }}
              <button type="button" class="am-btn am-btn-xs am-btn-danger" id="delete{{ $tag->id }}"><span class="am-icon-remove"></span> Delete</button>
            {{ Form::close() }}
          </td>
        </tr>
        @endforeach
      </tbody>
    </table>
  </div>
</div>
<div class="am-modal am-modal-confirm" tabindex="-1" id="my-confirm">
  <div class="am-modal-dialog">
    <div class="am-modal-bd">
    </div>
    <div class="am-modal-footer">
      <span class="am-modal-btn" data-am-modal-cancel>No</span>
      <span class="am-modal-btn" data-am-modal-confirm>Yes</span>
    </div>
  </div>
</div>
<script>
  $(function() {
    $('[id^=delete]').on('click', function() {
      $('.am-modal-bd').text('Sure you want to delete it?');
      $('#my-confirm').modal({
        relatedTarget: this,
        onConfirm: function(options) {
          $(this.relatedTarget).parent().submit();
        },
        onCancel: function() {
        }
      });
    });
  });
</script>
@stop
再在nav.blade.php中增加Tags选项:
<li class="{{ (isset($page) and ($page == 'tags')) ? 'am-active' : '' }}"><a href="{{ URL::to('admin/tags') }}">Tags</a></li>
在Route::group(array('prefix' => 'admin')中增加:
Route::get('tags', 'AdminController@tags');
在AdminController.php中增加:
public function tags() {
    return View::make('admin.tags.list')->with('tags', Tag::all()->orderBy('count', 'desc'));
}
现在点击导航栏上方的Tags超链接:
3.修改标签
创建修改标签的视图:
$ php artisan generate:view tags.edit
修改views/tags/edit.blade.php:
@extends('_layouts.default')

@section('main')
<div class="am-g am-g-fixed">
  <div class="am-u-sm-12">
      <h1>Edit Tag</h1>
      <hr/>
  @if (Session::has('message'))
    <div class="am-alert am-alert-{{ Session::get('message')['type'] }}" data-am-alert>
      <p>{{ Session::get('message')['content'] }}</p>
    </div>
  @endif
    @if ($errors->has())
    <div class="am-alert am-alert-danger" data-am-alert>
      <p>{{ $errors->first() }}</p>
    </div>
    @endif
    {{ Form::model($tag, array('url' => URL::route('tag.update', $tag->id), 'method' => 'PUT', 'class' => "am-form")) }}
        <div class="am-form-group">
        {{ Form::label('name', 'TagName') }}
        {{ Form::text('name', Input::old('name')) }}
        </div>
        <p><button type="submit" class="am-btn am-btn-success">
        <span class="am-icon-pencil"></span> Modify</button>
      </p>
    {{ Form::close() }}
  </div>
</div>
@stop
创建标签控制器:
$ php artisan generate:controller TagsController
修改TagsController.php:
public function __construct()
{
    $this->beforeFilter('auth', array('only' => array('create', 'store', 'edit', 'update', 'destroy')));
    $this->beforeFilter('csrf', array('only' => array('store', 'update', 'destroy')));
}

public function edit($id)
{
    return View::make('tags.edit')->with('tag', Tag::find($id));
}

public function update($id)
{
    $rules = array(
        'name' => array('required', 'regex:/^\w+$/'),
    );
    $validator = Validator::make(Input::only('name'), $rules);
    if ($validator->passes()) {
        Tag::find($id)->update(Input::only('name'));
        return Redirect::back()->with('message', array('type' => 'success', 'content' => 'Modify tag successfully'));
    } else {
        return Redirect::back()->withInput()->withErrors($validator);
    }
}
把这个控制器加到routes.php中:
Route::resource('tag', 'TagController');
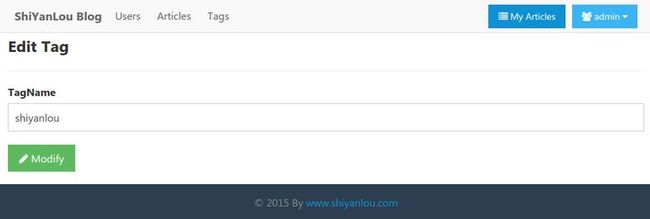
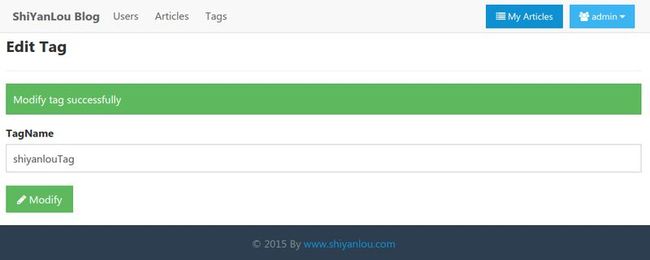
现在就能修改标签了:
4.删除标签
修改TagsController.php:
public function destroy($id)
{
    $tag = Tag::find($id);
    $tag->count = 0;
    $tag->save();
    foreach ($tag->articles as $article) {
        $tag->articles()->detach($article->id);
    }
    return Redirect::back();
}
我这里删除标签只是把它的文章数置为0,然后清除与相关文章的关联,你可以自己试下删除一个标签,再看看文章的标签是否去除了。
5.关联标签
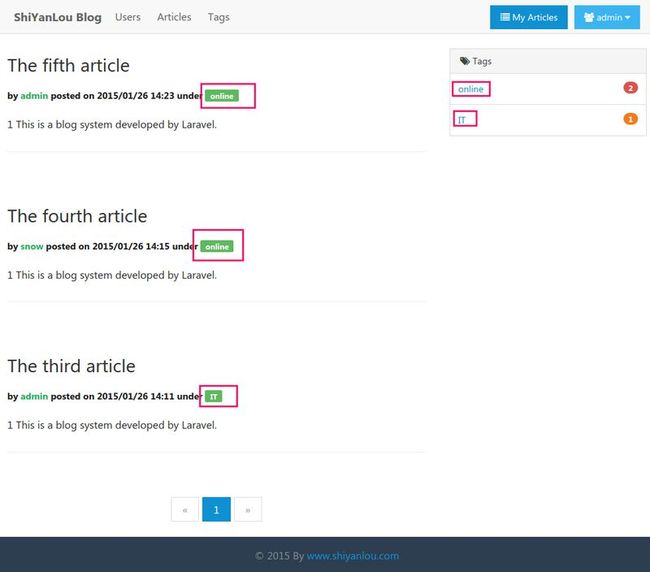
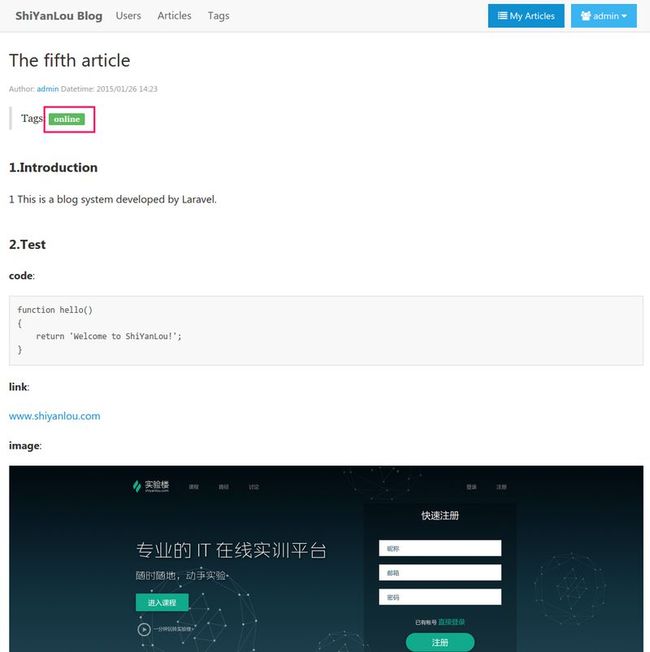
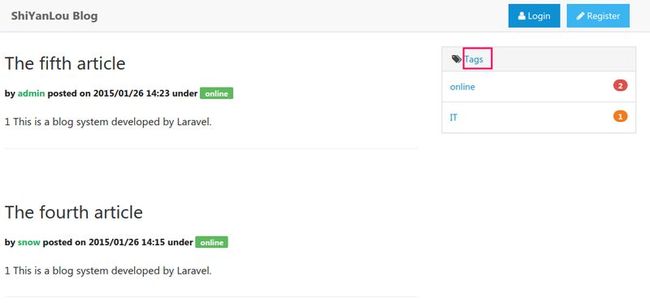
当我们点击首页文章、标签栏和显示文章内容的标签的时候应该跳转到显示相应标签下所有文章的页面:
我们对上述地方加上超链接地址:
<a href="{{ URL::to('tag/' . $tag->id . '/articles') }}">{{ $tag->name }}</a>
创建指定标签的文章列表视图:
$ php artisan generate:view articles.specificTag
修改views/articles/specificTag.blade.php:
@extends('_layouts.default')

@section('main')
<div class="am-g am-g-fixed">
  <div class="am-u-sm-12">
    <br/>
    <blockquote>Tag: <span class="am-badge am-badge-success am-radius">{{{ $tag->name }}}</span></blockquote>
      @foreach ($articles as $article)
      <article class="blog-main">
        <h3 class="am-article-title blog-title">
          <a href="{{ URL::route('article.show', $article->id) }}">{{{ $article->title }}}</a>
        </h3>
        <h4 class="am-article-meta blog-meta">
            by <a href="{{ URL::to('user/' . $article->user->id . '/articles') }}">{{{ $article->user->nickname }}}</a> posted on {{ $article->created_at->format('Y/m/d H:i') }} under
            @foreach ($article->tags as $tag)
        <a href="{{ URL::to('tag/' . $tag->id . '/articles') }}" style="color: #fff;" class="am-badge am-badge-success am-radius">{{ $tag->name }}</a>
            @endforeach
        </h4>
        <div class="am-g">
          <div class="am-u-sm-12">
            @if ($article->summary)
          <p>{{ $article->summary }}</p>
            @endif
            <hr class="am-article-divider"/>
          </div>
        </div>
      </article>
      @endforeach
    {{ $articles->links() }}
  </div>
</div>
@stop
在TagController.php增加:
public function articles($id)
{
    $tag = Tag::find($id);
    $articles = $tag->articles()->orderBy('created_at', 'desc')->paginate(10);
    return View::make('articles.specificTag')->with('tag', $tag)->with('articles', $articles);
}
在routes.php的Route::resource('tag', 'TagController');的上方增加:
Route::get('tag/{id}/articles', 'TagController@articles');
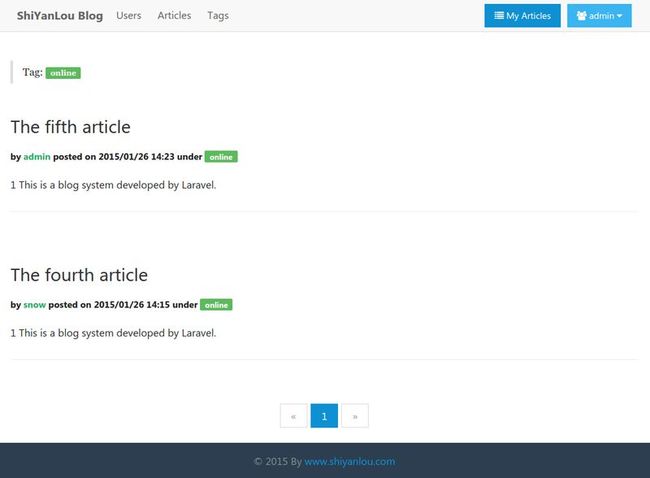
现在当我们点击页面上的标签时,就会显示该标签下的所有文章了:
6.显示所有标签
我们还需要一个显示所有标签的页面,先创建视图:
$ php artisan generate:view tags.list
修改views/tags/list.blade.php:
@extends('_layouts.default')

@section('main')
<div class="am-g am-g-fixed">
  <div class="am-u-sm-12">
    <h1>All Tags</h1>
    <hr/>
      @foreach ($tags as $tag)
    <a href="{{ URL::to('tag/' . $tag->id . '/articles') }}" class="am-badge am-radius {{ array('', 'am-badge-primary', 'am-badge-secondary', 'am-badge-success', 'am-badge-warning', 'am-badge-danger')[rand(0, 5)] }}">{{{ $tag->name }}} {{ $tag->count }}</a>
      @endforeach
    <br/>
    <br/>
  </div>
</div>
@stop
现在点击首页的Tags链接时就会跳转到显示所有标签的页面了:
7.小结
本节教程就到此结束了,这个博客系统想要实现的功能也基本完成了,下节开始将讲解优化、单元测试、部署和扩展开发等内容,你可以继续完善,例如在管理文章和标签的时候提供一个搜索功能,给它们都加上分页,在首页加上一个搜索文章的功能,给文章加上评论功能等等,在评论功能方面现在有很多第三方评论插件,可以快速帮你实现。
最后的代码下载:
$ git clone https://github.com/shiyanlou/laravel-blog-5.git
如果你英语比较好的话,建议laravel官网和后面三个网站;如果你是小白对laravel还不够了解,可以先去学习下中文文档;如果对laravel有疑问的话,可以去国内的laravel中文问答社区和PHPhub,这两个在中国是比较好的学习laravel的社区;如果对本课程有疑问的话推荐去实验楼论坛,里面有专门的人在线答疑。
Laravel官网
中文文档1、中文文档2
实验楼论坛
Laravel中文网问答社区
PHPHub中文社区
API文档
laravel.io
LARACASTS


