Hibernate上路_01-入门流程
本系列Hibernate版本:hibernate-release-4.2.7.SP1
- end
1.数据库准备:
/**注释:
	MySQL,创建一个新数据库
 **/
CREATE DATABASE db_hibernate  CHARACTER SET utf8;

use db_hibernate;

 -- 注释:创建一个表
CREATE TABLE tb_user(
	id INT PRIMARY KEY AUTO_INCREMENT, #注释:主键,自动序列
	name VARCHAR(20),
	age INT,
	city VARCHAR(40)
);
2.JavaWeb项目:

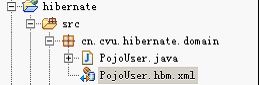
3.基本Java对象(POJO):
package cn.cvu.hibernate.domain;

public class PojoUser {
	//对应数据表中的 类型 字段
	private Integer id;
	private String name;
	private Integer age;
	private String city;

	//提供set/get方法
	public Integer getId() { }
	public void setId(Integer id) { }
	public String getName() { }
	public void setName(String name) { }
	public Integer getAge() { }
	public void setAge(Integer age) { }
	public String getCity() { }
	public void setCity(String city) { }
}
4.POJO.hbm.xml映射文件:
<?xml version="1.0" encoding="UTF-8"?>
<!DOCTYPE hibernate-mapping PUBLIC
    "-//Hibernate/Hibernate Mapping DTD 3.0//EN"
    "http://www.hibernate.org/dtd/hibernate-mapping-3.0.dtd">
<hibernate-mapping>
	<!-- 映射关系配置
	name="POJO类" table="表单名称" catalog="数据库名称,若不指定则使用jdbc中的配置" -->
	<class name="cn.cvu.hibernate.domain.PojoUser" table="tb_user" catalog="db_hibernate">
		<!-- 配置主键
		name="POJO中对应属性" colum="表单中主键名" type="数据类型" -->
		<id name="id" column="id" type="int">
			<!-- 主键的生成方式。native:根据底层数据库自动选择 -->
			<generator class="native"></generator>
		</id>
  <!-- 其它属性配置 -->
		<property name="name" column="name" type="string"></property>
		<property name="age" column="age" type="int"></property>
		<property name="city" column="city" type="string"></property>
	</class>
</hibernate-mapping>
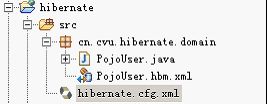
5.hibernate.cfg.xml框架文件:
<?xml version="1.0" encoding="UTF-8"?>
<!DOCTYPE hibernate-configuration PUBLIC
	"-//Hibernate/Hibernate Configuration DTD 3.0//EN"
	"http://www.hibernate.org/dtd/hibernate-configuration-3.0.dtd">
<hibernate-configuration>
	<!-- 会话工厂 -->
	<session-factory>
		<!-- 方言-指定数据库的SQL语言 -->
		<property name="hibernate.dialect">org.hibernate.dialect.MySQLInnoDBDialect</property>
		<!-- 指定数据库的驱动 -->
		<property name="hibernate.connection.driver_class">com.mysql.jdbc.Driver</property>
		<!-- 数据库路径 -->
		<property name="hibernate.connection.url">jdbc:mysql:///db_hibernate</property>
		<!-- 登录用户 -->
		<property name="hibernate.connection.username">root</property>
		<!-- 密码 -->
		<property name="hibernate.connection.password">123456</property>

		<!-- 常用配置 -->
		<property name="hibernate.show_sql">true</property><!-- 控制台打印sql语句 -->
		<property name="hibernate.format_sql">true</property><!-- 格式化输出的sql语句 -->
		<property name="hibernate.hbm2ddl.auto">update</property><!-- 在数据库自动建表 -->
		<property name="hibernate.connection.autocommit">true</property><!-- 自动提交事务 -->

		<!-- 引用映射文件(最后配置) -->
		<mapping resource="cn/cvu/hibernate/domain/PojoUser.hbm.xml"/>

	</session-factory>
</hibernate-configuration>
6.执行类:
模板代码:
package cn.cvu.hibernate.operate;

import org.hibernate.Session;
import org.hibernate.SessionFactory;
import org.hibernate.Transaction;
import org.hibernate.cfg.Configuration;
import org.hibernate.service.ServiceRegistry;
import org.hibernate.service.ServiceRegistryBuilder;
import org.junit.Test;

public class HibernateOperate {

	@Test
	/* 增 */
	public void test() throws Exception {
		// 1.实例化配置器,加载配置文件 hibernate.cfg.xml,POJO.hbm.xml
		Configuration configuration = new Configuration().configure();
		// 2.服务注册器
		ServiceRegistry serviceRegistry = new ServiceRegistryBuilder().
  applySettings(configuration.getProperties()).
  buildServiceRegistry();
		// 3.创建会话连接工厂
		SessionFactory sessionFactory = configuration.buildSessionFactory(serviceRegistry);
		// 4.创建会话
		Session session = sessionFactory.openSession();
		// 5.开启事务
		Transaction transaction = session.beginTransaction();

		// 6.由框架自动生成sql语句
  // 这里是操作代码

		// 7.提交事务,释放资源
		transaction.commit();
		session.close();
		sessionFactory.close();
	}
}
- end