CA (证书) <备忘>
实验环境:
192.168.88.150 ca.bloke.com ca
192.168.88.163 mail.bloke.com mail
192.168.88.12 client.bloke.com client
实验就以给dovecot颁发证书为例!
1、修改openssl配置文件</etc/pki/tls/openssl.cnf>:
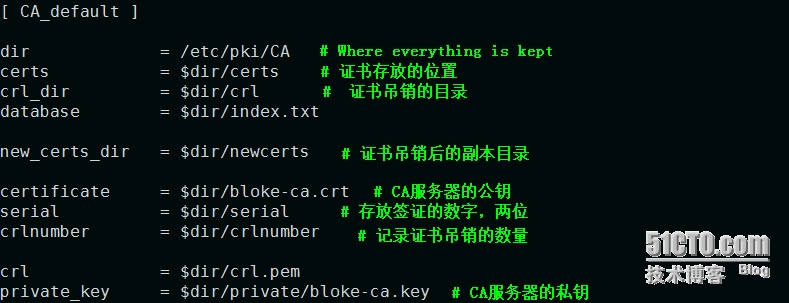


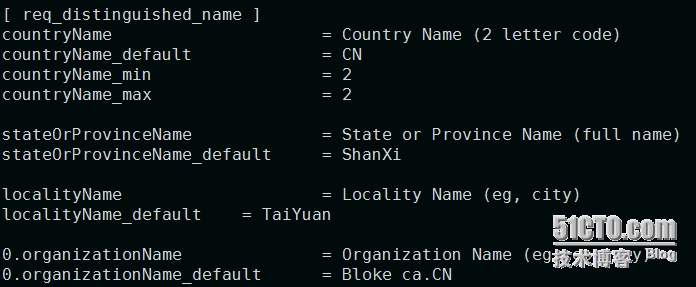
创建必要的文件: index.txt serial
echo 00 > serial
2、在CA服务器上生成私钥:
(umask 077 ; openssl genrsa -out /etc/pki/CA/private/bloke-ca.key -des3 2048)
3、在CA服务器上利用生成的私钥生成公钥:
openssl req -out /etc/pki/CA/bloke-ca.crt -new -key private/bloke-ca.key -x509 -days 365
4、 在mail服务器上生成用于dovecot服务的私钥:
(umask 077 ; openssl genrsa -out dovecot.key 2048)
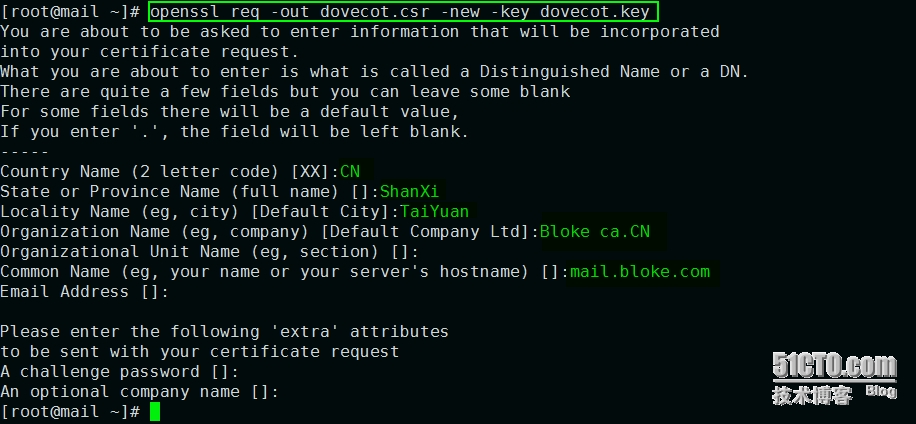
5、在mail服务器上利用dovecot的私钥生成dovecot的证书请求文件:
6、将mail服务器上生成的证书请求文件传给CA服务器,由CA服务器签证:
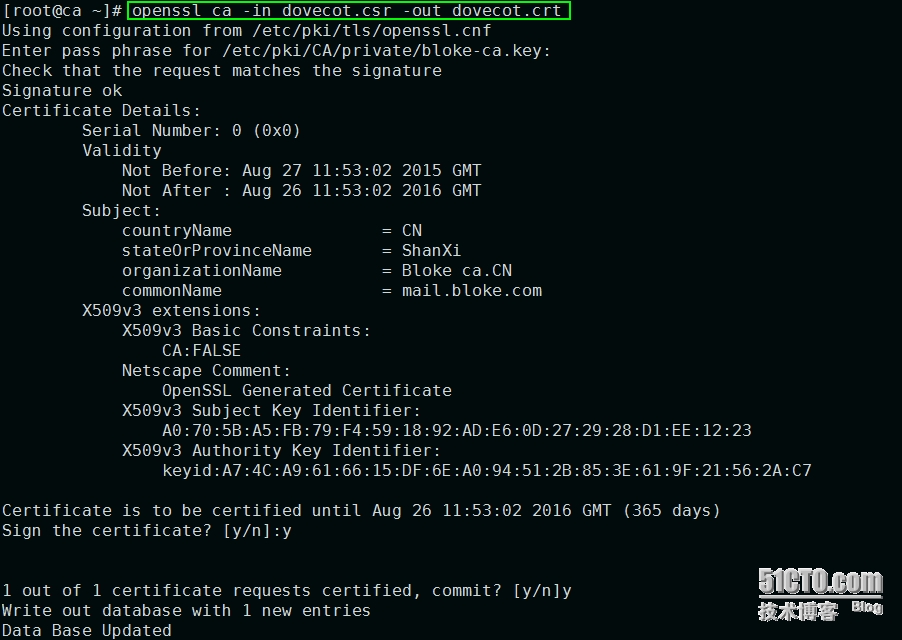
完成之后,将生成的dovecot.crt证书文件传输给mail服务器
然后mail服务器将dovecot的私钥和证书放置到指定的位置:
/etc/pki/tls/private/dovecot.key
/etc/pki/tls/certs/dovecot.crt
7、配置postfix和dovecot:
修改/etc/postfix/main.cf:
myhostname = mail.bloke.com
mydomain = bloke.com
myorigin = $mydomain
inet_interfaces = all
inet_protocols = all
mydestination = $myhostname, localhost.$mydomain, localhost, $mydomain,
mail.$mydomain, www.$mydomain, ftp.$mydomain
mynetworks = 192.168.88.0/24, 127.0.0.0/8
home_mailbox = Maildir/
mail_spool_directory = /var/spool/mail
8、配置dovecot:
修改 /etc/dovecot/conf.d/10-ssl.conf:
ssl_cert = </etc/pki/tls/certs/dovecot.crt
ssl_key = </etc/pki/tls/private/dovecot.key
修改 /etc/dovecot/conf.d/10-mail.conf:
mail_location = maildir:~/Maildir
9、重启postfix和dovecot服务:
/etc/init.d/postfix restart && /etc/init.d/dovecot restart
10、在mail服务器上建立user1用户
然后在客户端 client.bloke.com 上使用 thunderbird 测试:
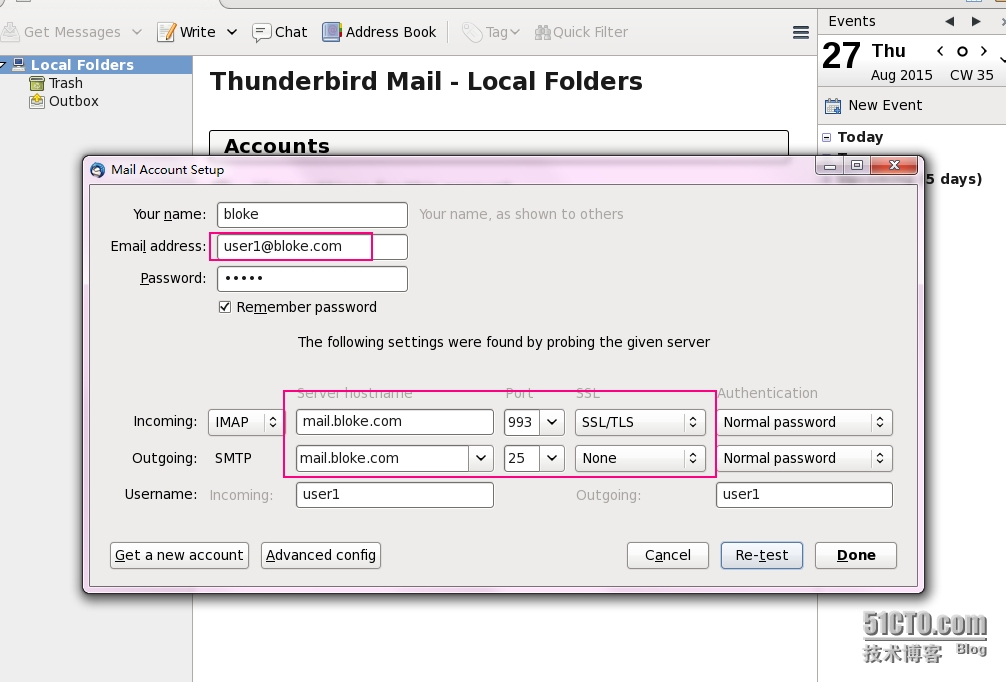
在后面的步骤中会出现提示:<因为mail服务器的证书对于client是不可信的>
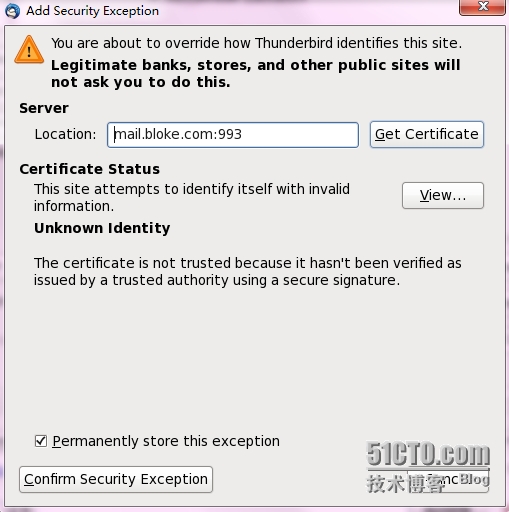
暂时先取消创建用户,将CA服务器的公钥传给client,导入到client的雷鸟中,再次创建查看效果:
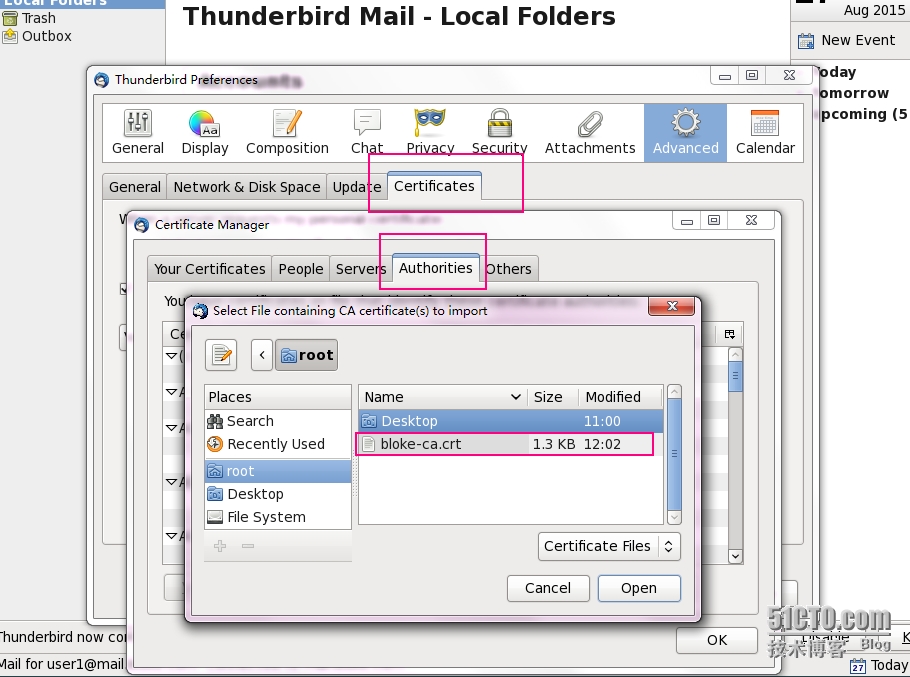
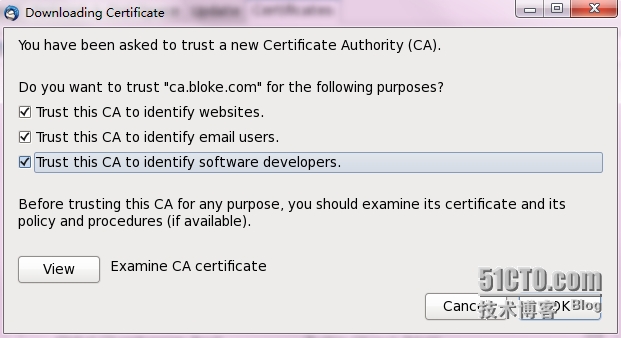
再次创建用户的时候,就不会弹出那个添加例外的框,说明证书已经得到client的信任:
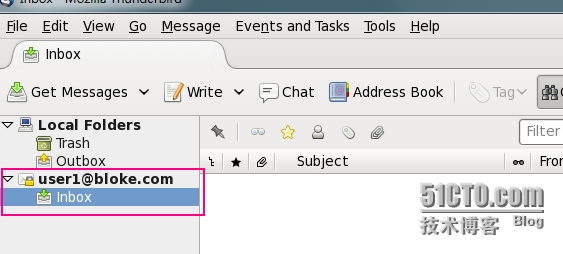
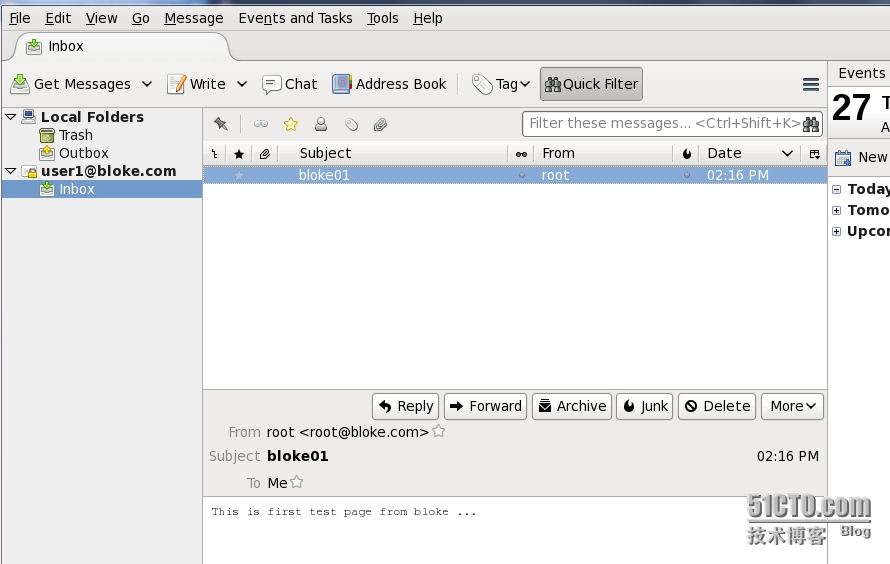
在mail服务器上使用root用户给user1用户发送一份邮件,测试接收:
echo 'This is first test page from bloke ...' | mail -s 'bloke01' [email protected]
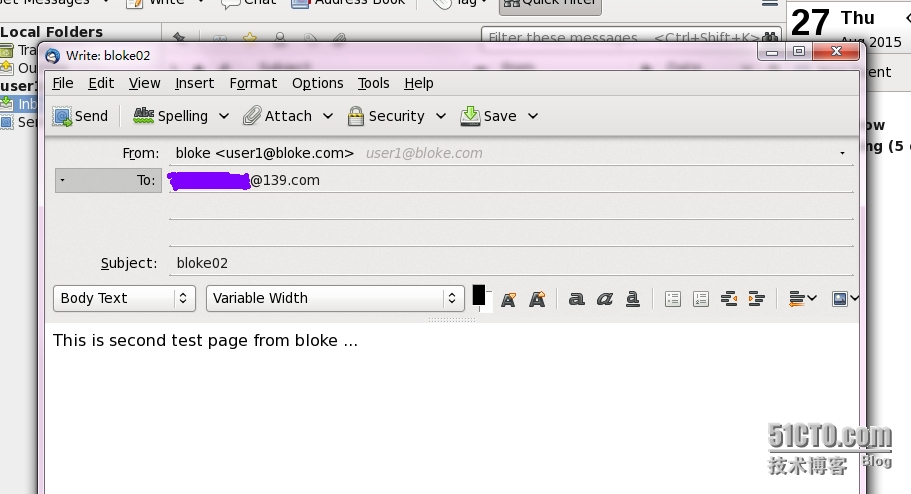
最后,测试一下在雷鸟上使用[email protected]用户 给139邮箱发邮件:
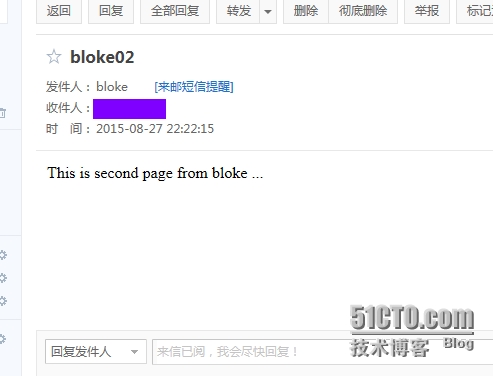
登陆139邮箱,查看邮件:
好了,实验到此就结束了。。。