OpenVAS系统安全检查工具
OpenVAS是开放式漏洞评估系统,也可以说它是一个包含着相关工具的网络扫描器。
OpenVAS是开放式漏洞评估系统,也可以说它是一个包含着相关工具的网络扫描器。其核心部件是一个服务器,包括一套网络漏洞测试程序,可以检测远程系统和应用程序中的安全问题。
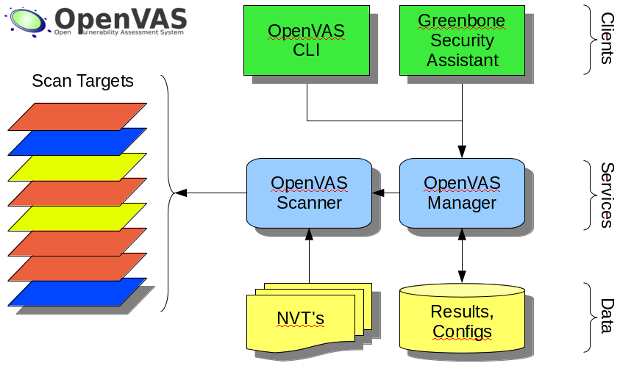
其架构如下图所示:
用户需要一种自动测试的方法,并确保正在运行一种最恰当的最新测试。OpenVAS包括一个中央服务器和一个图形化的前端。这个服务器准许用户运行 几种不同的网络漏洞测试(以Nessus攻击脚本语言编写),而且OpenVAS可以经常对其进行更新。OpenVAS所有的代码都符合GPL规范。
建立架构
OpenVAS是一个客户端/服务器架构,它由几个组件组成。在服务器上(仅限于Linux),用户需要四个程序包:
OpenVAS-Server: 实现基本的扫描功能
OpenVAS-Plugins: 一套网络漏洞测试程序
OpenVAS-LibNASL 和OpenVAS-Libraries: 实现服务器功能所需要的组件
而在客户端上(Windows或Linux均可),用户仅需要OpenVAS客户端。
About OpenVAS
The Open Vulnerability Assessment System (OpenVAS) is a framework of several services and tools offering a comprehensive and powerful vulnerability scanning and vulnerability management solution.
The actual security scanner is accompanied with a daily updated feed of Network Vulnerability Tests (NVTs), over 35,000 in total (as of April 2014).
All OpenVAS products are Free Software. Most components are licensed under the GNU General Public License (GNU GPL).

安装方法:
根据我服务器的系统centos6 ,我选择了最简单的yum安装,如下:
http://www.openvas.org/install-packages.html
OpenVAS via Atomicorp Repository (Atomic) for RHEL, CentOS, Fedora
Packages for various releases of Red Hat Enterprise Linux, CentOS and Fedora are available from the Atomicorp repository athttp://updates.atomicorp.com/.
The archives are available through the yum package manager for Fedora, RHEL and CentOS. These archives require access to both the vendors base and update channels. More information is available from the archive website.
Step 1: Configure Atomicorp Repository
(as user root, only once)
wget -q -O - http://www.atomicorp.com/installers/atomic |sh
Step 2: Quick-Install OpenVAS
(as user root, only once)
yum upgrade
yum install openvas
openvas-setup
Step 3: Quick-Start OpenVAS
( nothing to do, all is up and running directly after installation )
Step 4: Log into OpenVAS with user created in the step 2
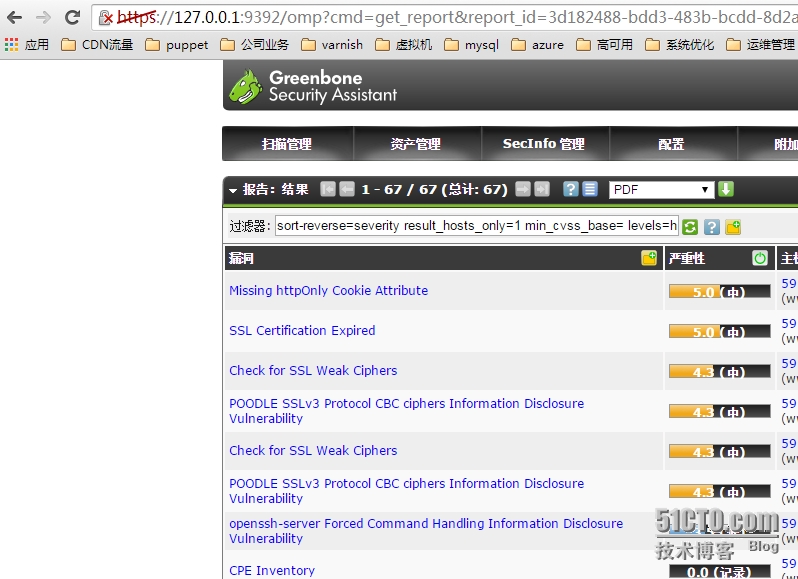
Open https://localhost:9392/.
然后登录操作。
