Kickstart无人职守安装RHEL6.4
本实验是在VirtualBox上搭建的虚拟机环境,使用的系统为RHEL6.4_64bit,由于VirtualBox默认不支持PXE网络启动,之后发现可以用官方提供的插件解决
插件下载地址:http://download.virtualbox.org/virtualbox/,找到对应版本目录下以.vbox-extpack结尾的文件
1、搭建Yum源(本地光盘镜像)
# mount /dev/cdrom /media/cdrom
# vim /etc/yum.repos.d/base.repo
[base]
name=base repo
baseurl=file:///media/cdrom
enabled=1
gpgcheck=0
2、安装syslinux、tftp-server、vsftpd
# yum -y install syslinux
# yum -y install tftp-server
# chkconfig tftp on
# service xinetd restart
# yum -y install vsftpd
# service vsftpd start
# chkconfig vsftpd on
3、复制PXE相关文件并修改
<1> 从光盘镜像中复制PXE启动时需要的文件
# cp /usr/share/syslinux/pxelinux.0 /var/lib/tftpboot/
# mkdir /var/lib/tftpboot/pxelinux.cfg
# cp /media/cdrom/isolinux/isolinux.cfg /var/lib/tftpboot/pxelinux.cfg/default
# cp /media/cdrom/isolinux/initrd.img /var/lib/tftpboot/
# cp /media/cdrom/isolinux/vmlinuz /var/lib/tftpboot/
<2> 修改/var/lib/tftpboot/pxelinux.cfg/default文件
# vim /var/lib/tftpboot/pxelinux.cfg/default
default linux       # 配置默认启动
#prompt 1
timeout 600         # 默认超时时间
display boot.msg
menu background splash.jpg
menu title Welcome to Red Hat Enterprise Linux 6.4!
menu color border 0 #ffffffff #00000000
menu color sel 7 #ffffffff #ff000000
menu color title 0 #ffffffff #00000000
menu color tabmsg 0 #ffffffff #00000000
menu color unsel 0 #ffffffff #00000000
menu color hotsel 0 #ff000000 #ffffffff
menu color hotkey 7 #ffffffff #ff000000
menu color scrollbar 0 #ffffffff #00000000
label linux
  menu label ^Install or upgrade an existing system
  menu default
  kernel vmlinuz
  append initrd=initrd.img ks=ftp://192.168.1.100/ks.cfg        # 配置读取的kickstart安装配置文件
label vesa
  menu label Install system with ^basic video driver
  kernel vmlinuz
  append initrd=initrd.img xdriver=vesa nomodeset
label rescue
  menu label ^Rescue installed system
  kernel vmlinuz
  append initrd=initrd.img rescue
label local
  menu label Boot from ^local drive
  localboot 0xffff
label memtest86
  menu label ^Memory test
  kernel memtest
  append -
4、安装配置DHCP服务
<1> 安装DHCP服务
# yum -y install dhcp.x86_64 dhcp-devel.x86_64
# cp -p /usr/share/doc/dhcp-4.1.1/dhcpd.conf.sample /etc/dhcp/dhcpd.conf
<2> 配置DHCP服务
# vim /etc/dhcp/dhcpd.conf
subnet 192.168.1.0 netmask 255.255.255.0 {          # 所属网段及掩码
  range dynamic-bootp 192.168.1.101 192.168.1.200;  # IP地址池范围
  option routers 192.168.1.1;                       # 路由器IP(网关)
  next-server 192.168.1.100;                        # 服务器IP地址(本机)
  filename="pxelinux.0";                            # PXE获得IP后的引导文件
}
<3> 启动DHCP服务
# service dhcpd start
# chkconfig dhcpd on
5、生成kickstart配置文件
<1> 安装kickstart软件包
# yum install system-config-kickstart
<2> 图形化工具配置生成ks.cfg文件
# system-config-kickstart
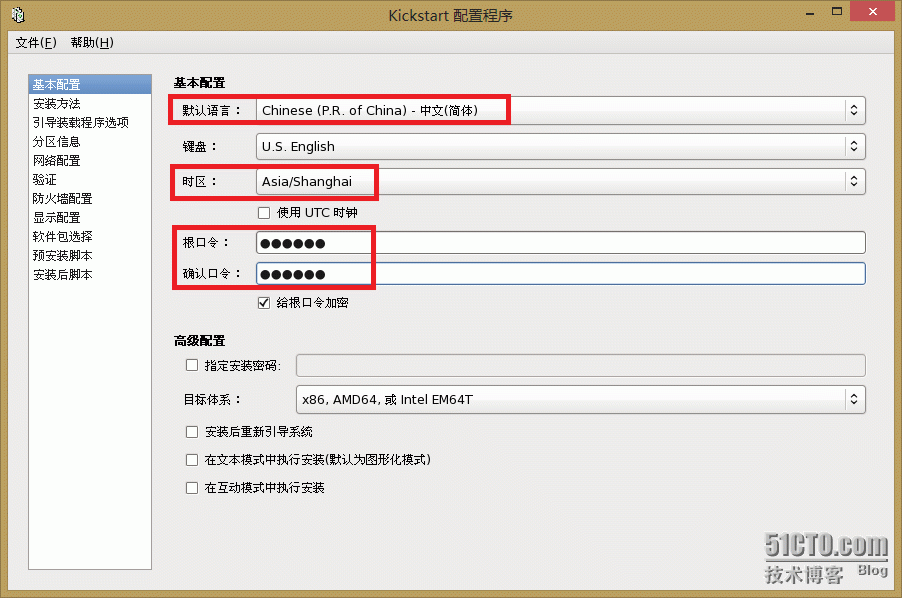
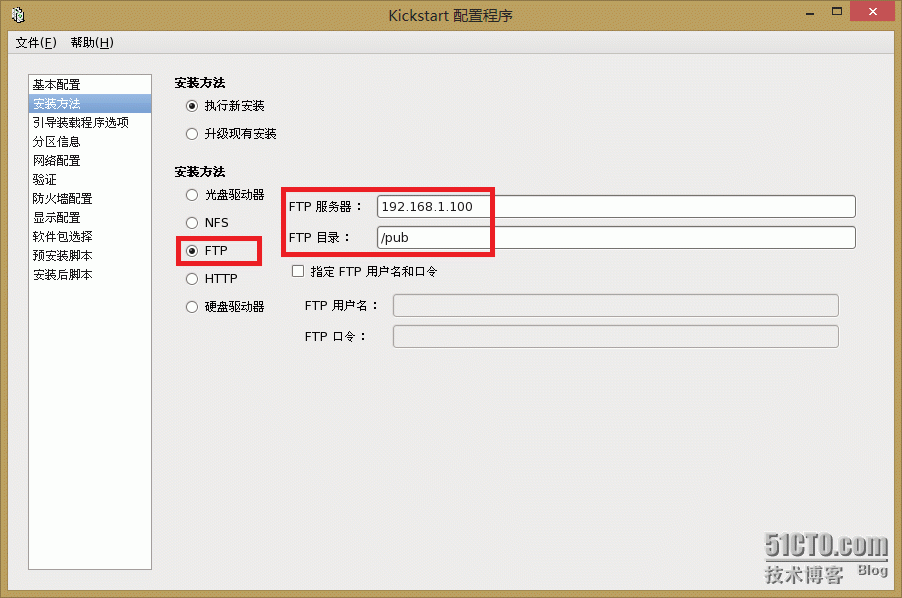
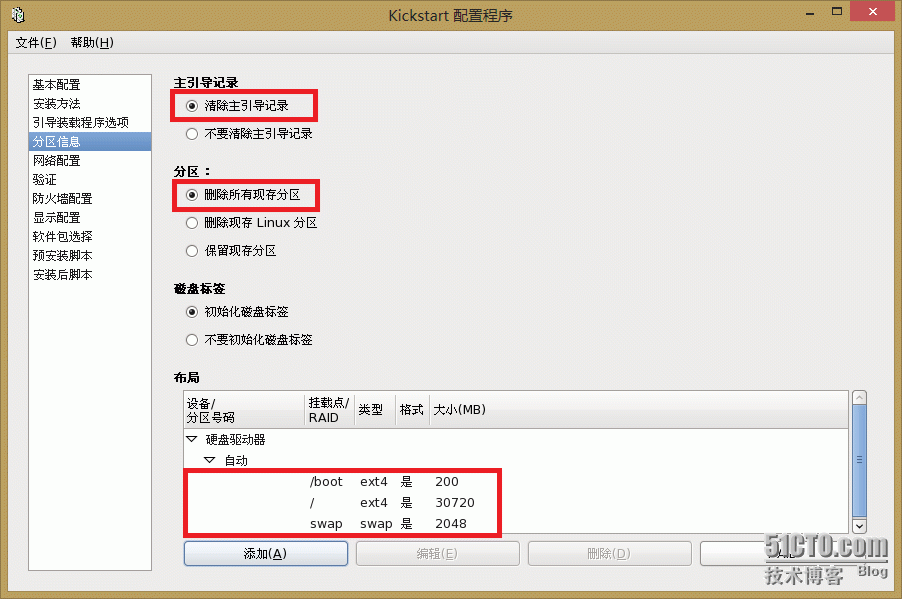
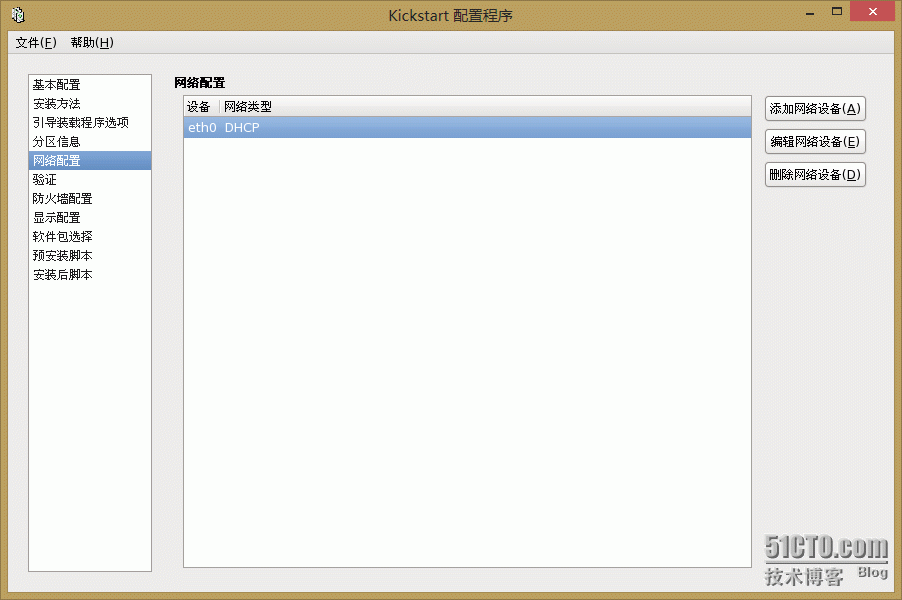
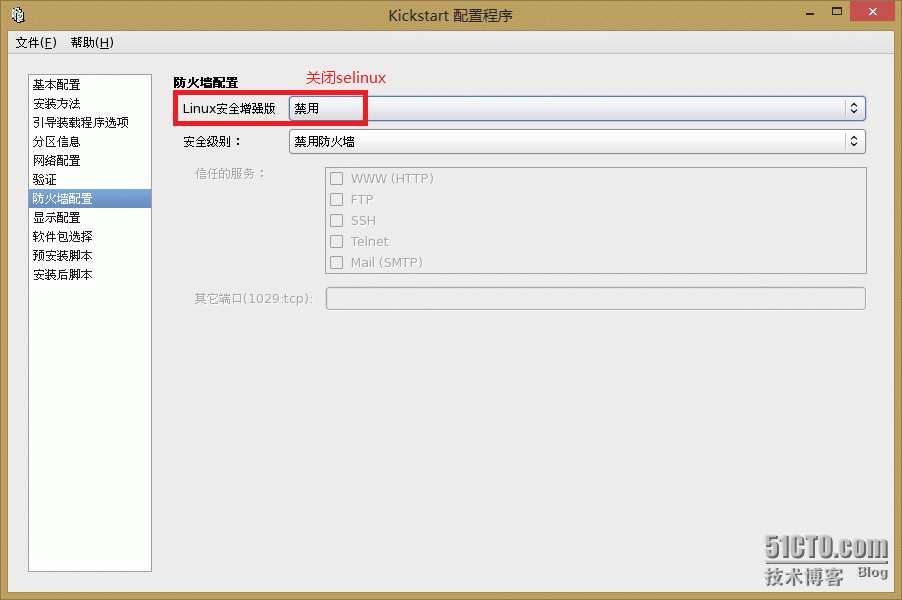
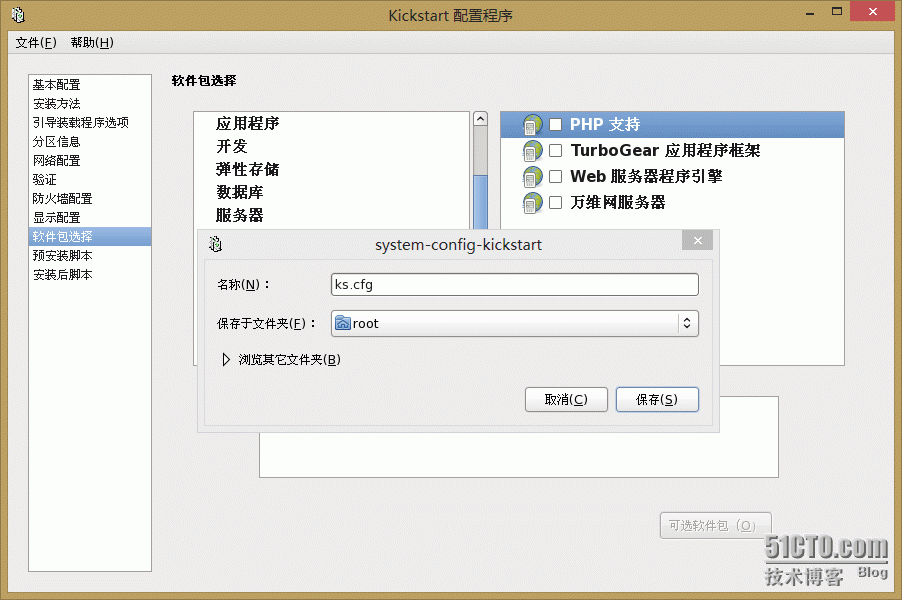
注:所要安装的软件包可以在图形化配置中选择,也可之后修改配置文件写入软件包列表
<3> 修改新生成的ks.cfg文件
# vim /root/ks.cfg
#platform=x86, AMD64, 或 Intel EM64T
#version=DEVEL
# Firewall configuration
firewall --disabled
# Install OS instead of upgrade
install
# Use network installation
url --url="ftp://192.168.1.100/pub"
# Root password
rootpw --iscrypted $1$tD0M/Ntd$E9ycZ9y9I3V7eOJyb5dh5.
# System authorization information
auth  --useshadow  --passalgo=sha512
# Use graphical install
graphical
firstboot --disable
# System keyboard
keyboard us
# System language
lang zh_CN
# SELinux configuration
selinux --disabled
# Installation logging level
logging --level=info
# System timezone
timezone  Asia/Shanghai
# Network information
network  --bootproto=dhcp --device=eth0 --onboot=on
# System bootloader configuration
bootloader --location=mbr
# Clear the Master Boot Record
zerombr
# Partition clearing information
clearpart --all --initlabel
# Disk partitioning information
part / --fstype="ext4" --size=200
part / --fstype="ext4" --size=30720
part swap --fstype="swap" --size=2048
%packages            # 所要安装的软件包
@base
@chinese-support
@console-internet
@core
@debugging
@basic-desktop
@development
@directory-client
@hardware-monitoring
@java-platform
@large-systems
@network-file-system-client
@performance
@perl-runtime
@system-management-snmp
@server-platform
@server-policy
@x11
mtools
pax
oddjob
sgpio
device-mapper-persistent-data
systemtap-client
jpackage-utils
samba-winbind
certmonger
pam_krb5
krb5-workstation
perl-DBD-SQLite
%end
注:如之前图形化配置中未配置所要安装的软件包,可复制本机的/root/anaconda-ks.cfg中%packages及之后的内容,粘贴至ks.cfg文件最后面即可
<4> 将配置文件复制到Vsftp服务的根目录中
# cp /root/ks.cfg /var/ftp
6、将系统安装文件复制到Vsftp服务根目录中的pub目录下(也可使用挂载光盘镜像的方式)
# umount /media/cdrom
# mount /dev/cdrom /var/ftp/pub/
7、关闭iptables和selinux
# service iptables stop
# setenforce 0
8、测试
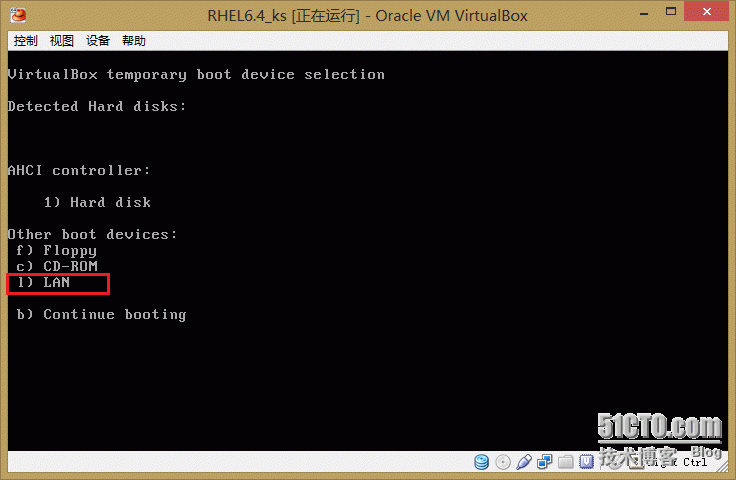
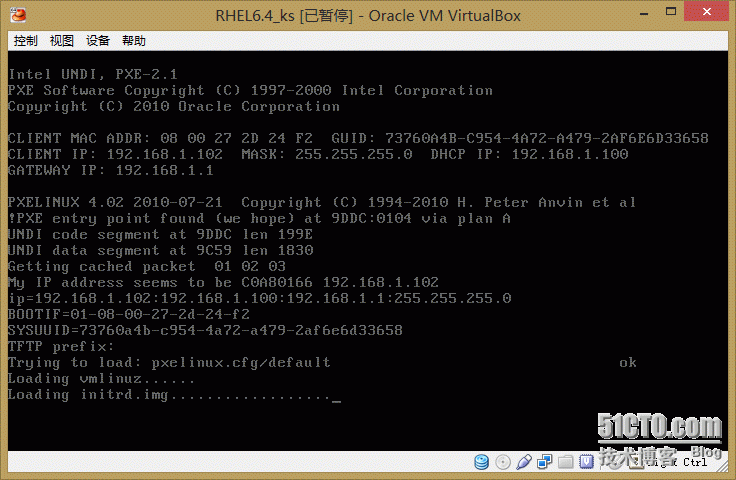
在VirtualBox中新建虚拟机(网卡改为桥接),启动时按F12进入boot选项后,按l即可
