Zabbix监控Linux、Windows主机
监控Linux主机
下载对应系统的agent代理程序:http://www.zabbix.com/download.php
我使用的是CentOS6.4_x64,下载这个

1、安装zabbix_agent代理程序
[root@localhost ~]# useradd zabbix
[root@localhost ~]# mkdir /usr/local/zabbix_agentd
[root@localhost ~]# tar zxvf zabbix_agents_2.2.0.linux2_6.amd64.tar.gz -C /usr/local/zabbix_agentd
[root@localhost ~]# cd /usr/local/zabbix_agentd/
[root@localhost zabbix_agentd]# cp conf/zabbix_agentd.conf /usr/local/etc/
[root@localhost ~]# vi /usr/local/etc/zabbix_agentd.conf
Hostname=localhost   #本机主机名
Server=192.168.1.153 #zabbix服务端IP
[root@localhost zabbix_agentd]# cp sbin/zabbix_agentd /etc/init.d/
[root@localhost zabbix_agentd]# /etc/init.d/zabbix_agentd start
[root@localhost ~]# echo "/etc/init.d/zabbix_agentd start" >> /etc/rc.local #开机启动
#查看是否安装成功,监听端口是10050
[root@localhost zabbix_agentd]# netstat -tupln | grep 10050
tcp    0   0 0.0.0.0:10050   0.0.0.0:* LISTEN      1780/zabbix_agentd
#在服务端执行,有返回信息说明安装成功
[root@localhost]# zabbix_get -s 127.0.0.1 -p 10050 -k system.uptime
27274
2、登陆zabbix页面添加Linux主机
Configuration―> Hosts ―> Create host
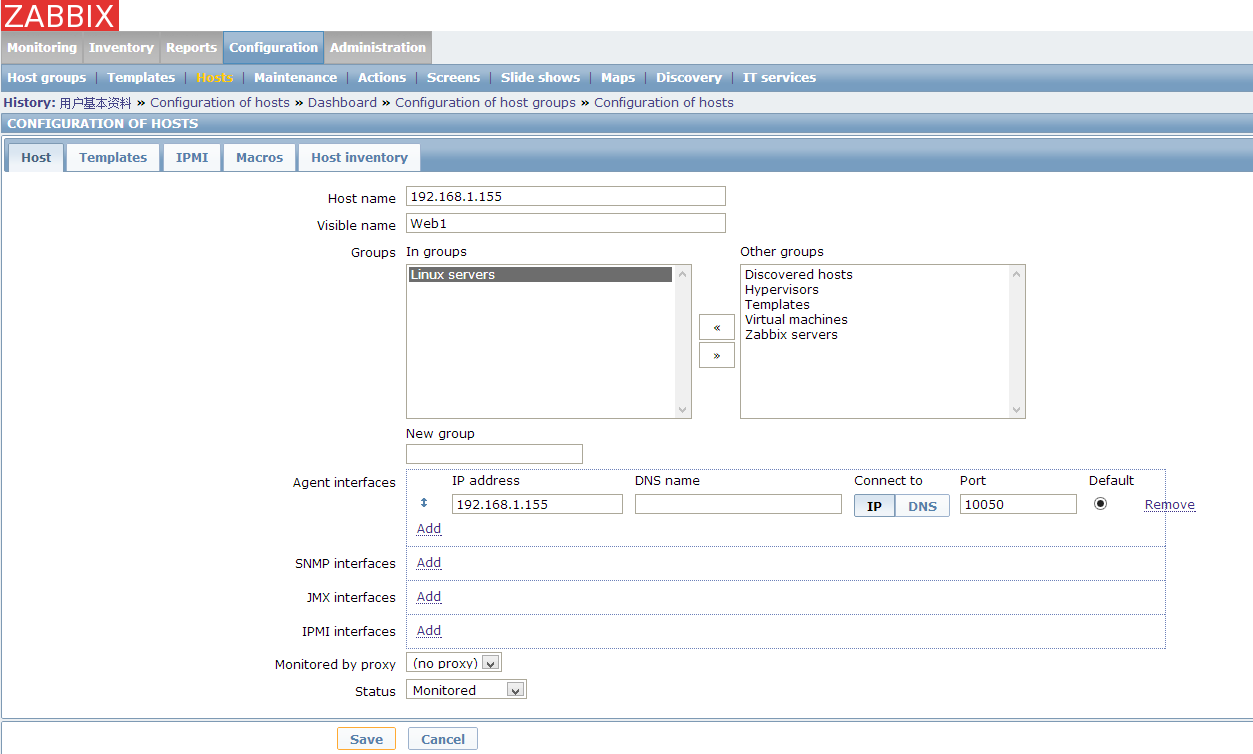
参数说明
Host name:被监控的主机
Visible:前端显示的名字
Groups:监控主机所在组
Agent interfaces:agent监控时配置信息
SNMP interfaces:snmp监控时配置信息
Status:是否被监控
#当主机的Status状态显示 Monitored,说明被监控
3、为主机添加监控item(监控类型)
Configuration ―> Hosts ―> 选择被监控主机--> Create item

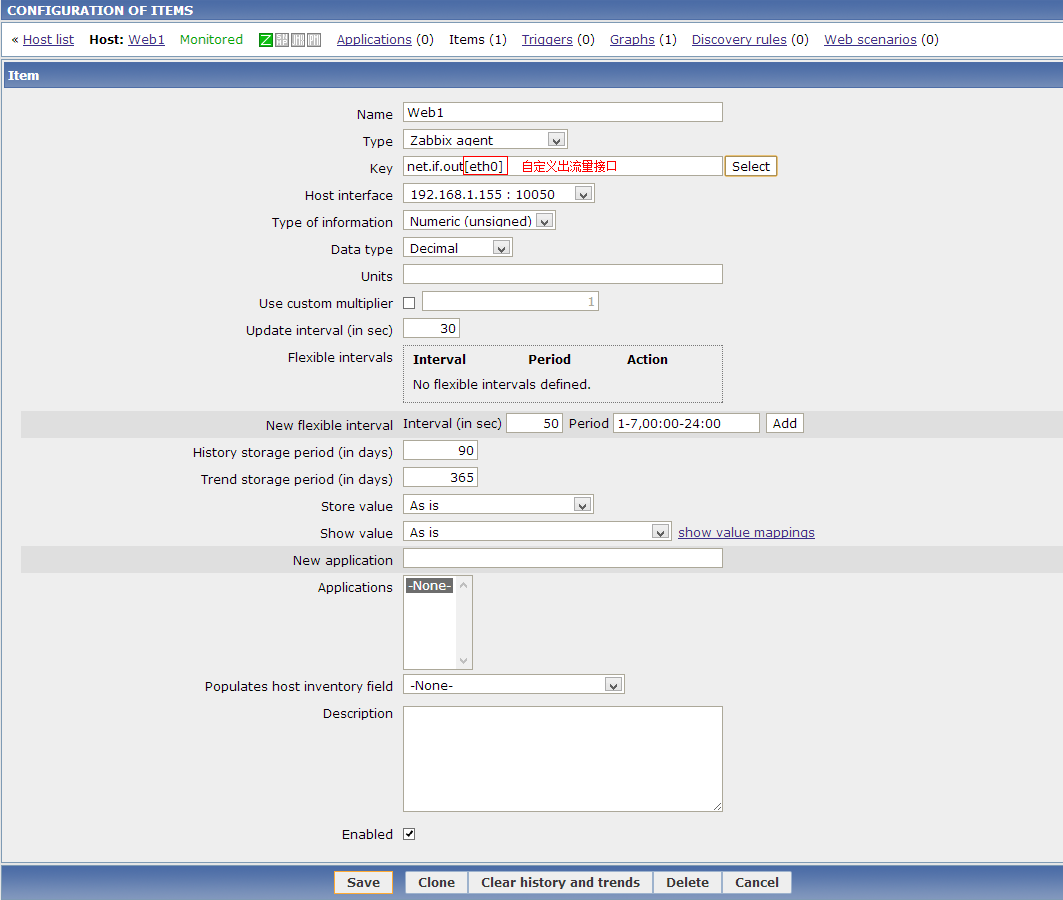
参数说明
Name:item定义的名称
Type:item使用监控的类型(我们选择内存总量)
Key:选择监控的资源
Units:数据存储单位
Updateinterval (in sec):监控更新周期
Historystorage period (in days):历史数据保存的天数
Trendstorage period (in days):数据保留的天数
#Error打钩说明我们添加成功

#等待几分钟查看是否获取到数据
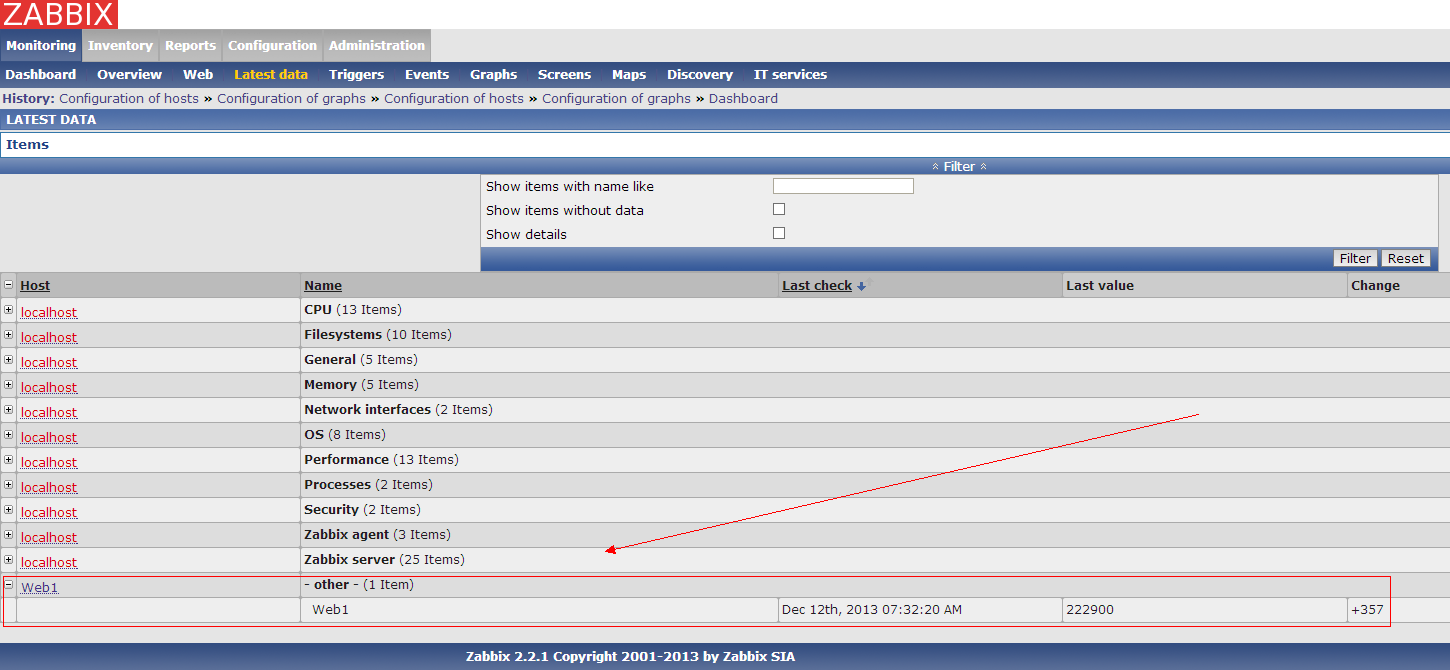
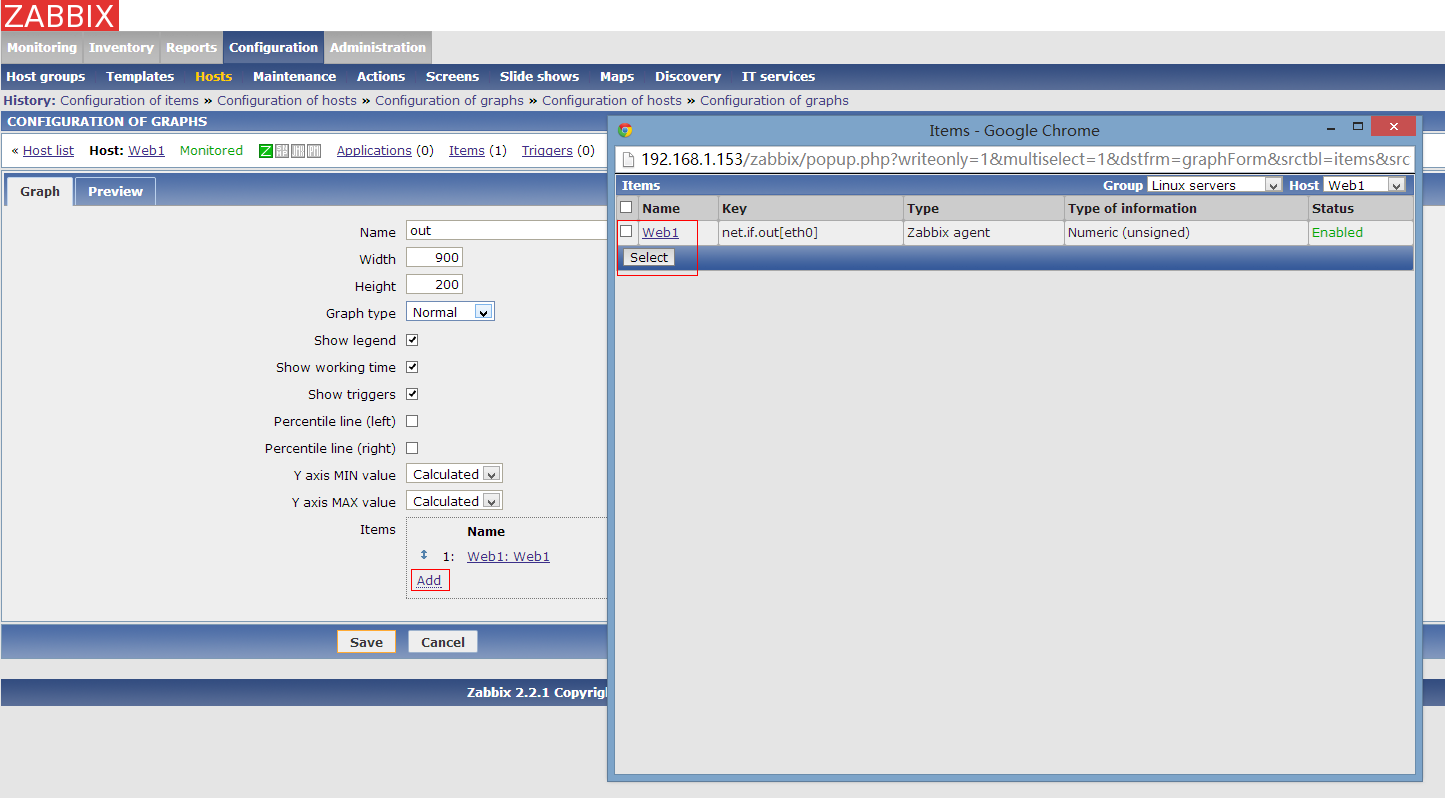
4、为Web1主机添加图形
Configuration ―> Hosts ―> 选择被监控主机--> Create Graph

5、为图形Graph添加Sreens
Configuration ―> Sreens --> Createsreen
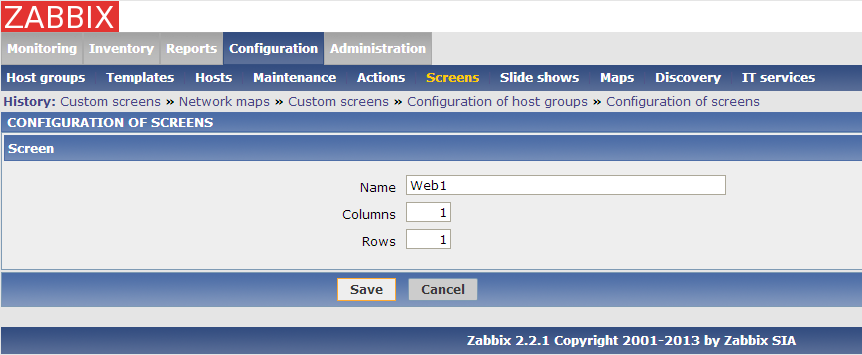
Configuration ―> Sreens --> Web1

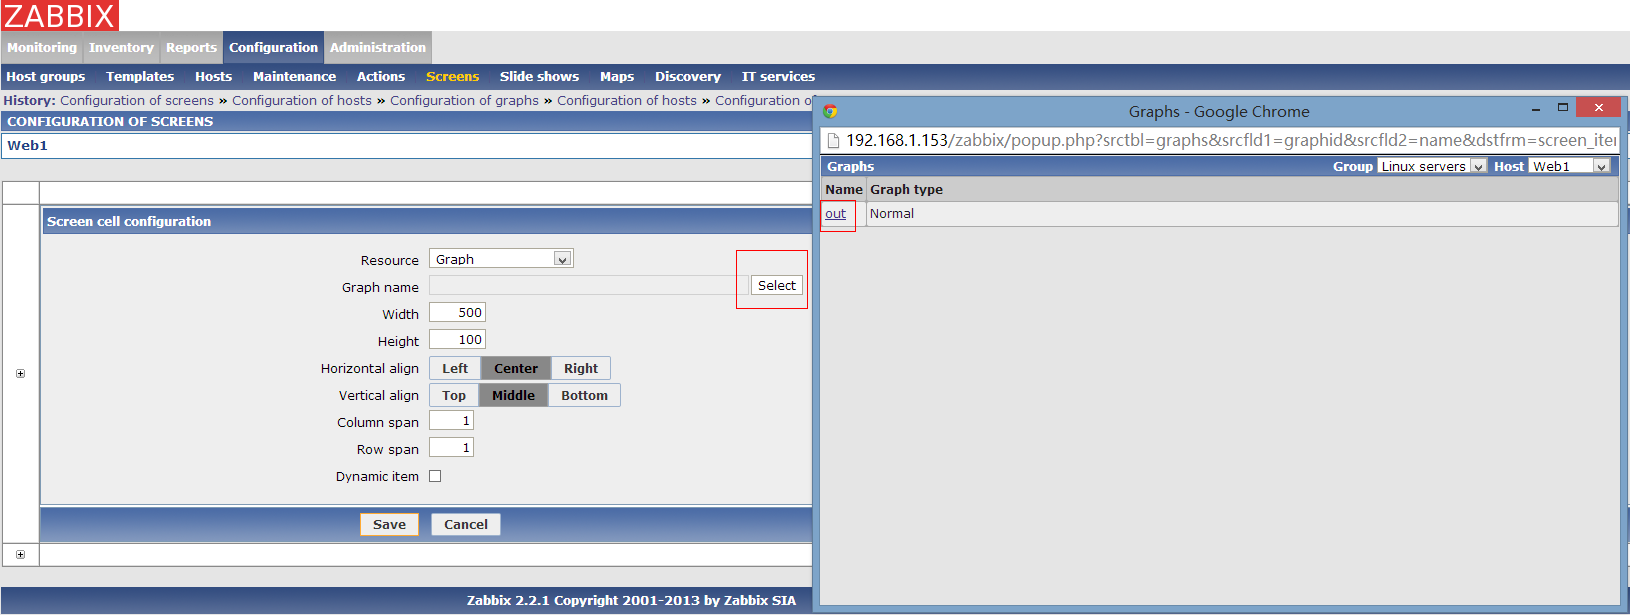
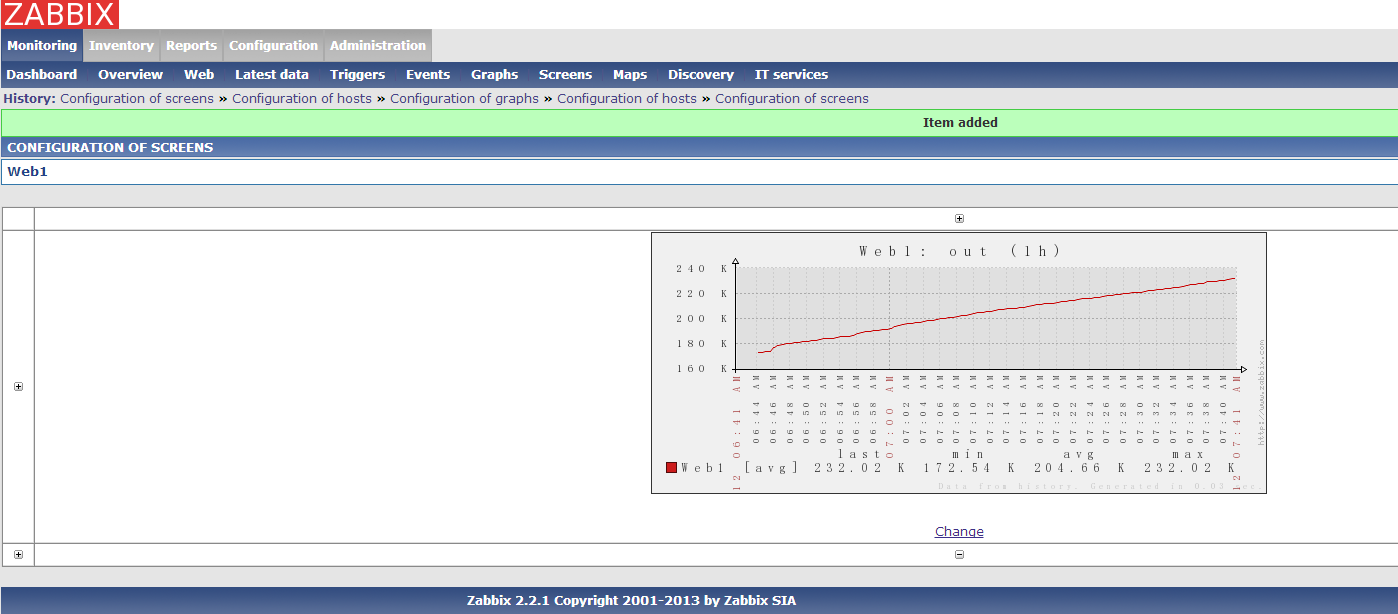
点击Change
监控Windows主机(Server 2008 R2)
下载:http://www.zabbix.com/downloads/2.2.0/zabbix_agents_2.2.0.win.zip
1、在C:\Program Files (x86)\下创建zabbix_agentd目录,将压缩包中bin/win64和conf解压到此目录,并重命名conf/zabbix_agentd.win.conf为zabbix_agentd.conf
2、修改配置文件zabbix_agentd.conf以下两项:
LogFile=C:\ProgramFiles (x86)\zabbix_agentd\zabbix_agentd.log
Server=192.168.1.153 #zabbix服务端IP
Hostname= #本机主机名
3、安装zabbix_agentd代理程序并启动
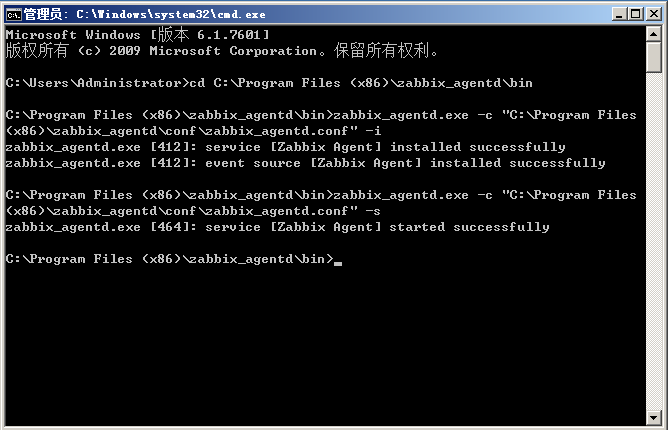
参数说明
-c:指定配置文件位置
-i:安装agent
-s:启动agent
-x:停止agent
-d:卸载agent1
此时,会在服务最下面多一个
服务端Web页面添加主机与Linux添加一样,同上。