linux下使用redis代理twmproxy
twemproxy,又名nutracker,是一个快速,轻量级的代理程序,支持memcache 和redis协议。它主要用来降低后端缓存服务器的连接数。
目前的最新版本为0.3.0.git地址:https://github.com/yuyunliuhen/twemproxy。
编译:
$get clone https://github.com/yuyunliuhen/twemproxy $cd twemproxy & ./configure --enable-debug=log & make $src/nutcracker --help
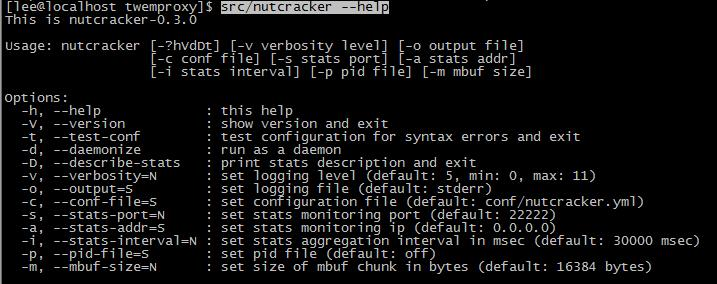
这样就已经编译成功了,这里从源代码目录启动,也可以通过make install 安装。
命令行选项:
-t, --test-conf : test configuration for syntax errors and exit
![]()
测试配置文件是否正确,默认为conf/nutcracker.yml,详细内容是这样的:

配置文件各项参数的说明下面会进行详细的介绍;
-d, --daemonize : run as a daemon

后台启动进程
-D, --describe-stats : print stats description and exit
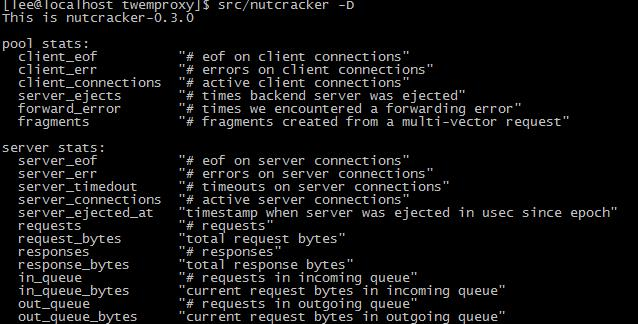
-v, --verbosity=N : set logging level (default: 5, min: 0, max: 11)
默认情况下debug日志是不可用的,不过在生产环境中打开debug日志并将日志级别设置为verbosity,LOG_INFO(-v 6 或者 �Cverbosity=6);
默认日志级别:

日志级别-v 6 或者 �Cverbosity=6:

在这个日志级别里,nutcracker 日志记录了每个客户端和服务端的生存周期和一些像节点从hash环上淘汰等重要信息.
打开debug日志的方法是在编译的时候加上--enable-debug=log选项.
-o, --output=S : set logging file (default: stderr)
![]()
-c, --conf-file=S : set configuration file (default: conf/nutcracker.yml)
如果不指定此选项,默认为conf/nutcracker.yml,我们也可以设定自己的配置文件;
![]()
-s, --stats-port=N : set stats monitoring port (default: 22222)
![]()
-a, --stats-addr=S : set stats monitoring ip (default: 0.0.0.0)
![]()
指定启动地址,默认为0.0.0.0;
-i, --stats-interval=N : set stats aggregation interval in msec (default: 30000 msec)
![]()
-p, --pid-file=S : set pid file (default: off)
![]()
-m, --mbuf-size=N : set size of mbuf chunk in bytes (default: 16384 bytes)

配置文件参数:
listen: The listening address and port (name:port or ip:port) for this server pool.
nutcracker服务器池监听端口和地址;
hash: The name of the hash function
hash函数,支持md5,crc16,crc32,finv1a_32等十多种;
hash_tag: A two character string that specifies the part of the key used for hashing. Eg "{}" or "$$". Hash tagenable mapping different keys to the same server as long as the part of the key within the tag is the same.
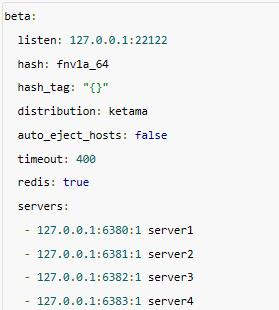
启用hash tags 意味着你将使用key的一部分来计算hash值,当hash tages存在的时候 ,我们使用在标签内的key的一部分来构建一致性hash,其他情况,我们使用全部的key去构建。hash tags能够让你将不同的key(只要在标签内的部分相同)映射到相同的服务器上。
例如,服务池beta的配置如下,指定了两个hash_tag字符“{}”,这意味着keys”user:{user1}:ids” 和 “user:{user1}:tweets” 将会映射到同一台服务器上,因为我们使用的是’user1′来计算hash,对于key “user:user1:ids”将会是用整个字符串来计算hash,所以可能会映射到其他服务器上。
timeout: The timeout value in msec that we wait for to establish a connection to the server or receive a response from a server. By default, we wait indefinitely.
为nutcracker的每一个服务池配置timeout 要比仅仅依靠客户端超时要好的多。
比如 :timeout: 400
仅仅依靠客户端超时设置并不能达到理想的超时效果,反而起到了相反的作用,因为客户端的超时设置在这里变成了客户端对代理的超时,但代理对服务端的链接是一直保持的,客户端重试请求对于服务端是没有效果的。默认情况下,任何发送给服务端的请求,nutcracker都会无限期的等待,当timeout被设置后,如果在timeout的时间过后还没有从服务端得到回应,这时会将超时错误信息SERVER_ERROR Connection time out发送给客户端。
backlog: The TCP backlog argument. Defaults to 512. preconnect: A boolean value that controls if nutcracker should preconnect to all the servers in this pool on process start. Defaults to false. redis: A boolean value that controls if a server pool speaks redis or memcached protocol. Defaults to false. server_connections: The maximum number of connections that can be opened to each server. By default, we open at most 1 server connection.
twemproxy的设计意图是通过少量的服务端的链接来响应更多的客户端的链接,但是需要注意的是当twemproxy配置了 server_connections: > 1时,情况就不一定是这样的。
为了说明这一点,假设在twemproxy 配置为server_connections: 2的场景下,一个客户端发出了以set foo 0 0 3\r\nbar\r\n(写)为开始,然后第二个命令是get foo\r\n (读)的piplined请求,期望的结果是读取foo的时候能够返回bar,然而,由于配置了两个服务端链接,读写请求可能被发送到不同的链接上,也意味着他们的执行顺序要看哪一个先到达服务端,总结一下,如果客户端期望得到的是我最后写的内容,需要将twemproxy配置为 server_connections:1或者客户端只发起同步的请求。
auto_eject_hosts: A boolean value that controls if server should be ejected temporarily when it fails consecutively server_failure_limit times. See liveness recommendations for information. Defaults to false. server_retry_timeout: The timeout value in msec to wait for before retrying on a temporarily ejected server, when auto_eject_host is set to true. Defaults to 30000 msec. server_failure_limit: The number of consecutive failures on a server that would lead to it being temporarily ejected when auto_eject_host is set to true. Defaults to 2. servers: A list of server address, port and weight (name:port:weight or ip:port:weight) for this server pool.
twemproxy上代理的服务实例可以通过两种字符串格式指定‘host:port:weight’ 或者 ‘host:port:weight name’.

或者

在前面的配置中,keys是直接由‘host:port:weight’三重映射而来,而在后者keys是由节点名映射而来,节点名和主机的地址和端口对应,后者的方法可以使我们更自由地在不打乱hash环的情况下重置节点后端实例。在auto_eject_hosts设置为false的情况下,达到理想的配置。 了解详细issue 25
需要注意的是当使用节点名来构建一致性hash环的时候,twemproxy将会忽略’host:port:weight name’这种格式的字符串中权重的值。
测试使用:
(1) 配置一份配置文件:
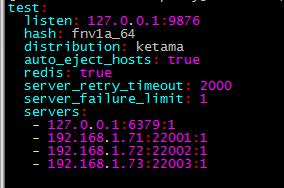
(2) 按照servers的配置分别在对应服务器上启动redis-server;
(3) 启动nutcracker

日志显示redis pool代理4 servers.
(4) 连接nutcracker,并设置获取键值
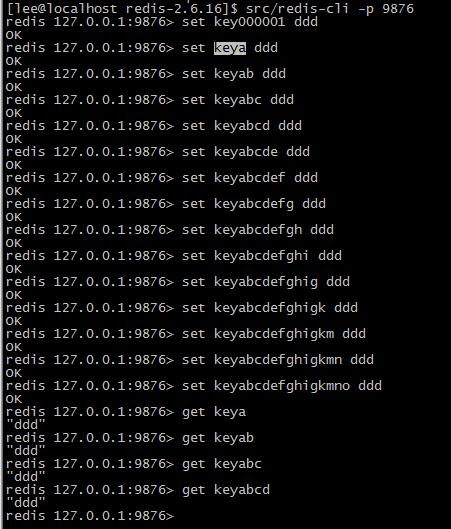
各个redis服务器的监视情况:


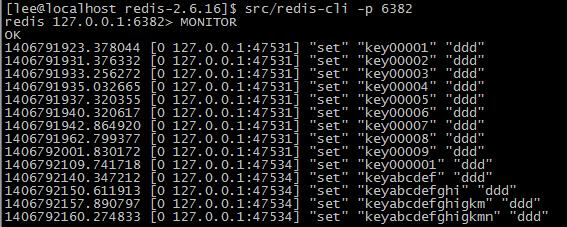

nutcracker日志:

以上只是展示了一主机多实例的情况,如果是多主机多实例,只需要更改对应IP就行了。
参考:twemproxy/recommendation.md(翻译)twemproxy的一些生产环境使用经验
原文链接:http://blog.chinaunix.net/uid-8625039-id-4384964.html