How to Configure Network Static IP Address and Manage Services on RHEL/CentOS 7.0
博客来源:
http://www.tecmint.com/configure-network-interface-in-rhel-centos-7-0/How to Configure Network Static IP Address and Manage Services on RHEL/CentOS 7.0
By Matei Cezar Under: Network On: July 12, 2014
Download Your Free eBooks NOW - 10 Free Linux eBooks for Administrators
This scope of this tutorial is to explain how we can edit and make changes to Network Configurations on RHEL/CentOS 7.0 from command line only, and, more specific how we can set up a Static IP addresses on network interfaces using system network scripts, which is a must be configured to serve Internet-facing network services, and how to configure or change RHEL/CentOS 7.0 system hostname.
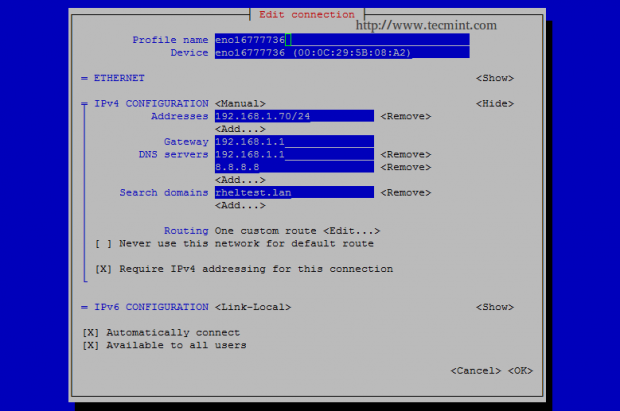
Configure Static IP in Linux
Also will show you, how we can manage or disable unwanted system services, such as Network Manager, which is no longer needed in-case you use a manual static IP configured on network scripts, Avahi-Daemon which is, also, not needed on a server and represents a seriously security gap, unless you installed the server on your Laptop and you want to instantly browse your network for other services, and on the final will present you Network Manager Text User Interface �C nmtui, a system utility that can ease the job of editing your system network settings with advanced Interface configurations like creating Bond, Bridge, Team and VLAN Interfaces.
Requirements
RHEL 7.0 Minimal System Installation
Active RHEL 7.0 Subscriptions and Functional Repositories
CentOS 7.0 Minimal System Installation
Also be aware that most of configurations offered by editing system files should not be performed from a remote location using SSH service until you establish an continue and reliable network connection using a fixed IP address.
Step 1: Disable Unwanted System Services
1. Before actually starting to do anything we need to make sure that our system has some necessary editing and networking tools like netstat, ifconfig, wget and curl installed, some of them will not be used on this step but
it’s better to have them installed for future configurations.
# yum install nano wget curl net-tools lsof
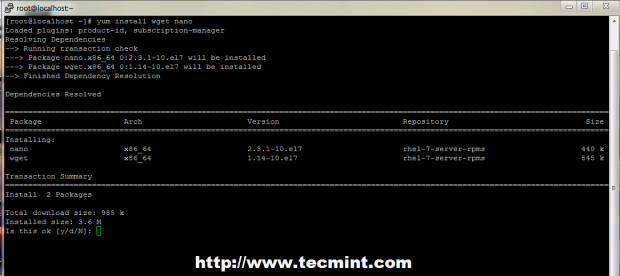
Install wget in Linux
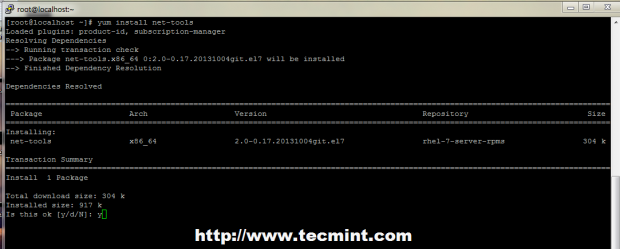
Install net-tools in Linux
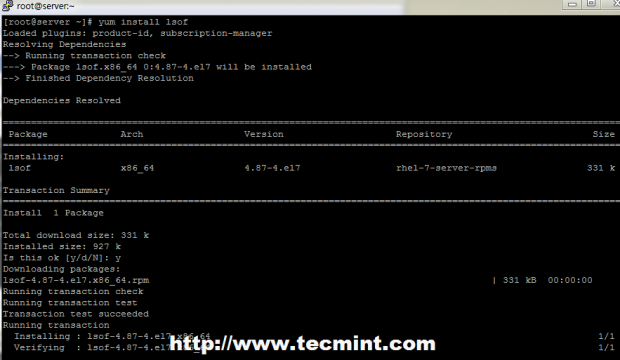
Install lsof in Linux
2. After the tools have installed run ifconfig to get your Network Interfaces settings and status, and, then run netstat or lsof command to check what services are running by default on our server.
# ifconfig
# netstat -tulpn
# lsof -i
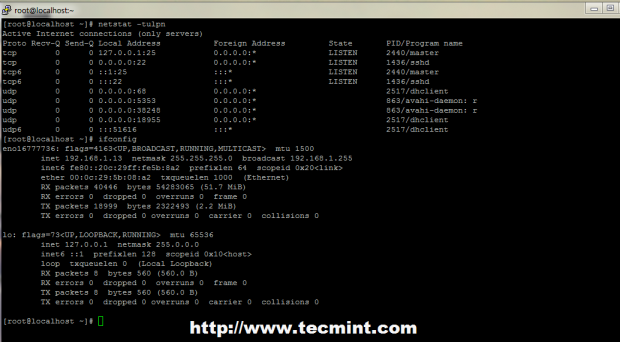
netstat-tulpn Command
3. The netstat command output is pretty self-explanatory and shows a list of sockets associated with their running program name.
If, for example, our system will not be used as a mail service you can stop Postfix master daemon which runs on localhost and, also stop and disable other unwanted services using the following commands �C the only service I advise not to stop or disable for now is SSH, if you need remote control over server.
# systemctl stop postfix
# systemctl stop avahi-daemon
# systemctl disable postfix
# systemctl disable avahi-daemon

Stop Avahi Daemon

Stop Postfix Service
4. You can, also, use old init commands to stop or disable services but since Red Hat now implements systemd process and service management, you should better get used to systemctlcommand and use it often.
If you used Arch Linux then it should be a piece of cake to switch to systemd �C although all init commands now are linked and pass-through systemd filter.
# service postfix stop
# chkconfig postfix off
5. If you want to get a list of all started services run service command and for an exhaustive report use systemctl.
# service --status-all
# systemctl list-unit-files
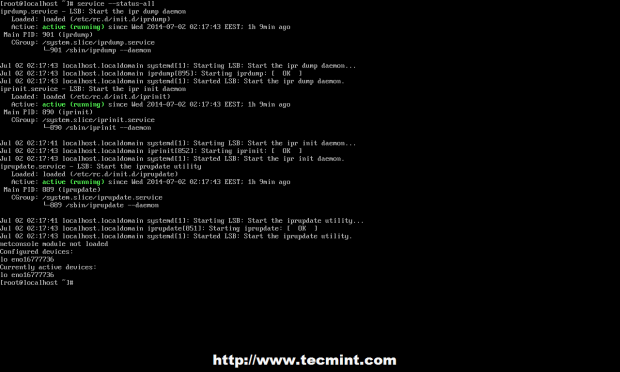
List All Services in Linux
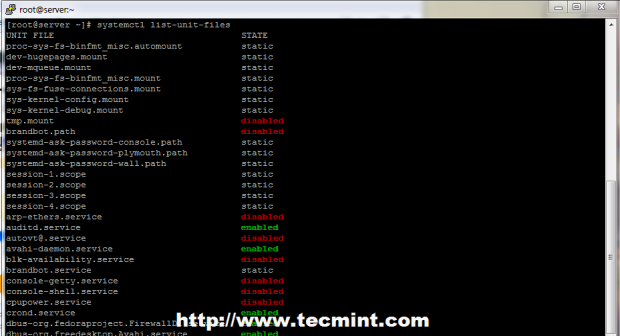
List All Services Report
6. To manage services run systemctlcommand using the most important switches: start, stop,restart, reload, disable, enable, show, list-dependencies, is-enabled etc. followed by your service name.
Also, another important feature that systemctl command can also run on remote server through SSH service on a
specified host using �CH option and perform the same actions as locally. For example, see the command and screenshot below.
# systemctl -H remote_host start remote_service

Run systemctl on Remote Server
Step 2: Configuring Static IP and Set Hostname
7. Before starting editing Network Interface Card system files make sure that from now on and until you set static IP, you have physical or any other type of access to your server, because this step requires bringing down your network interface and connections.
Although it can be done smoothly without disrupting your connectivity and activate connection after reboot. There is no way you can test it before reboot, if you only have a single NIC attached. Still I will present you the entire method and indicate the steps needed to be avoided in case you want to maintain your connectivity and test it afterwards.
For beginning start by stopping and disabling NetworkManager service.
** Don’t run this command if you still want to maintain connection **
# systemctl stop NetworkManager.service
# systemctl disable NetworkManager.service
8. Now move to /etc/sysconfig/network-scripts/ path, open and choose your Network Interface you want to assign static IP for editing �C to get all NICs names use ifconfig -a or ip -a commands.
# nano /etc/sysconfig/network-scripts/ifcfg-eno16777736
9. Use the next template to edit file and make sure that ONBOOT statement is set on YES ,BOOTPROTO is set to static or none and don’t change HWADDR and UUID values provided by default.
HWADDR=00:0C:29:5B:08:A2
TYPE=Ethernet
BOOTPROTO=static
DEFROUTE=yes
PEERDNS=yes
PEERROUTES=yes
USERCTL=no
NM_CONTROLLED=no
IPV4_FAILURE_FATAL=no
IPV6INIT=yes
IPV6_AUTOCONF=yes
IPV6_DEFROUTE=yes
IPV6_PEERDNS=yes
IPV6_PEERROUTES=yes
IPV6_FAILURE_FATAL=no
NAME=eno16777736
UUID=8c6eefa2-0d7b-4559-9870-2953290dc988
ONBOOT=yes
                IPADDR=192.168.1.70
                NETMASK=255.255.255.0
                GATEWAY=192.168.1.1
                DNS1=192.168.1.1
                DNS2=8.8.8.8
                DOMAIN=rheltest.lan
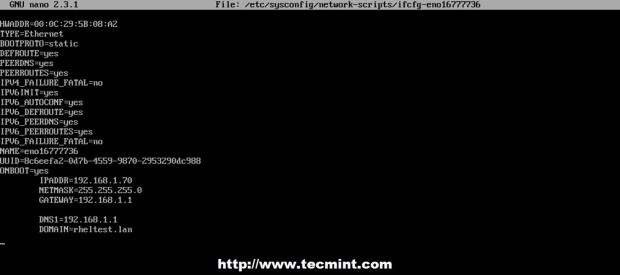
Configure IP Address in Linux
10. After finishing editing the file, close it and move to resolv.conf file if you want DNS servers enabled system wide.
# nano /etc/resolv.conf
Here just add your DNS servers using nameserver statement.
nameserver 192.168.1.
nameserver 8.8.8.8
11. Now Network Interface is configured with a static IP, the only thing remaining is to restart your network or reboot your system and use ifconfig or ip command to view IP address and test configuration using ping command.
# systemctl restart network
NOTE: After restart use the newly static IP address configured to perform remote login with SSH.
# service network status
# ifconfig
# ip addr show
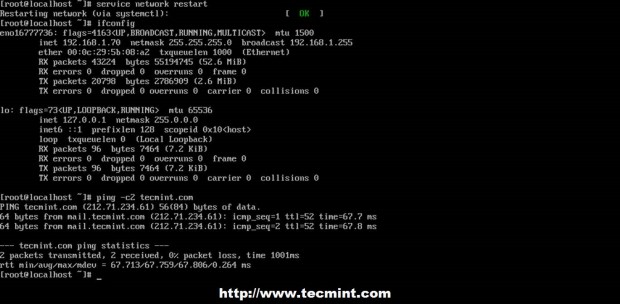
Start Newtork in Linux
12. To adjust system hostname system-wide, open hostname and hosts file located on /etc path and edit both the following way.
Hostname File
# nano /etc/hostname
Here you can add just the name of the system but it’s a good idea to append the .dot domain to.
server.rheltest.lan
Hosts File
# nano /etc/hosts
Here add the same hostname as above on 127.0.0.1 line before localhost.localdomain statements.
127.0.0.1 server.rheltest.lan localhost.localdomain …

Set Hostname in Linux
To test if your hostname is correctly set use hostname command.
# hostname -s # For short name# hostname -f # For FQDN mame
Step 3: Use Network Manager Text User Interface
13. NetworkManager Text User Interface (TUI) tool, nmtui, is a RHEL intuitive tool which provides a text interface to configure networking by controlling Network Manager, which helps editing advanced network settings such as assign static IP addresses to Network Interfaces, activate or disable a connection, edit WI-FI connections, set your system hostname or create advanced Network interfaces like InfiniBand, bond, bridge, team or VLAN.
NetworkManager-tui is installed by default in RHEL/CentOS 7.0, but if for some reasons its missing issue the following command to install it.
# yum install NetworkManager-tui
14. To start Network Manager Text User Interface run nmtui command and use TAB or arrowkeys to navigate through and press Enter to select an option. If you want to directly edit or connect a specific interface run the following options.
# nmtui edit eno16777736
# nmtui connect eno16777736
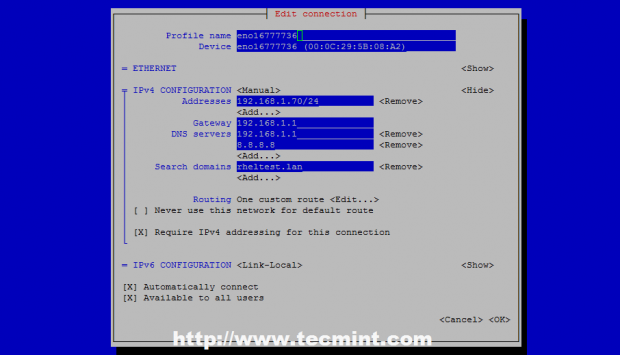
NetworkManager Text User Interface
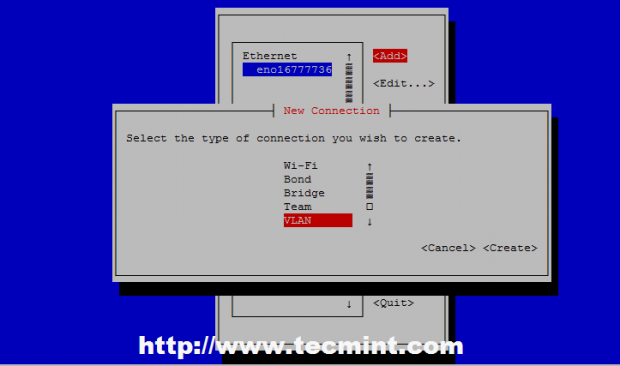
Select Network Connection
If you want to set static IP you can, also, use Network Manager Text User Interface as a facile alternative to actually edit network interfaces files, with a limited number of options that method has to offer, but make sure Network Manager service is enabled and started on your system.