分布式监控之Zabbix-Agent
Zabbix agent安装配置文档
1. 环境准备:
Zabbix需要在被监控的host上安装agent,在zabbix官网上下载相应平台的agent包到各被监控端,按如下方式在被监控上运行agent。(注:官网上下载的agent包里没有运行agentd所必须的配置文件,可以从zabbix server上拷贝一份zabbix_agentd.conf,这个conf文件是所有平台都通用的)
1) 源码安装
首先新建zabbix用户来启动zabbix服务
groupadd zabbix
useradd zabbix -g zabbix
安装依赖服务
yum install wget make gcc gcc-c++ autoconf ncurses-devel fping -y
下载zabbix源码包
http://jaist.dl.sourceforge.net/project/zabbix/ZABBIX%20Latest%20Stable/2.2.3/zabbix-2.2.3.tar.gz
tar xzf zabbix-2.2.3.tar.gz
cd zabbix-2.2.3.
./configure --prefix=/usr/local/zabbix --enable-agent
make install
复制启动脚本和配置文件
cp misc/init.d/redhat/zabbix_agentd_ctl /etc/init.d/
mkdir /etc/zabbix
cp misc/conf/zabbix_agentd.conf /etc/zabbix
编辑配置文件
vi /etc/zabbix/zabbix_agentd.conf
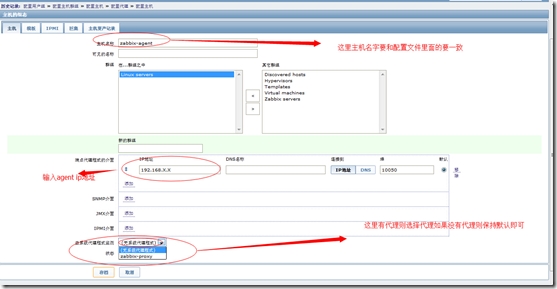
Server=192.168.X.X #这里写zabbix server的ip地址 如果设置了proxy则这里写proxy的ip地址
Hostname=zabbix-agent #此处与zabbix网页监控中的host名一致
开启zabbix_agentd服务
/etc/init.d/zabbix_agentd_ctl start
可能需要修改zabbix_agentd_ctl 脚本,有时候里面zabbix agent的存放路径不对,根据实际环境修改下就可以。
一般出现什么问题都会在/tmp/zabbix_agentd.log上有记录,帮助排错。
或者在server端上看/tmp/zabbix_server.log也可以。
2) yum安装
rpm --import http://repo.zabbixzone.com/centos/RPM-GPG-KEY-zabbixzone
rpm -Uv http://repo.zabbixzone.com/centos/zabbixzone-release-0.0-1.noarch.rpm
yum install zabbix-agent -y
chkconfig zabbix-agent on
mv /etc/zabbix/zabbix_agentd.conf /etc/zabbix/zabbix_agentd.default
sed 's/Server=127.0.0.1/Server=192.168.X.X/' /etc/zabbix/zabbix_agentd.default > /etc/zabbix/zabbix_agentd.conf
service zabbix-agent start
在web页面添加主机
1)这里选择的是手动添加
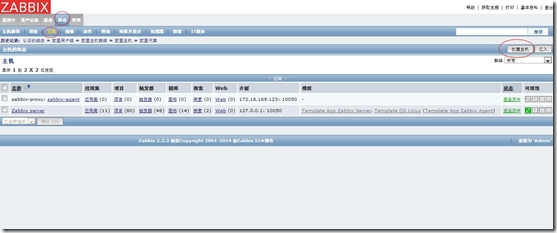
组态》主机》创建主机


2)自动添加主机
详情查看http://www.centoscn.com/image-text/config/2013/0806/1108.html
常见错误排查及解决
zabbix_agentd.log里面有出现host [] not found错误的解决
查看zabbix_agentd.log时出现下列错误
[[email protected] ~]# tail /var/log/zabbix/zabbix_agentd.log
1266:20140523:063554.157 no active checks on server [127.0.0.1:10051]: host [zabbix.clvn.com.cn] not found
出现该错误的原因是一般是zabbix_agentd.conf里面的Hostname和前端zabbix web里面的配置不一样所造成的,即在zabbix web页面Monitoring->Configuration->Hosts 页面的Name和zabbix_agentd.conf里面的Hostname要一样。
解决方法:
1.查看zabbix_agentd.conf文件中的Hostname
[root@bjsd-zabbix-x86v-app01 ~]# cat /etc/zabbix/zabbix_agentd.conf | grep Hostname
### Option: Hostname
# Value is acquired from HostnameItem if undefined.
# Hostname=
Hostname=zabbix.clvn.com.cn
### Option: HostnameItem
# Item used for generating Hostname if it is undefined. Ignored if Hostname is defined.
# HostnameItem=system.hostname
# Aliases can be used in HostMetadataItem but not in HostnameItem parameters.
2.在zabbix web页面Monitoring->Configuration->Hosts 页面更改Host name和zabbix_agentd.conf里面的Hostname一样。
3.重新启动zabbix-agent服务
[root@zabbix ~]# service zabbix-agent restart
Shutting down Zabbix agent: [ OK ]
Starting Zabbix agent: [ OK ]
4.再次查看日志文件
[root@bjsd-zabbix-x86v-app01 ~]# tail /var/log/zabbix/zabbix_agentd.log
1262:20140523:063900.738 Got signal [signal:15(SIGTERM),sender_pid:2615,sender_uid:0,reason:0]. Exiting ...
1257:20140523:063900.741 Got signal [signal:15(SIGTERM),sender_pid:2615,sender_uid:0,reason:0]. Exiting ...
1257:20140523:063900.762 Zabbix Agent stopped. Zabbix 2.2.3 (revision 44105).
2627:20140523:063900.929 Starting Zabbix Agent [zabbix.clvn.com.cn]. Zabbix 2.2.3 (revision 44105).
2627:20140523:063900.929 using configuration file: /etc/zabbix/zabbix_agentd.conf
2628:20140523:063900.941 agent #0 started [collector]
2630:20140523:063900.943 agent #2 started [listener #2]
2629:20140523:063900.944 agent #1 started [listener #1]
2631:20140523:063900.947 agent #3 started [listener #3]
2632:20140523:063900.948 agent #4 started [active checks #1]