iscsi网络存储LVM逻辑卷和RAID5卷
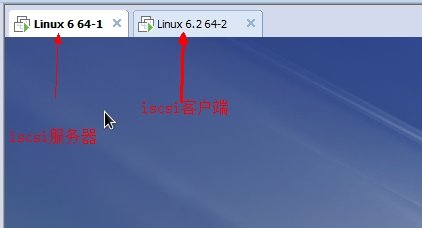
先来介绍一下网络实验环境linux-1版本是RHEL 6.5 64位操作系统,是作为iscsi服务器使用,并且生成了LVM逻辑卷和RAID5卷,用于作为网络存储空间。
linux-2版本是RHEL6.2 64位操作系统,作为iscsi客户端,并接收服务器端提供的LVM逻辑卷网络存储空间。

首先给linux-1添加四块硬盘,空间大小自己定义。

下面来生成一块LVM逻辑卷,此处为后面分配给linux-2虚拟机的准备空间。
[root@linux-1 ~]# fdisk /dev/sdb //编辑sdb硬盘
Command (m for help): n //生成分区
Command action
e extended
p primary partition (1-4)
P //生成主分区
Partition number (1-4): 1 //主分区编号1
First cylinder (1-652, default 1):
Using default value 1
Last cylinder, +cylinders or +size{K,M,G} (1-652, default 652):
Using default value 652 //分区为磁盘默认大小(所有)
Command (m for help): t //修改分区格式
Hex code (type L to list codes): 8e //输入8e代表LVM逻辑卷
Changed system type of partition 1 to 8e (Linux LVM)
Command (m for help): p //查看当前磁盘的分区情况
……
Device Boot Start End Blocks Id System
/dev/sdb1 1 652 5237158+ 8e Linux LVM
Command (m for help): w //保存并退出
下面是把刚才的sdb磁盘创建为逻辑卷。
[root@linux-1 ~]# pvcreate /dev/sdb1 //把sdb1生成物理卷
[root@linux-1 ~]# vgcreate benet /dev/sdb1 //生成为卷组benet
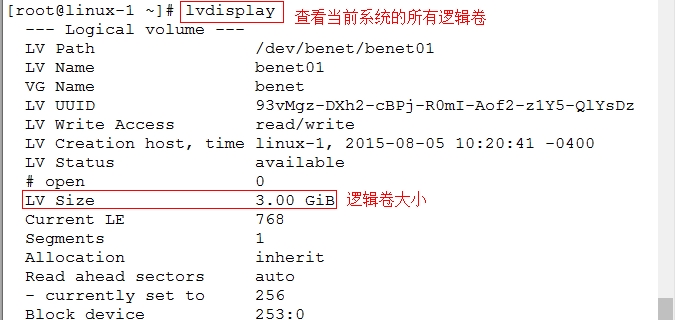
[root@linux-1 ~]# lvcreate -L 3G -n benet01 benet //然后生成benet01逻辑卷“-L”指定逻辑卷大小为3G
[root@linux-1 ~]# lvdisplay 查看系统逻辑卷情况如下。

下面再来生成一组RAID5卷。如下所示。
[root@linux-1 ~]# mdadm -Cv /dev/md0 -a yes -n3 -l5 /dev/sd[cde] //-Cv指定RAID5卷文件名;-a yes表示激活;-n3表示使用3块磁盘;-l5表示类型为RAID5卷;然后后面是指定cde三块磁盘。
[root@linux-1 ~]# mdadm -Q /dev/md0 //查看创建的RAID5卷空间
/dev/md0: 9.99GiB raid5 3 devices, 0 spares. Use mdadm --detail for more detail.
下面使用yum仓库安装服务端程序。
[root@linux-1 ~]# yum install scsi-target-utils -y
[root@linux-1 ~]# service tgtd start //直接可以启动服务
Starting SCSI target daemon: [ OK ]
[root@linux-1 ~]# netstat -natp | grep tgtd //查看tgtd服务的控制端口
tcp 0 0 0.0.0.0:3260 0.0.0.0:* LISTEN 2176/tgtd
tcp 0 0 :::3260 :::* LISTEN 2176/tgtd
下面创建两个新的iscsi磁盘标识。一个是LVM逻辑卷,一个是RAID。
[root@linux-1 ~]# tgtadm -L iscsi -o new -m target -t 1 -T iqn.2015-08.com.benet.store:lvm
[root@linux-1 ~]# tgtadm -L iscsi -o new -m target -t 2 -T iqn.2015-08.com.benet.store:raid
[root@linux-1 ~]# tgtadm -L iscsi -o show -m target //查看新建的iscsi磁盘
Target 1: iqn.2015-08.com.benet.store:lvm
…………
LUN: 0
Target 2: iqn.2015-08.com.benet.store:raid
…………
LUN: 0
为两个iscsi磁盘标识创建物理磁盘关联。
[root@linux-1 ~]# tgtadm --lld iscsi -o new -m logicalunit -t 1 -l 1 -b /dev/benet/benet01 //关联LVM逻辑卷
[root@linux-1 ~]# tgtadm --lld iscsi -o new -m logicalunit -t 2 -l 1 -b /dev/md0 //关联RAID卷
[root@linux-1 ~]# tgtadm -L iscsi -o show -m target //此时再次进行查看iscsi磁盘标识
Target 1: iqn.2015-08.com.benet.store:lvm //iscsi磁盘标识1信息
System information:
Driver: iscsi
State: ready
I_T nexus information:
LUN information:
LUN: 0
Type: controller
SCSI ID: IET 00010000
SCSI SN: beaf10
Size: 0 MB, Block size: 1
Online: Yes
Removable media: No
Prevent removal: No
Readonly: No
Backing store type: null
Backing store path: None
Backing store flags:
LUN: 1
Type: disk
SCSI ID: IET 00010001
SCSI SN: beaf11
Size: 3221 MB, Block size: 512
Online: Yes
Removable media: No
Prevent removal: No
Readonly: No
Backing store type: rdwr
Backing store path: /dev/benet/benet01
Backing store flags:
Account information:
ACL information:
Target 2: iqn.2015-08.com.benet.store:raid //iscsi磁盘标识2信息
System information:
Driver: iscsi
State: ready
I_T nexus information:
LUN information:
LUN: 0
Type: controller
SCSI ID: IET 00020000
SCSI SN: beaf20
Size: 0 MB, Block size: 1
Online: Yes
Removable media: No
Prevent removal: No
Readonly: No
Backing store type: null
Backing store path: None
Backing store flags:
LUN: 1
Type: disk
SCSI ID: IET 00020001
SCSI SN: beaf21
Size: 10728 MB, Block size: 512
Online: Yes
Removable media: No
Prevent removal: No
Readonly: No
Backing store type: rdwr
Backing store path: /dev/md0
Backing store flags:
Account information:
ACL information:
发布设备并指定访问权限
[root@linux-1 ~]# tgtadm --lld iscsi -o bind -m target -t 1 -I 192.168.100.60 //-o bind就是绑定,后面跟设备文件也就是LVM,并指定为哪台IP地址使用
[root@linux-1 ~]# tgtadm --lld iscsi -o bind -m target -t 2 -I 192.168.100.70 //这个地址是不存在的,这里只是作为解释一下
[root@linux-1 ~]# vim /etc/tgt/targets.conf //编辑主配置文件然后在最后一行添加以下内容
<target iqn.2015-08.com.benet.store:lvm>
backing-store /dev/benet/benet01
initiator-address 192.168.100.60 //客户机IP地址
</target>
<target iqn.2015-08.com.benet.store:raid>
backing-store /dev/md0
initiator-address 192.168.100.70
</target>
[root@linux-1 ~]# chkconfig --level 35 tgtd on //添加至chkconfig管理
[root@linux-1 ~]# service tgtd restart //再次进行重启服务
Stopping SCSI target daemon: [ OK ]
Starting SCSI target daemon: [ OK ]
[root@linux-1 ~]# service iptables stop //关闭防火墙
iptables: Setting chains to policy ACCEPT: filter [ OK ]
iptables: Flushing firewall rules: [ OK ]
iptables: Unloading modules: [ OK ]
[root@linux-1 ~]# setenforce 0 //关闭SElinux
下面设置iscsi客户端的配置-----安装iscsi设备发现客户端软件-----
[root@linux-2 ~]# yum -y install iscsi-initiator-utils
[root@linux-2 ~]# service iscsi start //启动服务
[root@linux-2 ~]# iscsiadm -m discovery -t sendtargets -p 192.168.100.50 //指定iscsi服务器IP地址
[root@linux-2 ~]# iscsiadm -m node -T iqn.2015-08.com.benet.store:lvm --login lsscsi //指定设备文件LVM逻辑卷
[root@linux-2 ~]# ls /dev //此时查看dev目录下面的所有内容。此时会显示
…………
loop2 sda tty33 vcs1
loop3 sda1 tty34 vcs2
loop4 sda2 tty35 vcs3
loop5 sda3 tty36 vcs4
loop6 sda4 tty37 vcs5
loop7 sda5 tty38 vcs6
lp0 sdb tty39 vcsa
…………
[root@linux-2 ~]# fdisk /dev/sdb //此时再进行分区并挂载使用
Command (m for help): n //创建分区
Command action
e extended
p primary partition (1-4)
P //创建主分区
Partition number (1-4): 1 //主分区编号1
First cylinder (1-1014, default 1):
Using default value 1
Last cylinder, +cylinders or +size{K,M,G} (1-1014, default 1014):
Using default value 1014 //空间为默认的所有
Command (m for help): p //查看分区情况
Device Boot Start End Blocks Id System
/dev/sdb1 1 1014 3143369 83 Linux
Command (m for help): w //保存并退出
[root@linux-2 ~]# mkfs -t ext4 /dev/sdb1 //格式化分区
[root@linux-2 ~]# vim /etc/fstab //设置自动挂载,添加如下语句
/dev/sdb1 /opt ext4 defaults 0 0
[root@linux-2 ~]# mount -a //重新识别设备挂载
[root@linux-2 ~]# df -h //查看设备挂载情况
Filesystem Size Used Avail Use% Mounted on
/dev/sda5 9.7G 2.7G 6.6G 29% /
tmpfs 996M 88K 996M 1% /dev/shm
/dev/sda1 194M 28M 157M 15% /boot
/dev/sda3 15G 165M 14G 2% /home
/dev/sr0 3.4G 3.4G 0 100% /mnt
/dev/sdb1 3.0G 69M 2.8G 3% /opt
OK以上就是iscsi网络存储的全部操作,实验完成,谢谢大家!
经验总结:实验不难,比较难的是原理,所以注意需要多多练习。