RESTEasy hello world example
RESTEasy, JBoss project, implementation of the JAX-RS specification. In this tutorial, we show you how to use RESTEasy framework to create a simple REST style web application.
Technologies and Tools used in this article:
- RESTEasy 2.2.1.GA
- JDK 1.6
- Maven 3.0.3
- Eclipse 3.6
Read this, this and this to understand what’s REST.
1. Directory Structure
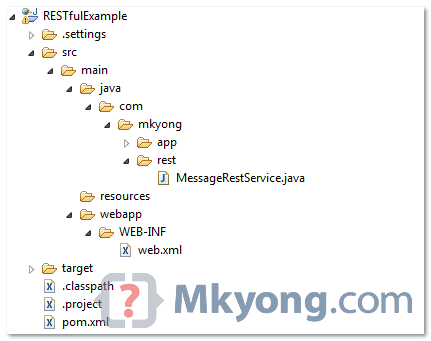
Review final directory structure of this tutorial. Just a standard web project structure.
Create a standard Maven web project structure.
- mvn archetype:create -DgroupId=com.mkyong.common -DartifactId=RESTfulExample
- -DarchetypeArtifactId=maven-archetype-webapp -DinteractiveMode=false
- mvn eclipse:eclipse -Dwtpversion=3.2.5
Declares JBoss public Maven repository and “resteasy-jaxrs” in your Maven pom.xml file. That’s all you need to use RESTEasy.
File : pom.xml
- <project ...">
- <repositories>
- <repository>
- <id>JBoss repository</id>
- <url>https://repository.jboss.org/nexus/content/groups/public-jboss/</url>
- </repository>
- </repositories>
- <dependencies>
- <dependency>
- <groupId>org.jboss.resteasy</groupId>
- <artifactId>resteasy-jaxrs</artifactId>
- <version>2.2.1.GA</version>
- </dependency>
- </dependencies>
- </project>
4. REST Service
A simple REST service. See demo at the end of the article, it should be self-explanatory.
- package com.mkyong.rest;
- import javax.ws.rs.GET;
- import javax.ws.rs.Path;
- import javax.ws.rs.PathParam;
- import javax.ws.rs.core.Response;
- @Path("/message")
- public class MessageRestService {
- @GET
- @Path("/{param}")
- public Response printMessage(@PathParam("param") String msg) {
- String result = "Restful example : " + msg;
- return Response.status(200).entity(result).build();
- }
- }
5. web.xml
Now, configure listener and servlet to support RESTEasy. Read this JBoss documentation for detail explanation.
File : web.xml
- <web-app id="WebApp_ID" version="2.4"
- xmlns="http://java.sun.com/xml/ns/j2ee"
- xmlns:xsi="http://www.w3.org/2001/XMLSchema-instance"
- xsi:schemaLocation="http://java.sun.com/xml/ns/j2ee
- http://java.sun.com/xml/ns/j2ee/web-app_2_4.xsd">
- <display-name>Restful Web Application</display-name>
- <!-- Auto scan REST service -->
- <context-param>
- <param-name>resteasy.scan</param-name>
- <param-value>true</param-value>
- </context-param>
- <!-- this need same with resteasy servlet url-pattern -->
- <context-param>
- <param-name>resteasy.servlet.mapping.prefix</param-name>
- <param-value>/rest</param-value>
- </context-param>
- <listener>
- <listener-class>
- org.jboss.resteasy.plugins.server.servlet.ResteasyBootstrap
- </listener-class>
- </listener>
- <servlet>
- <servlet-name>resteasy-servlet</servlet-name>
- <servlet-class>
- org.jboss.resteasy.plugins.server.servlet.HttpServletDispatcher
- </servlet-class>
- </servlet>
- <servlet-mapping>
- <servlet-name>resteasy-servlet</servlet-name>
- <url-pattern>/rest/*</url-pattern>
- </servlet-mapping>
- </web-app>
| Note You need to set the “resteasy.servlet.mapping.prefix” if your servlet-mapping for the resteasy servlet has a url-pattern other than “/*“.
In above example, the resteasy servlet url-pattern is “/rest/*“, so you have to set the “resteasy.servlet.mapping.prefix” to “/rest” as well, otherwise, you will hit resource not found error message |
| Note Remember to set “resteasy.scan” to true, so that RESTEasy will find and register your REST service automatically. |
6. Demo
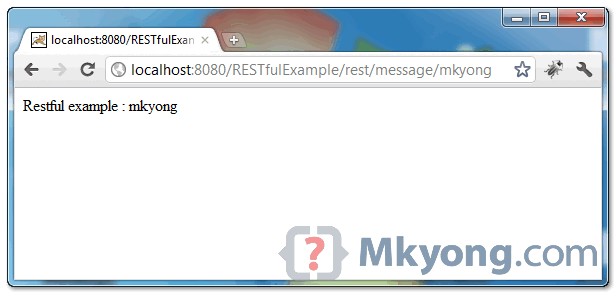
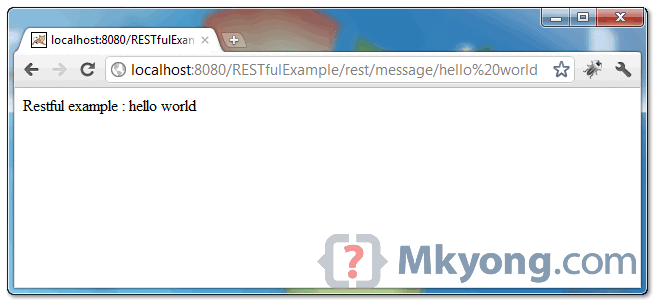
In this example, web request from “projectURL/rest/message/” will match to “MessageRestService“, and “projectURL/rest/message/{any values}” will match to @PathParam parameter.
Test 1 : http://localhost:8080/RESTfulExample/rest/message/mkyong
Test 2 : http://localhost:8080/RESTfulExample/rest/message/hello%20world
Alternative REST Service Registration
In above example, you are register REST service via “ResteasyBootstrap” listener. Here i show you another way.
Create a class and extends javax.ws.rs.core.Application, and add your REST service manually.
- package com.mkyong.app;
- import java.util.HashSet;
- import java.util.Set;
- import javax.ws.rs.core.Application;
- import com.mkyong.rest.MessageRestService;
- public class MessageApplication extends Application {
- private Set<Object> singletons = new HashSet<Object>();
- public MessageApplication() {
- singletons.add(new MessageRestService());
- }
- @Override
- public Set<Object> getSingletons() {
- return singletons;
- }
- }
File : web.xml , no more listener, configure your application class like below :
- <web-app id="WebApp_ID" version="2.4"
- xmlns="http://java.sun.com/xml/ns/j2ee"
- xmlns:xsi="http://www.w3.org/2001/XMLSchema-instance"
- xsi:schemaLocation="http://java.sun.com/xml/ns/j2ee
- http://java.sun.com/xml/ns/j2ee/web-app_2_4.xsd">
- <display-name>Restful Web Application</display-name>
- <context-param>
- <param-name>resteasy.servlet.mapping.prefix</param-name>
- <param-value>/rest</param-value>
- </context-param>
- <servlet>
- <servlet-name>resteasy-servlet</servlet-name>
- <servlet-class>
- org.jboss.resteasy.plugins.server.servlet.HttpServletDispatcher
- </servlet-class>
- <init-param>
- <param-name>javax.ws.rs.Application</param-name>
- <param-value>com.mkyong.app.MessageApplication</param-value>
- </init-param>
- </servlet>
- <servlet-mapping>
- <servlet-name>resteasy-servlet</servlet-name>
- <url-pattern>/rest/*</url-pattern>
- </servlet-mapping>
- </web-app>
Done.
Download Source Code
注:转自http://www.mkyong.com/webservices/jax-rs/resteasy-hello-world-example/


