【CS】尺度不变特征变换匹配算法SIFT(3)
尺度不变特征变换匹配算法SIFT(3)
e-mail:[email protected]
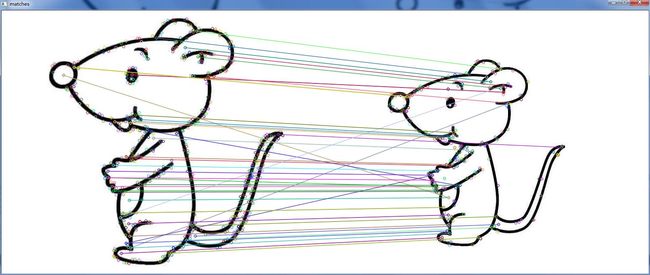
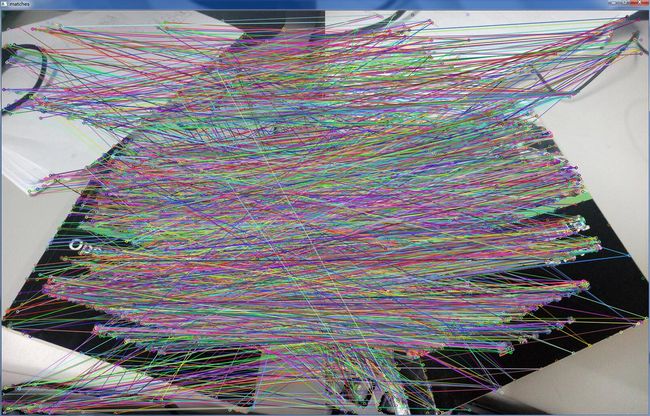
通过SIFT(1)和SIFT(2)初步学会使用SIFT算法进行特征提取和匹配,但是我们从实践中会发现,直接通过SIFT特征提取的结果并不是非常乐观,存在比较多的错误匹配,如图1所示:图1中只是选择了50个匹配点,并进行了连线,很明显存在一些错误匹配点。如果我们选择讲所有匹配点进行连线,可以得到图2,从图2中可以发现,错误匹配点是相当多。
图1
图2
那么,为了剔除这些错误匹配,我们可以使用RANSAC方法,通过调用opencv函数库中的findFundamentalMat()函数,即可剔除掉错误匹配点(野点、无效数据点)。那么这部分工作需要两大步:(1)通过SIFT算法获取SIFT特征点;(2)通过findFundamentalMat()函数剔除错误匹配点。
我先贴出完整的代码,以方便探讨下面的内容。对于RANSAC方法的原理性学习将后续进行。
#include <iostream>
#include <opencv2\opencv.hpp>

using namespace std;
using namespace cv;

int main()
{
	Mat firstImage=imread("ww.jpg");
	Mat secondImage = imread("ee.jpg");
	if(firstImage.empty()||secondImage.empty())
	{
		cout<<"error"<<endl;
		return 0;
	}

	//resize(firstImage,firstImage,Size(800,1000),0,0,1);
	//resize(secondImage,secondImage,Size(800,1000),0,0,1);

	////////////////////////////////////////////////////////////////////////////////
	//第一步:获取SIFT特征
	//@Author:code陈
	////////////////////////////////////////////////////////////////////////////////
	//difine a sift detector
	SiftFeatureDetector siftDetector;
	//store key points
	vector<KeyPoint> firstKeypoint,secondKeypoint;
	//detect image with SIFT,get key points
	siftDetector.detect(firstImage,firstKeypoint);
	siftDetector.detect(secondImage,secondKeypoint);
	Mat firstOutImage,secondOutImage;
	//draw key points at the out image and show to the user
	drawKeypoints(firstImage,firstKeypoint,firstOutImage,Scalar(255,0,0));
	drawKeypoints(secondImage,secondKeypoint,secondOutImage,Scalar(0,255,0));
	imshow("first",firstOutImage);
	imshow("second",secondOutImage);
	// difine a sift descriptor extractor
	SiftDescriptorExtractor extractor;
	//store the descriptor of each image
	Mat firstDescriptor,secondDescriptor;
	BruteForceMatcher<L2<float>> matcher;

	vector<DMatch> matches;
	Mat matcheImage;
	//compute the descriptor of each image
	extractor.compute(firstImage,firstKeypoint,firstDescriptor);
	extractor.compute(secondImage,secondKeypoint,secondDescriptor);
	//match

	matcher.match(firstDescriptor,secondDescriptor,matches);

	////////////////////////////////////////////////////////////////////////////////
	//第二步:RANSAC方法剔除outliner
	//@Author:code陈
	////////////////////////////////////////////////////////////////////////////////

	//将vector转化成Mat
	Mat firstKeypointMat(matches.size(),2,CV_32F),secondKeypointMat(matches.size(),2,CV_32F);
	for(int i = 0;i<matches.size();i++)
	{
		firstKeypointMat.at<float>(i,0) = firstKeypoint[matches[i].queryIdx].pt.x;
		firstKeypointMat.at<float>(i,1) = firstKeypoint[matches[i].queryIdx].pt.y;
		secondKeypointMat.at<float>(i,0) = secondKeypoint[matches[i].trainIdx].pt.x;
		secondKeypointMat.at<float>(i,1) = secondKeypoint[matches[i].trainIdx].pt.y;
	}
	//Calculate the fundamental Mat;
	vector<uchar> ransacStatus;
	Mat fundamentalMat = findFundamentalMat(firstKeypointMat,secondKeypointMat,ransacStatus,FM_RANSAC);
	cout<<fundamentalMat<<endl;
	//Calculate the number of outliner points;
	int outlinerCount = 0;
	for(int i=0;i<matches.size();i++)
	{
		if(ransacStatus[i]==0)
		{
			outlinerCount++;
		}
	}
	//Calculate inliner points;
	vector<Point2f> firstInliner;
	vector<Point2f> secondInliner;
	vector<DMatch> inlinerMatches;
	int inlinerCount = matches.size()-outlinerCount;
	firstInliner.resize(inlinerCount);
	secondInliner.resize(inlinerCount);
	inlinerMatches.resize(inlinerCount);
	int index = 0;
	for(int i=0;i<matches.size();i++)
	{
		if(ransacStatus[i]!=0)
		{
			firstInliner[index].x = firstKeypointMat.at<float>(i,0);
			firstInliner[index].y = firstKeypointMat.at<float>(i,1);
			secondInliner[index].x = secondKeypointMat.at<float>(i,0);
			secondInliner[index].y = secondKeypointMat.at<float>(i,1);
			inlinerMatches[index].queryIdx = index;
			inlinerMatches[index].trainIdx = index;
			index ++;
		}
	}
	vector<KeyPoint> inlinerFirstKeypoint(inlinerCount);
	vector<KeyPoint> inlinerSecondKeypoint(inlinerCount);
	KeyPoint::convert(firstInliner,inlinerFirstKeypoint);
	KeyPoint::convert(secondInliner,inlinerSecondKeypoint);
	//cout<<fundamentalMat<<endl;
	//select 50 keypoints
	//matches.erase(matches.begin()+50,matches.end());
	//inlinerMatches.erase(inlinerMatches.begin()+50,inlinerMatches.end());
	drawMatches(firstImage,inlinerFirstKeypoint,secondImage,inlinerSecondKeypoint,inlinerMatches,matcheImage);
	imshow("ransacMatches",matcheImage);
	drawMatches(firstImage,firstKeypoint,secondImage,secondKeypoint,matches,matcheImage);
	imshow("matches",matcheImage);

	//imshow();
	waitKey(0);
	return 0;
}
下面对每一步进行简单描述:
(1)通过SIFT算法获取SIFT特征点
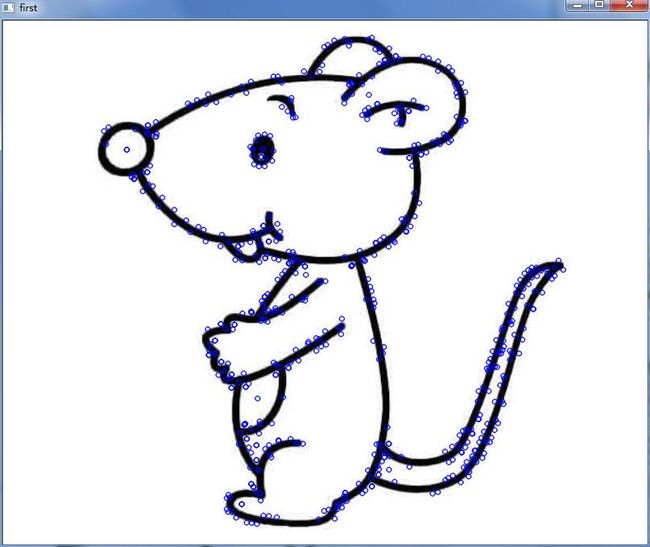
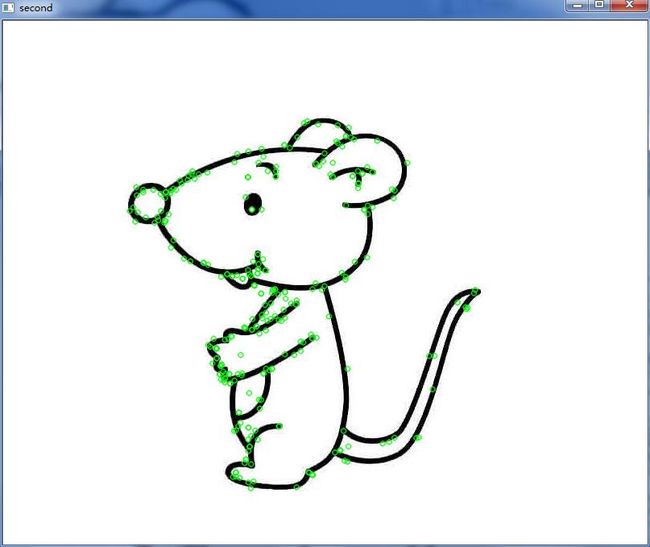
这一部分在SIFT(1)和SIFT(2)中已经做了相应说明,本文将不再阐述各个函数的作用和参数说明。该步骤的输入为两张图片,输出则为每张图片的特征点和每个特征点的SIFT特征描述子,每个描述子为128维。特征点如下图所示:
图3
图4
(2)通过findFundamentalMat()函数剔除错误匹配点
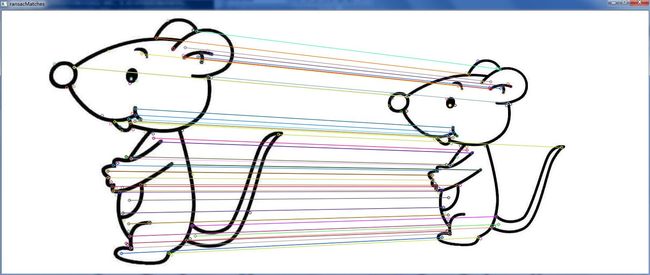
如果我们直接利用SIFT特征点进行匹配,那么结果如图2所示,现在我们利用findFundamentalMat()函数剔除,在前面贴出的代码中,对每一步已经做了相应的注释,剔除结果如图5所示。
图5
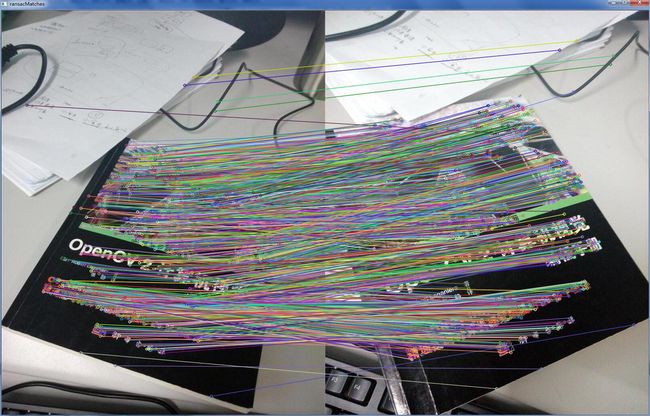
图5中我只选择了最新的50个匹配结果,显示效果非常理想。那么显示所有的结果呢?如图6所示。
图6
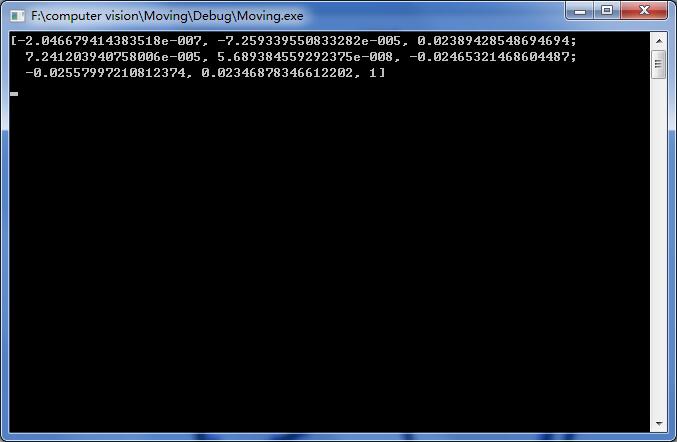
从图6中我们可以看出,经过RANSAC算法之后,剔除了大部分的错误匹配点,还存在少数的错误点,已经达到了非常理想的效果。findFundamentalMat()函数输入5个参数,返回的是一个3X3的基础矩阵:而对于该矩阵的利用,后续将继续学习。
其他说明:
(1)在代码中我使用了resize()函数对输入图像的尺寸进行了一定处理,因为SIFT算法的一个缺点就是计算量非常大,图片过大的时候,很容易因内存不足而崩~
(2)在代码中还是用了matches.erase()是为了SIFT匹配后,提高可视化度。
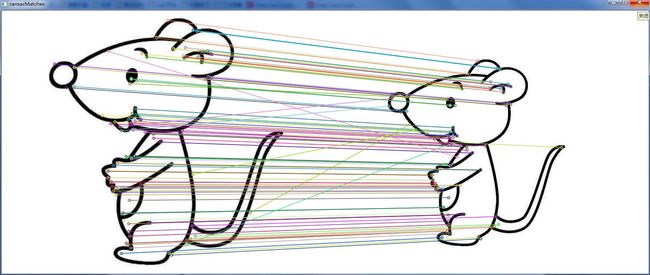
在这里再贴上一组对比图片:
RANSAC前
RANSAC后
文章内容为个人理解所写,难免出现错误,欢迎指正。
