Flex Builder and AsWing Quick Start
This tutorial actually shows you how to install the Flex Builder and the AsWing. What you will learn in doing this procedure will carry over into your new projects using other new library components(such as as3corelib).It’s also explain how to install and use subclipse( SVN pulg-in for Eclipse ) to checkout fresh code.| Catalog Basic Part:
2 Download and install AsWing
3 Create,Compile,Run a Application that use AsWing components.
Advanced Part:
5 Checkout AsWing from SVN
|
1.1 Download Flex Builder2.0
In Basic Part, we selecte download “Flex Builder 2 (English|Windows|168.78 MB)”;

Double click the file you hava downloaded which name like “FLXB_2.0_Win_WWE.exe
select “Flex Builder and Flex SDK”
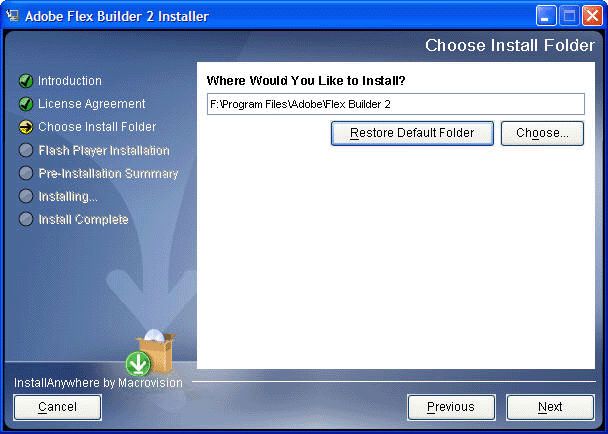
 Select a folder to install Flex Builder.I change to “G:\Flex\Flex Builder 2”.
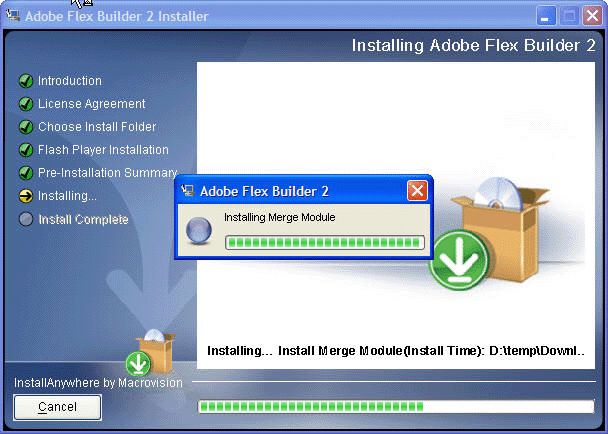
Installing…
Flex Builder is installed Complete.

1.2 Stratup Flex Builder.
After Download and Install Flex Builder, we can select Start -> All Programs -> Adobe -> Adobe Flex Builder 2 to open Flex Builder.
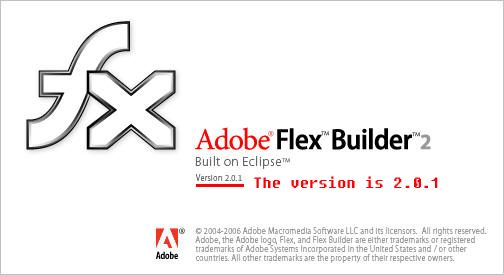
The Flex Builder is starting, it’s version is 2.0.1.
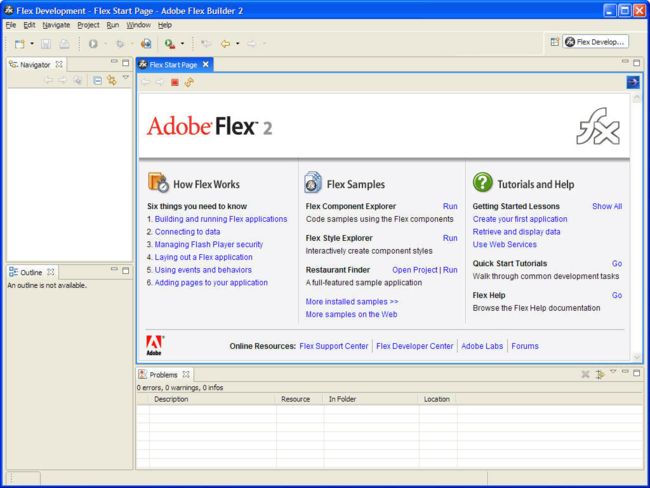
The main window of Flex Builder.
2.1 Downlaod AsWingA3
At the beginning,we download packaged version of AsWing at Here.
Selecte “AsWing A3 0.8”(it will change when you visit this page). Remember to choose AsWing A3 series which is base ActionScript 3.The downloaded file name is “aswing_a3_0_8.zip”.

Change default Workspace to “G:\acode”, Flex Builder will restart automatic.

Choose a folder as workspace of Flex Builder.

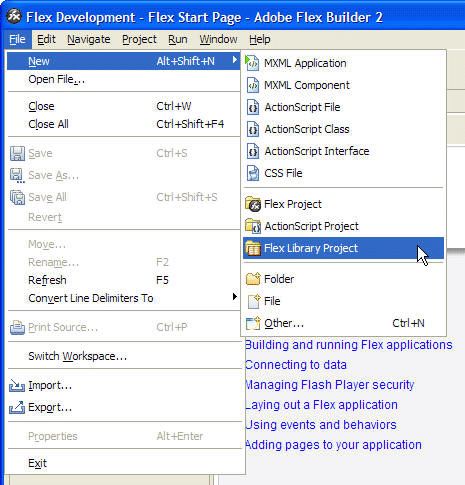
Create a “Flex Library Project” with name ”AsWingA3”.
2.2 Import AsWing project.
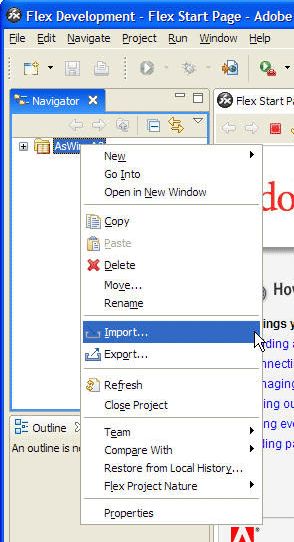
Unpack the “aswing_a3_0_8.zip” to somewhere. Right-Click on project “AsWingA3″ select “Import”
Select import form “File System”
Select the location you unpacked,
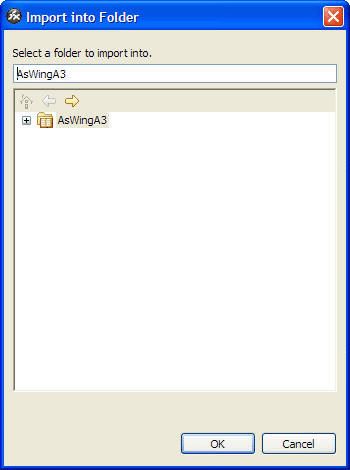
Select into folder, it’s “AsWingA3″.
Some Properities setup
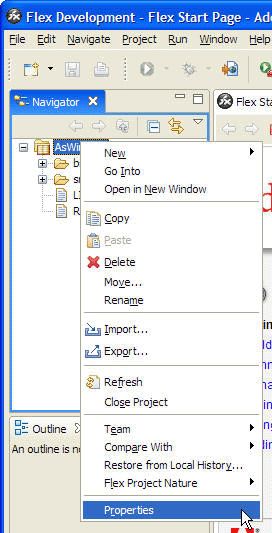
Right click on the AsWingA3 project, select “Properities” at the bottom.
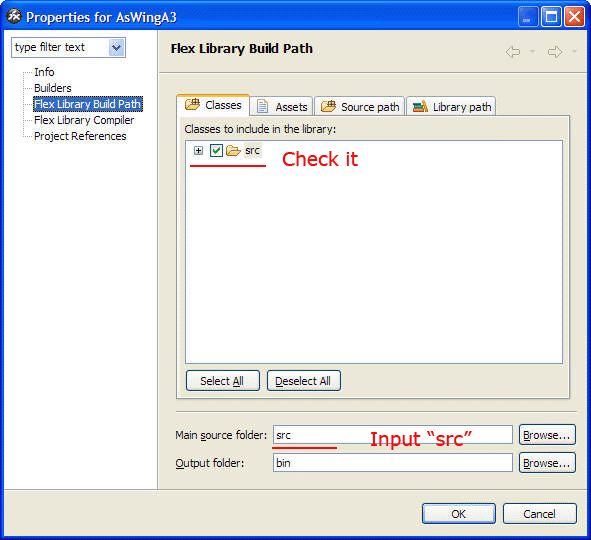
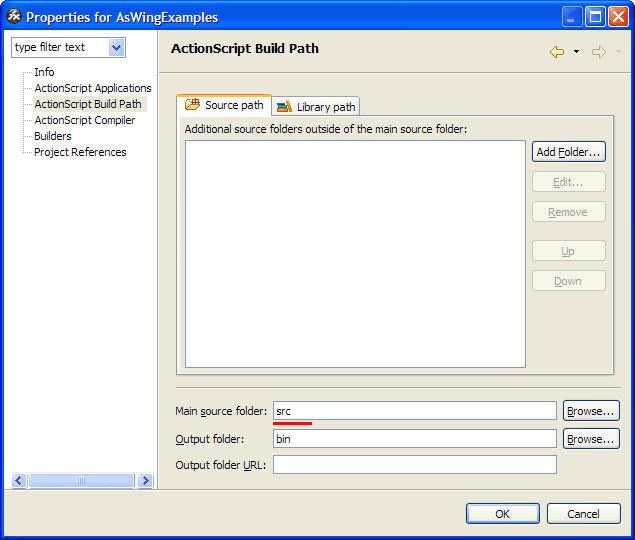
Change to “Flex Build Path”, check the “src” folder and ,fill “src” in “Main sorce folder”
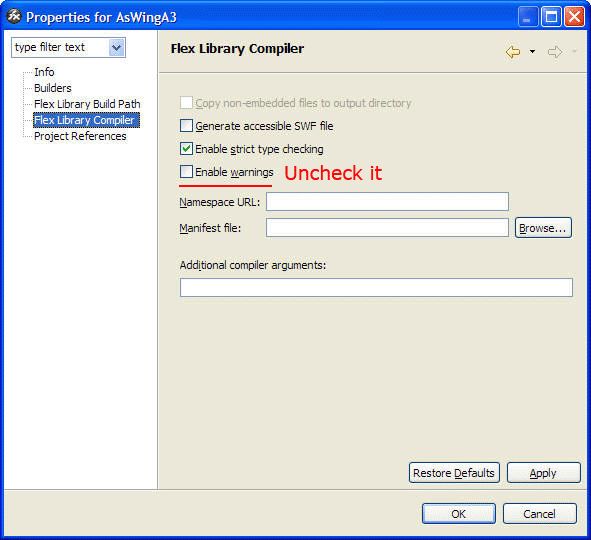
Select “Flex Library Complier” , Uncheck the “Enable warnings”,
2.3 Clean to Build
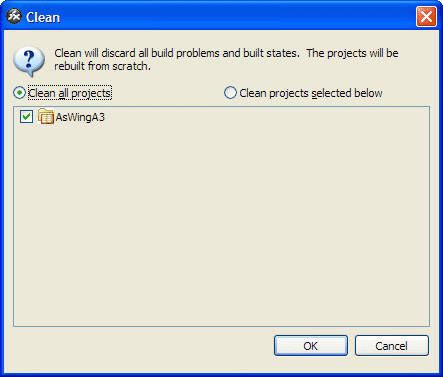
Select “Project” -> “Clean…”

Check the projects yout want to clean and rebuild.Press “OK” button.
Building project will take you about one minute.
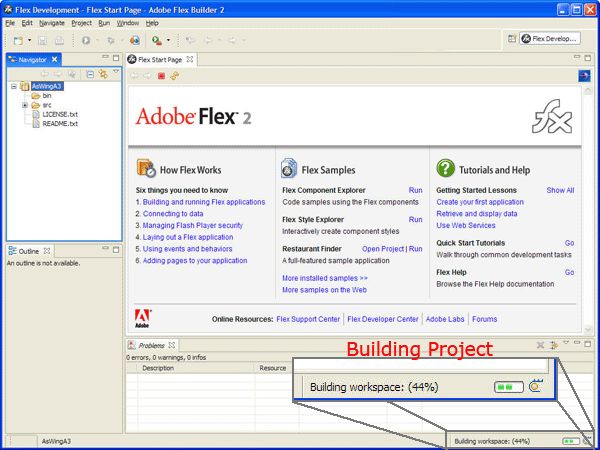
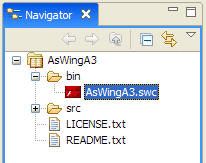
After build project, a new library file(AsWingA3.swc) is created.
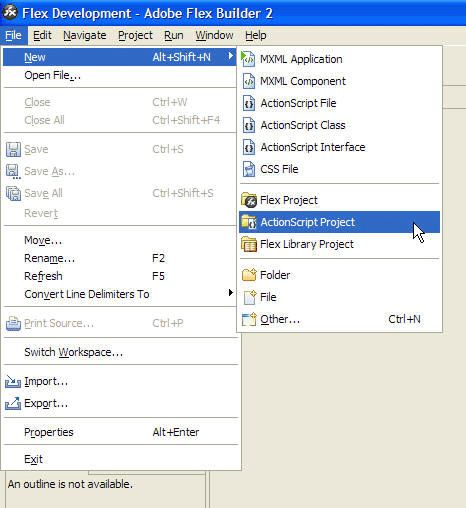
3.1 Create a new ActionScript Project with project name “AsWingExamples”.
Fill AsWingExamples in “Project name” ,click Finish button.

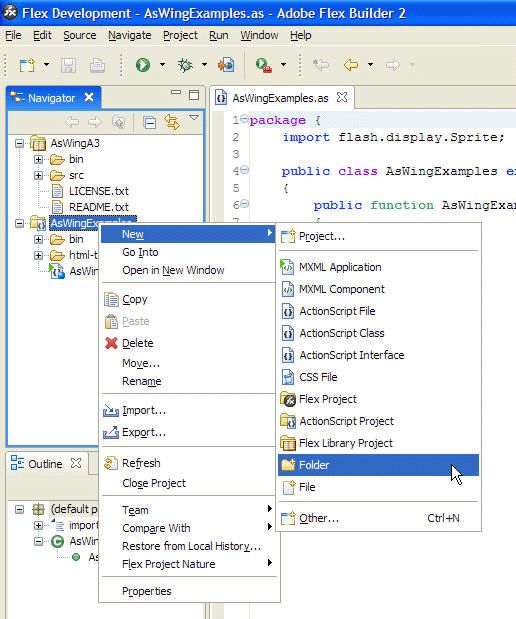
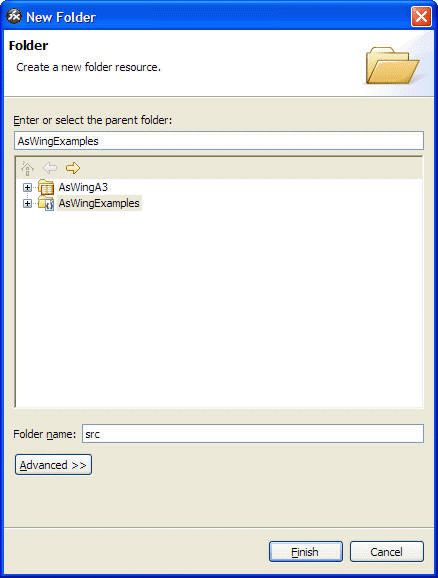
Create a Source Code Forlder with name “src”,
Open Properities pane, select “ActionScript Build Path”->”Source path”,fill “src” in “Main sorce folder”

Change to “Library path”,click “Add Project” button,

select “AsWingA3” as a library.

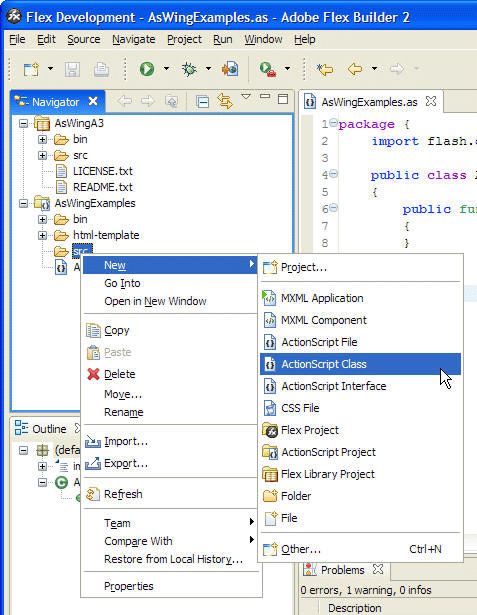
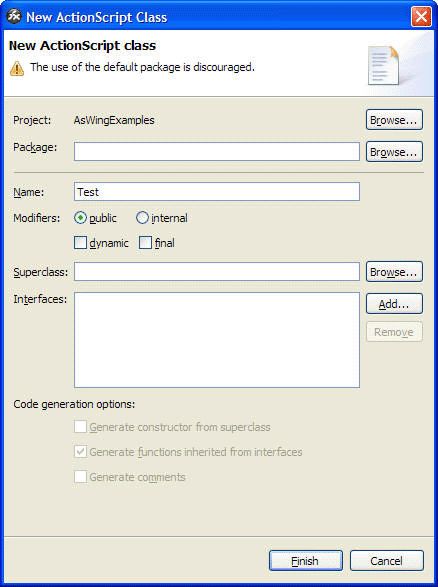
Create a ActionScript Class with name “Test”, copy the code into it:
Source code of Test.as
{
import flash.display.Sprite;
import flash.display.StageScaleMode;
import org.aswing.AsWingManager;
  import org.aswing.JFrame;
  import org.aswing.JLabel;
  import org.aswing.event.AWEvent;
  import org.aswing.geom.IntDimension;public class Test extends Sprite
  {
   public function Test(){
   super();
   stage.scaleMode = StageScaleMode.NO_SCALE;
   stage.stageFocusRect = false;
   AsWingManager.setRoot( this );createFrame();
   }
private function createFrame() : JFrame{
var frame : JFrame = new JFrame( this, "Test of AsWingA3" );
frame.getContentPane().append(new JLabel( "Hello world!" ));
frame.setSize(new IntDimension( 200, 120 ) );
frame.show();
return frame;
}
}
}
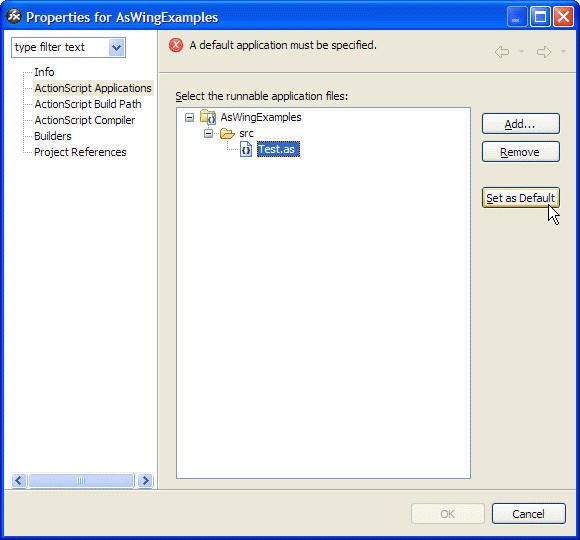
 Select “ActionScript Applications”,click “Remove” button to delete “AsWingExamples.as(deleted)”,
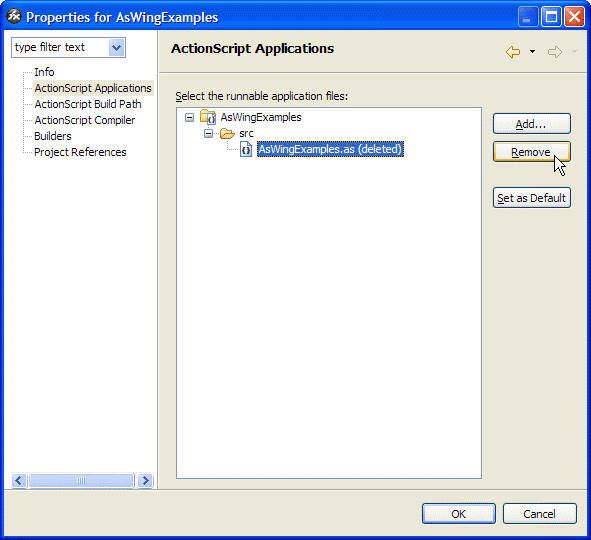 then press “Add” button, select “Test.as”,
 press “Set as Default” to set “Test.as” as the default Main Class.
 You’ll find the icon of “Test.as” is changed to which mean Main Class.

3.2 Run the application
At the end, press the green “Run” button at ToolBar, select “Test”,
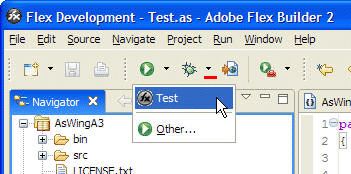
wait a second, a html page is popup with our first ActionScript application.
