【像黑客一样写博客之八】分类标签
原创作品,转载请标明:http://blog.csdn.net/jackystudio/article/details/16855023
给文章分类和添加标签是博客必不可少的功能,方便了信息的快速攫取。
1.添加分类
1.1.添加分类插件
进入Octopress\plugins目录,新建category_list_tag.rb文件,添加如下代码
- module Jekyll
- class CategoryListTag < Liquid::Tag
- def render(context)
- html = ""
- categories = context.registers[:site].categories.keys
- categories.sort.each do |category|
- posts_in_category = context.registers[:site].categories[category].size
- category_dir = context.registers[:site].config['category_dir']
- category_url = File.join(category_dir, category.gsub(/_|\P{Word}/, '-').gsub(/-{2,}/, '-').downcase)
- html << "<li class='category'><a href='/#{category_url}/'>#{category} (#{posts_in_category})</a></li>\n"
- end
- html
- end
- end
- end
- Liquid::Template.register_tag('category_list', Jekyll::CategoryListTag)
1.2.添加边栏文件
进入Octopress\source\_includes\custom\asides目录,新建category_list.html,添加如下代码
- <section>
- <h1>Categories</h1>
- <ul id="categories">
- {% category_list %}
- </ul>
- </section>
1.3.添加分类到主页面
打开Octopress/_config.yml,在default_asides一栏中添加
- default_asides: [..., custom/asides/category_list.html]
1.4.生成页面,推送
- rake generate
- rake preview
- rake deploy
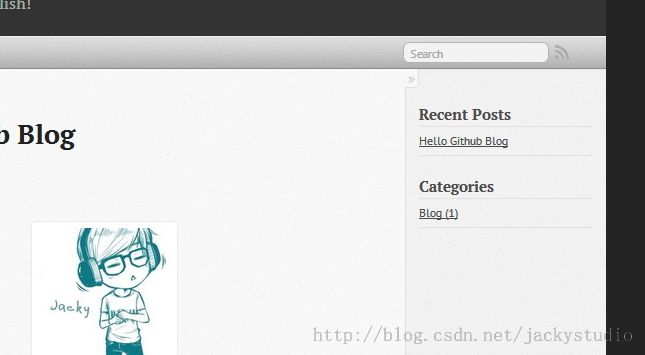
打开页面http://geekjacky.github.io/,如下
1.5.推送source分支
- git add .
- git commit -m "增加分类边栏"
- git push origin source
1.6.给文章增加分类
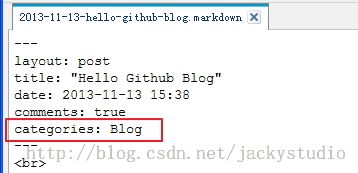
还记得博文的开头有个categories么?填在这里就行了。
2.添加标签
标签可以加在边栏,也可以加在顶部导航,这里两种方法都介绍一下,我自己是加到导航栏,因为标签太多了,放在边栏不好看。
2.1.获取插件
先克隆这两个项目到本地,这里会使用到项目中相关的插件。
- git clone https://github.com/robbyedwards/octopress-tag-pages.git
- git clone https://github.com/robbyedwards/octopress-tag-cloud.git
(2)在Octopress-tag-cloud中,复制tag_cloud.rb到/plugins目录。
2.2.增加标签
2.2.1.增加到边栏
2.2.1.1.增加边栏文件
进入Octopress\source\_includes\custom\asides目录,创建tags.html,添加如下代码
- <section>
- <h1>Tags</h1>
- <ul class="tag-cloud">
- {% tag_cloud font-size: 90-210%, limit: 10, style: para %}
- </ul>
- </section>
2.2.1.2.添加标签到主页面边栏
打开Octopress/_config.yml,在default_asides一栏中添加
- default_asides: [..., custom/asides/tags.html]
2.2.2.增加到导航栏
2.2.2.1.增加新网页
运行如下命令
- rake new_page['tag_cloud']
2.2.2.2.在导航栏添加新页面
进入Octopress\source\_includes\custom,打开navigation.html,添加一栏
- <li><a href="/tag-cloud/">Tags</a></li>
2.2.2.3.修改标签内容
进入Octopress\source\tag-cloud目录,修改index.markdown,添加如下内容
- <ul class="tag-cloud">{% tag_cloud font-size: 90-210%, limit: 1000, style: para %}</ul>
2.3.给文章增加标签
用markdownpad打开博文,在categories下增加一行
- tags: [Octopress]
2.4.生成页面,推送
- rake generate
- rake preview
- rake deploy
打开Tags页面http://geekjacky.github.io/tag-cloud/,如下
2.5.推送source分支
- git add .
- git commit -m "添加标签"
- git push origin source
2.6.生成博文时自动追加tags
不想每次都手动添加tag这一行,没问题。打开Octopress目录下的Rakefile,加入下面这一行,加在哪?你找得到的。
- post.puts "tags: "
2.7.Bug
如果在使用标签生成静态页面的时候,出现如下错误。
- Liquid Exception: comparison of Array with Array failed in page


