Android NFC 开发教程(3): Mifare Tag 读写示例
前面例子介绍了检测,读写NFC TAG开发的一般步骤,本例针对常用的Mifare Tag 具体说明。
Mifare Tag 可以有1K ,2K, 4K,其内存分区大同小异,下图给出了1K字节容量的Tag的内存分布:
数据分为16个区(Sector) ,每个区有4个块(Block) ,每个块可以存放16字节的数据,其大小为16 X 4 X 16 =1024 bytes
每个区最后一个块称为Trailer ,主要用来存放读写该区Block数据的Key ,可以有A,B两个Key,每个Key 长度为6个字节,缺省的Key值一般为全FF或是0. 由 MifareClassic.KEY_DEFAULT 定义。
因此读写Mifare Tag 首先需要有正确的Key值(起到保护的作用),如果鉴权成功
auth = mfc.authenticateSectorWithKeyA(j,
MifareClassic.KEY_DEFAULT);
然后才可以读写该区数据。
本例定义几个Mifare相关的类 MifareClassCard ,MifareSector, MifareBlock 和MifareKey 以方便读写Mifare Tag.
Android 系统来检测到NFC Tag, 将其封装成Tag类,存放到Intent的NfcAdapter.EXTRA_TAG Extra 数据包中,可以使用MifareClassic.get(Tag) 获取对象的 MifareClassic类。
Tag tagFromIntent = intent.getParcelableExtra(NfcAdapter.EXTRA_TAG);
// 4) Get an instance of the Mifare classic card from this TAG
// intent
MifareClassic mfc = MifareClassic.get(tagFromIntent);
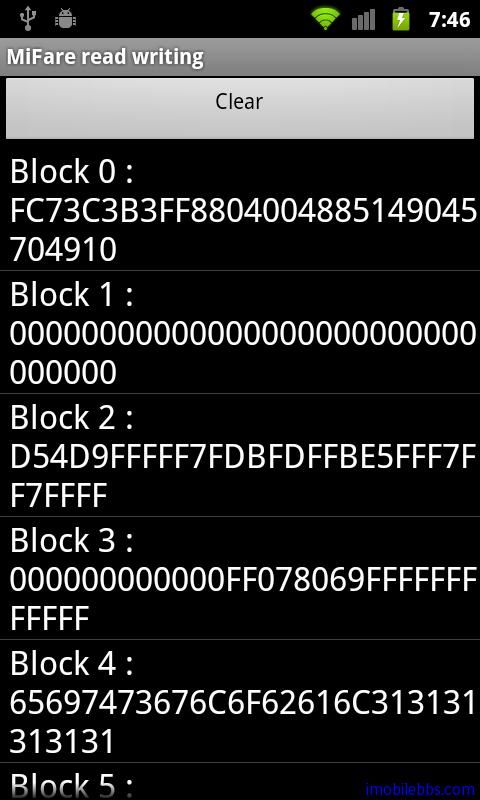
下面为读取Mifare card 的主要代码:
// 1) Parse the intent and get the action that triggered this intent
String action = intent.getAction();
// 2) Check if it was triggered by a tag discovered interruption.
if (NfcAdapter.ACTION_TECH_DISCOVERED.equals(action)) {
 // 3) Get an instance of the TAG from the NfcAdapter
 Tag tagFromIntent = intent.getParcelableExtra(NfcAdapter.EXTRA_TAG);
 // 4) Get an instance of the Mifare classic card from this TAG
 // intent
 MifareClassic mfc = MifareClassic.get(tagFromIntent);
 MifareClassCard mifareClassCard=null;

 try { // 5.1) Connect to card
 mfc.connect();
 boolean auth = false;
 // 5.2) and get the number of sectors this card has..and loop
 // thru these sectors
 int secCount = mfc.getSectorCount();
 mifareClassCard= new MifareClassCard(secCount);
 int bCount = 0;
 int bIndex = 0;
 for (int j = 0; j < secCount; j++) {
 MifareSector mifareSector = new MifareSector();
 mifareSector.sectorIndex = j;
 // 6.1) authenticate the sector
 auth = mfc.authenticateSectorWithKeyA(j,
 MifareClassic.KEY_DEFAULT);
 mifareSector.authorized = auth;
 if (auth) {
 // 6.2) In each sector - get the block count
 bCount = mfc.getBlockCountInSector(j);
 bCount =Math.min(bCount, MifareSector.BLOCKCOUNT);
 bIndex = mfc.sectorToBlock(j);
 for (int i = 0; i < bCount; i++) {

 // 6.3) Read the block
 byte []data = mfc.readBlock(bIndex);
 MifareBlock mifareBlock = new MifareBlock(data);
 mifareBlock.blockIndex = bIndex;
 // 7) Convert the data into a string from Hex
 // format.

 bIndex++;
 mifareSector.blocks[i] = mifareBlock;

 }
 mifareClassCard.setSector(mifareSector.sectorIndex,
 mifareSector);
 } else { // Authentication failed - Handle it

 }
 }
 ArrayList<String> blockData=new ArrayList<String>();
 int blockIndex=0;
 for(int i=0;i<secCount;i++){

 MifareSector mifareSector=mifareClassCard.getSector(i);
 for(int j=0;j<MifareSector.BLOCKCOUNT;j++){
 MifareBlock mifareBlock=mifareSector.blocks[j];
 byte []data=mifareBlock.getData();
 blockData.add("Block "+ blockIndex++ +" : "+
 Converter.getHexString(data, data.length));
 }
 }
 String []contents=new String[blockData.size()];
 blockData.toArray(contents);
 setListAdapter(new ArrayAdapter<String>(this,
 android.R.layout.simple_list_item_1, contents));
 getListView().setTextFilterEnabled(true);

 } catch (IOException e) {
 Log.e(TAG, e.getLocalizedMessage());
 showAlert(3);
 }finally{

 if(mifareClassCard!=null){
 mifareClassCard.debugPrint();
 }
 }
}// End of method
本例下载

