Kinect:DIY Kinect Hacking(二)(原创)
7. What message to send?
现在,我们可以使用Python+LibUSB来发送Control Endpoint数据包了。
ctrl_transfer( bmRequestType, bmRequest, wValue, wIndex, nBytes)
这个命令既可以发送数据包也可以接收数据包,这取决于bmRequestType的值(input or output)。不过,这个命令还有很多其它选项参数。所以要想发送数据需要知道bmRequestType, bmRequest, wValue, wIndex以及有多少数据用来读或者写。
If we were totally on our own,我们可以开始尝试读取数据从设备里。这意味我们必须首先设置bmRequestType。
bmRequestType传递的值非常结构化,所以这并不难去猜测。(See lvr.com for more information )
• Bits D2, D3 和 D4都是保留位置,所以这里设为0。
• The direction is set by bit #7, 0值 代表“写”即向设备发送数据。1值代表“读”即从设备接收数据。
• The 'type' of message is two bits(D6和D5), 0 = Standard(标准), 1 = Class, 2 = Vendor(供应商), 3 = Reserved(保留选项)。对于许多非标准设备,你可能希望得到供应商的类型。如果是标准型的设备,像摄像头或麦克风,可以设置为值0或值1。值3未使用。
• 最后俩个Bits(D1和D0)被用于确定接收的消息,0 = Device, 1 = Interface, 2 = Endpoint, 3 = Other。Go with 0 to start, you can try 2 if there are other endpoints。
最安全的事情,那就是读取数据(它不会覆盖任何东西或配置),you can do that by sending packets with bmRequestType = 0b11000000(16进制:bmRequestType = 0xC0 )(Read Vendor data from Device) .
If I were to write a fuzzer:
(1)I'd start by setting wIndex to 0
(2)Iterating through all the byte values (255 different values) of bmRequest
(3)Te first few hundred wValue
这么做是非常安全的,只是从USB设备读取随机数据。开始读取一个字节直到看到任何显示,然后增加值。
import usb.core
import usb.util
import sys

# find our device
dev = usb.core.find(idVendor=0x045e, idProduct=0x02B0)

# was it found?
if dev is None:
    raise ValueError('Device not found')

# set the active configuration. With no arguments, the first
# configuration will be the active one
dev.set_configuration()

# Let's fuzz around!

# Lets start by Reading 1 byte from the Device using different Requests
# bRequest is a byte so there are 255 different values
for bRequest in range(255):
    try:
        ret = dev.ctrl_transfer(0xC0, bRequest, 0, 0, 1)
        print "bRequest ",bRequest
        print ret
    except:
        # failed to get data for this request
        pass
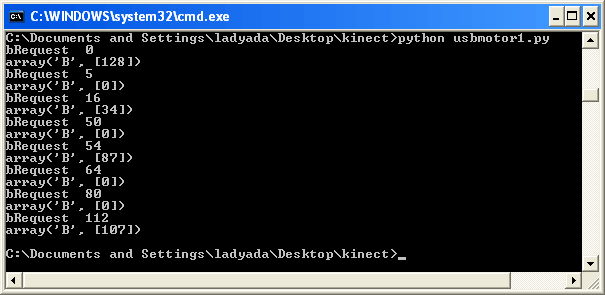
我们可以看到Request的值0, 5, 16, 50, 54, 64, 80 和112 全都返回了一些数据。其余的值没有任何读取。
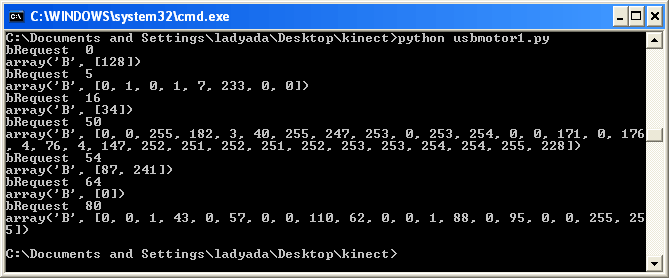
接下来,我们会尝试读取更多的数据,通过改变最后一个参数的值为100 bytes。
好了,有很多数据,但是这些数据代表什么意思呢?This is where some guessing based on the device itself would come in handy(一些硬件设备即将派上用场). I'm terribly lazy though and if given an option to avoid a lot of guesswork, I'll take it!
8. USB Analyzer
对Kinect进行逆向工程更容易一些,因为我们有一个著名的工作系统(XBOX 360)。 取代命令猜测,我们可以看看什么命令从XBOX里发送,然后“重放这些命令”。
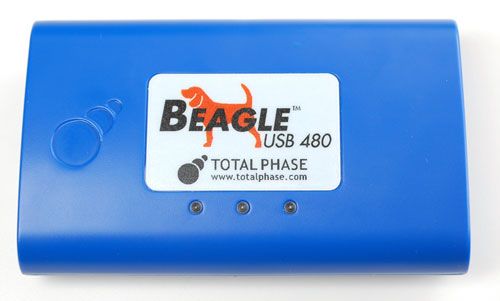
然而,我们首先需要能够监听这些命令。With protocols such as SPI, Serial(串行), Parallel(并行) and i2c, 你可以监听这些命令,通过使用逻辑分析仪或示波器。 USB is fast/complex enough to require its own kind of logic analyzer. 我们将会使用一个被称为Beagle480 from TotalPhase的分析仪,这是一台“高速的”USB分析仪,这次我们也要挥霍一把了。 (对于许多设备, 速度还不够快, 那些都是一些低成本的分析仪。)
USB分析仪扮演了一个“tap”的角色在XBOX和Kinect之间。一台电脑也需要连接好,这台电脑用于接收所有传输的数据到内存中并记录下。
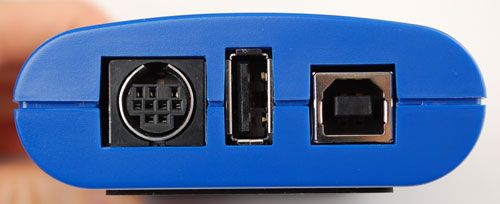
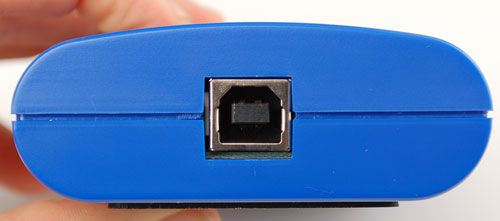
从左至右,分别是DIN连接口,USB A连接口和USB B连接口。XBOX连接到 USB B,KINECT连接到USB A。DIN connector is for other kinds of data sniffing (like SPI or i2c)
在另一边,有一个单独的USB B连接口,它用来连接监听的电脑。
The best way we've found to get the right data is to make sure to get even the 'enumeration' (initialization) packets,所以插入监听电脑并启动软件。然后在另一端插入你想侦听的设备.
9. Lookin' at logs
你可能没有一个USB分析仪,我们这里有一些日志,you can use to follow along with us. Visit the GitHub repository and click the **Downloads** button
Make yourself a sandwich, its a big file!
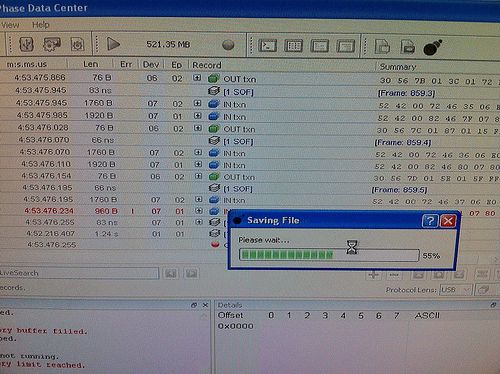
Also download the Beagle Data Center software (Mac/Win/Linux) and install it
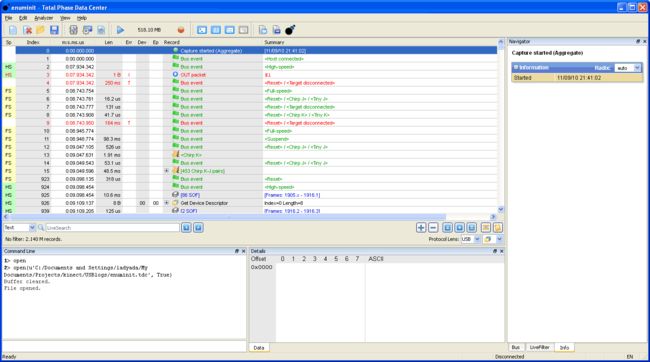
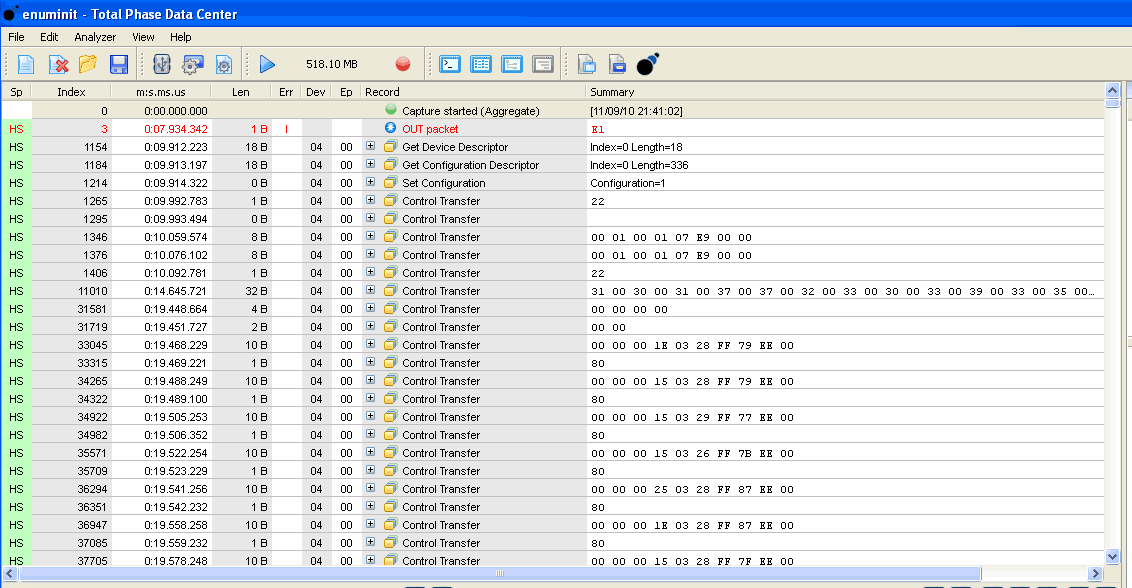
OK now that you've eaten, 让我们打开enuminit.tdc 文件。This is the full enumeration and initialization。
记住,当我们在记录数据的时候会有很多,不过我们可以消减这些数据。
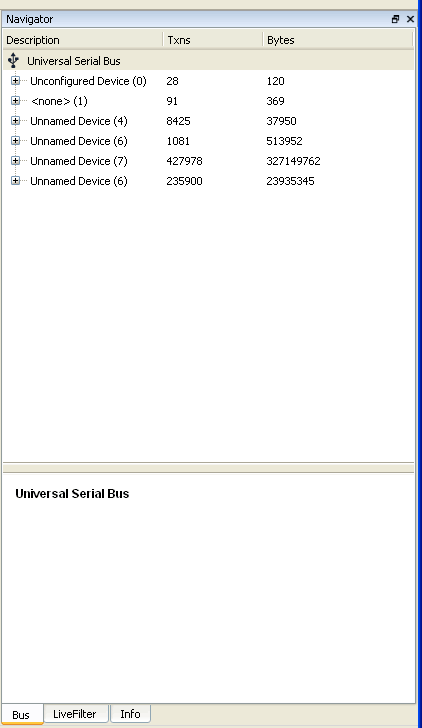
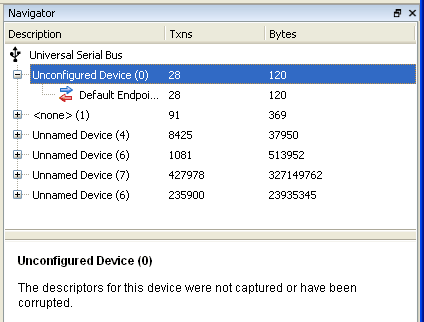
让我们重新回忆一下,Kinect有四个设备(hub, camera, mic, motor),但是我们只需要监听其中的一个(motor)。Click on the Bus tab on the lower right.
We have a few devices. Lets explore each one。
如果你点击了Unconfigured device (0) ,你会发现该设备还没有被捕获。这可能是因为 I jiggled the cable when inserting it so it started to create a device and then got disconnected. Its not important
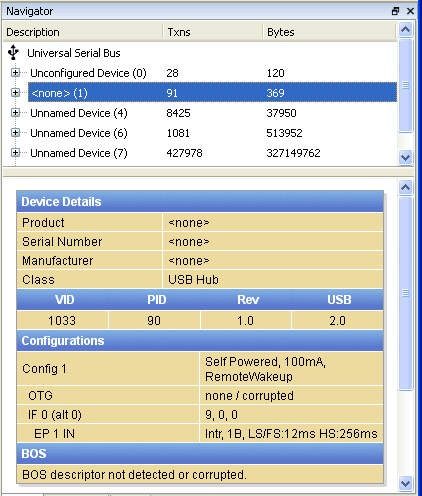
Click on <none> (1) This device is a Class device type USB Hub. That's the internal hub. 我们可以忽略这一点。
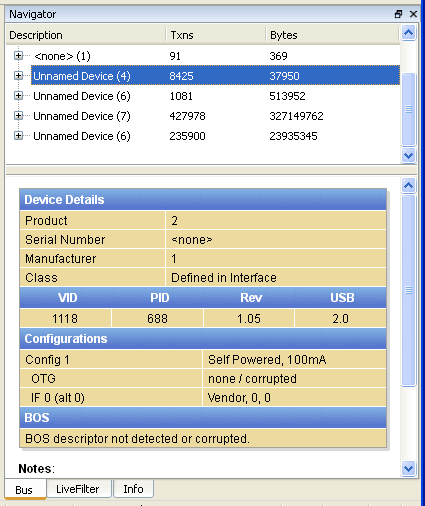
Device #4 has a PID of 688, 这是个十进制的值. 如果我们把它转换为十六进制,我们会得到0x02b0 - 这个就是马达设备!
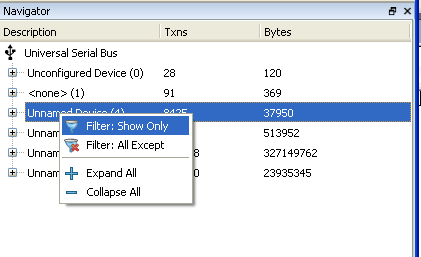
现在,我们可以过滤了,仅显示马达设备的日志。
现在,我们的日志已经非常短了。
你可以看到有一些初始化工作,and then just two repeating motifs:一个1字节的消息和一个10字节的消息交替出现。
马达会根据XBOX的命令来转动,这里一定有一些从XBOX发送给KINECT的命令。 让我们在过滤下,只显示发送给KINECT的命令。
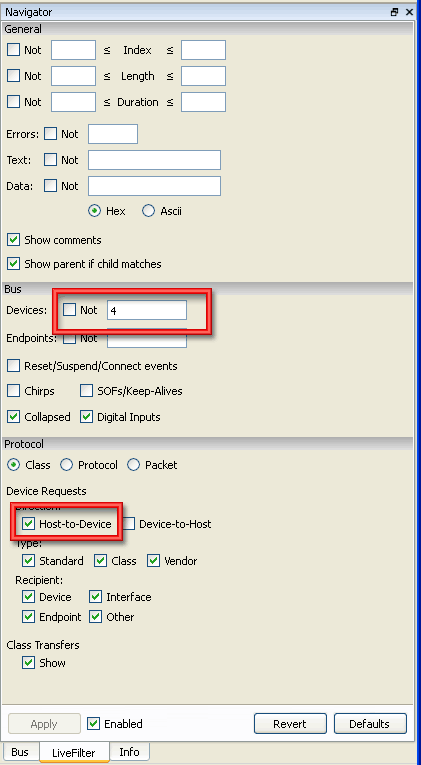
找到LiveFilter选项卡,然后勾上Host-to-Device一项。
现在,我们真的把它消减下来了(译者:列表的信息大部分被过滤了)。 这里只有四个命令发送给Kinect的马达,since the motor moves during initialization we can just try each one. 下面,让我们看下每个命令吧。
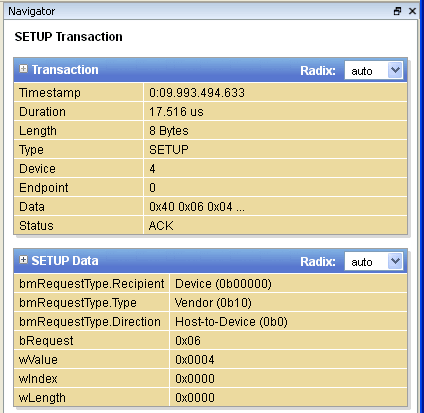
Command 1 has a bRequest of 0x06 and a wValue of 4, the wLength is 0 which means no data is written, the entire command is the Request and Value
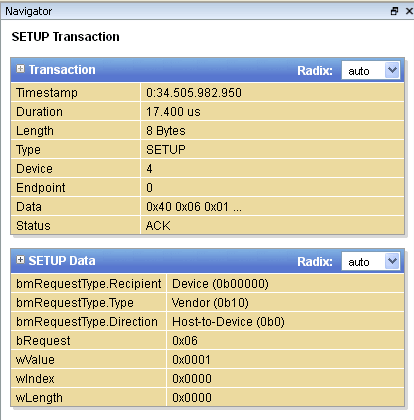
Command #2 uses the same bRequest but with a different wValue of 0x01
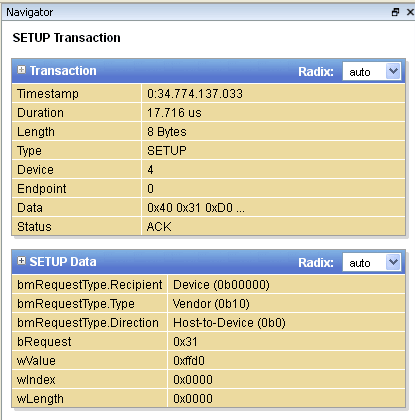
Command #3 is a different bRequest of 0x31 and a wValue of 0xffd0
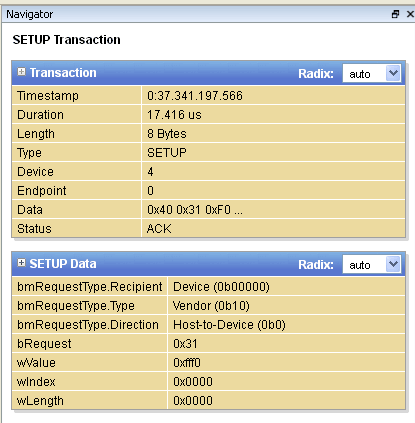
Command #4 is the same bRequest and a wValue of 0xfff0
现在我们已经确定有俩个请求命令可以发送。一个是0x06,另一个是0x31
Time to experiment!
10. Command #1 & 2 - LED blinky!
(续)

