android-serialport-api串口工具测试随笔
android-serialport-api是网上下载的,如果原作者看到,请留个名,谢谢
以下是随笔,很乱的,也有错误和笔误。--记录的目的是后面NDK开发做前期的铺垫![]()
在data/data/android.serialport.sample中放有lib和shared_prefs中android.serialport.sample_preferences----来保存串口和波特率参数前面我们说过,Android系统会将Preference元素的值存储在sharedPreference文件中。该文件存放路径位于
DDMS视图下的data/data/[packgename]/shared_prefs/文件下,命名约定为:packagename_preferencse.xml。
所以android.serialport.sample_preferences.xml就会存有我们在SerialPortPreferences类中设定的设备和波特率,其就是一个共享文件哦
public class Application extends android.app.Application {
public SerialPortFinder mSerialPortFinder = new SerialPortFinder();
private SerialPort mSerialPort = null;
public SerialPort getSerialPort() throws SecurityException, IOException, InvalidParameterException {
if (mSerialPort == null) {
/* Read serial port parameters */
/* Check parameters */
if ( (path.length() == 0) || (baudrate == -1)) {
throw new InvalidParameterException();
}
/* Open the serial port */
mSerialPort = new SerialPort(new File(path), baudrate);
}
return mSerialPort;
}
public void closeSerialPort() {
if (mSerialPort != null) {
mSerialPort.close();
mSerialPort = null;
}
}
1,跳转到SerialPortPreferences;--》建立”setup”
获取Application自定义的数据类,类成员mSerialPortFinder,在Application中构造(即初始化)
addPreferencesFromResource(R.xml.serial_port_preferences);设置界面布局,对于device和baudrates进行配置
ListPreference类!!!!!!保存
在data/data/android.serialport.sample中lib和shared_prefs中android.serialport.sample_preferences
获取设备下面所有串口设备和路径,SerialPortFinder类!!!!
![]()
SerialPortFinder类!!!!------------------------如下
itdriv = getDrivers().iterator();iterator为迭代器给getDrivers加上一个迭代器,遍历所有的驱动。
Getdrivers中proc/tty/drivers遍历控制台设备
得到要的驱动设备的名称和路径:
1, 先遍历itdriv = getDrivers().iterator();即getDRIVERS
吧每遍历到一个即添加到设备mDrivers.add(new Driver(w[0], w[1])); driver类
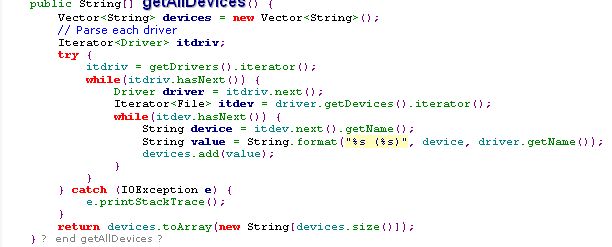
public String[] getAllDevices() {
		Vector<String> devices = new Vector<String>();
		// Parse each driver
		Iterator<Driver> itdriv;
		try {
			//frank
			Log.d(TAG, "getAllDevices1: ");
			itdriv = getDrivers().iterator();//先遍历注册所有符合要求的终端设备

			while(itdriv.hasNext()) {
			Log.d(TAG, "getAllDevices2: ");
				Driver driver = itdriv.next();
				Iterator<File> itdev = driver.getDevices().iterator();//
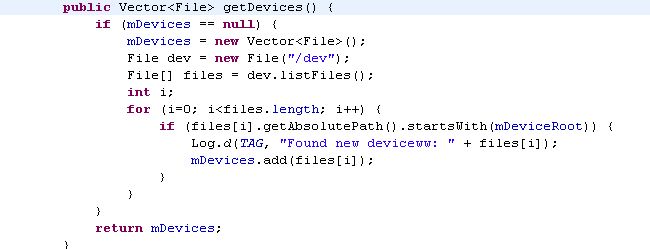
比较/dev下路径前缀是否相同的保存下来
然后再到/dev下面去所搜前缀相同的设备名:
譬如:上面遍历到/dev/tty,那么这里就会搜索有没有dev/tty0,1,2,3等等类推
这样最后就能在初始化的地方映射到/dev/ttyGS0 dev/s3c2410_serial0/1/2/3等等
while(itdev.hasNext()) {
Log.d(TAG, "getAllDevices3: ");
String device = itdev.next().getName();
String value = String.format("%s (%s)", device, driver.getName());
devices.add(value);
}
}
} catch (IOException e) {
e.printStackTrace();
}
return devices.toArray(new String[devices.size()]);
}
public String[] getAllDevicesPath() {
Vector<String> devices = new Vector<String>();
// Parse each driver
Iterator<Driver> itdriv;
try {
//frank
Log.d(TAG, "getAllDevicesPath1: ");
itdriv = getDrivers().iterator(); while(itdriv.hasNext()) {
Log.d(TAG, "getAllDevicesPath1: ");
Driver driver = itdriv.next();
Iterator<File> itdev = driver.getDevices().iterator();
while(itdev.hasNext()) {
Log.d(TAG, "getAllDevicesPath1: ");
String device = itdev.next().getAbsolutePath();
devices.add(device);
}
}
} catch (IOException e) {
e.printStackTrace();
}
return devices.toArray(new String[devices.size()]);
}
}
输出
D/SerialPort( 577): getAllDevices1:
D/SerialPort( 577): Found new driver1: /dev/ttyGS
D/SerialPort( 577): Found new driver3: 0
D/SerialPort( 577): Found new driver2: 251
D/SerialPort( 577): Found new driver0: g_serial
D/SerialPort( 577): Found new driver1: /dev/ttyUSB
D/SerialPort( 577): Found new driver3: 0-253
D/SerialPort( 577): Found new driver2: 188
D/SerialPort( 577): Found new driver0: usbserial
D/SerialPort( 577): Found new driver1: /dev/s3c2410_serial
D/SerialPort( 577): Found new driver3: 64-67
D/SerialPort( 577): Found new driver2: 204
D/SerialPort( 577): Found new driver0: ttySAC
D/SerialPort( 577): getAllDevices2:
D/SerialPort( 577): Found new deviceww: /dev/ttyGS0
D/SerialPort( 577): getAllDevices3:
D/SerialPort( 577): getAllDevices2:
D/SerialPort( 577): getAllDevices2:
D/SerialPort( 577): Found new deviceww: /dev/s3c2410_serial0
D/SerialPort( 577): Found new deviceww: /dev/s3c2410_serial1
D/SerialPort( 577): Found new deviceww: /dev/s3c2410_serial2
D/SerialPort( 577): Found new deviceww: /dev/s3c2410_serial3
D/SerialPort( 577): getAllDevices3:
D/SerialPort( 577): getAllDevices3:
D/SerialPort( 577): getAllDevices3:
D/SerialPort( 577): getAllDevices3:
D/SerialPort( 577): getAllDevicesPath1:
D/SerialPort( 577): getAllDevicesPath1:
D/SerialPort( 577): getAllDevicesPath1:
D/SerialPort( 577): getAllDevicesPath1:
D/SerialPort( 577): getAllDevicesPath1:
D/SerialPort( 577): getAllDevicesPath1:
D/SerialPort( 577): getAllDevicesPath1:
D/SerialPort( 577): getAllDevicesPath1:
D/SerialPort( 577): getAllDevicesPath1:
第一部分”setup”的初始化总的device基本到这里,遍历出了接口,波特率类似
记录到这里


