用到Bitmap(位图,显示图片)、compress(压缩并保存图片)、自定义更换背景图的范例
-
-
- 自定义View
- 布局
- 主函数
-
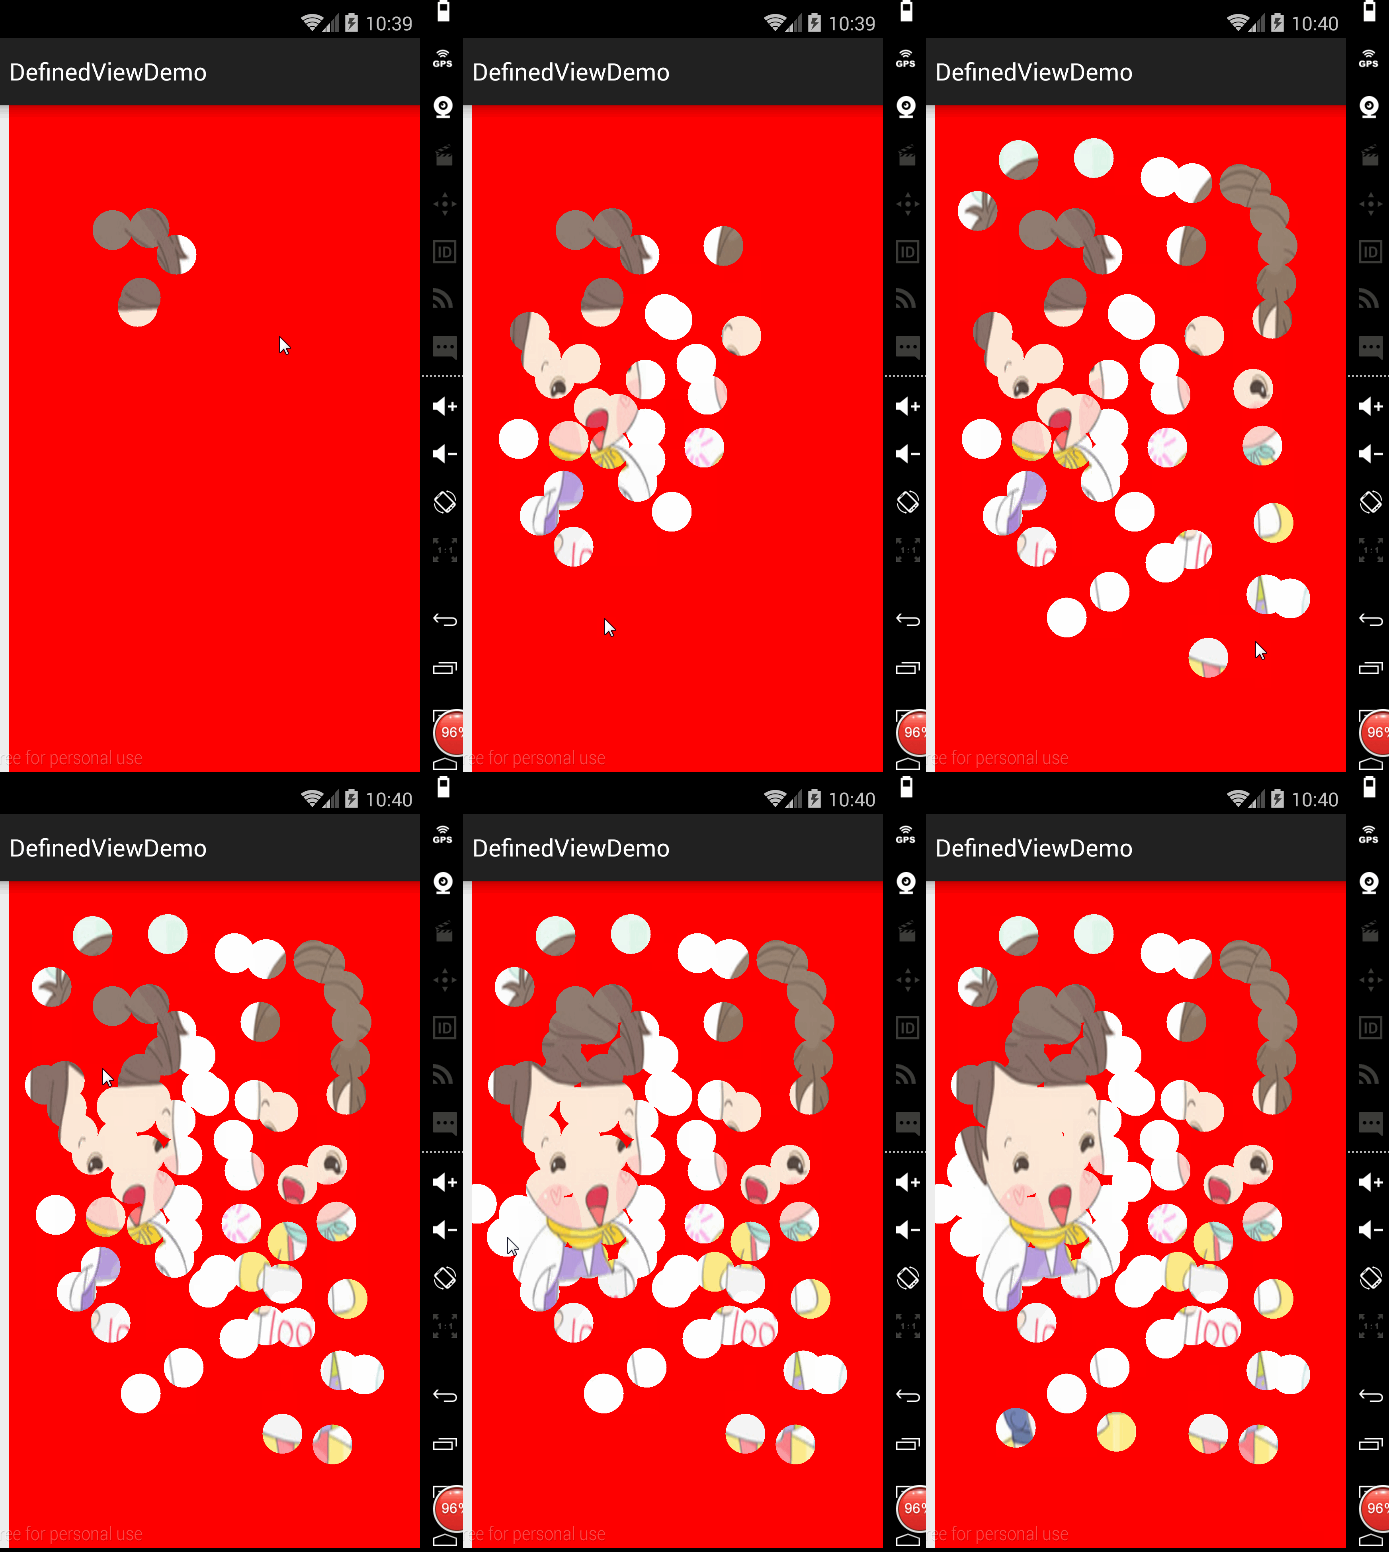
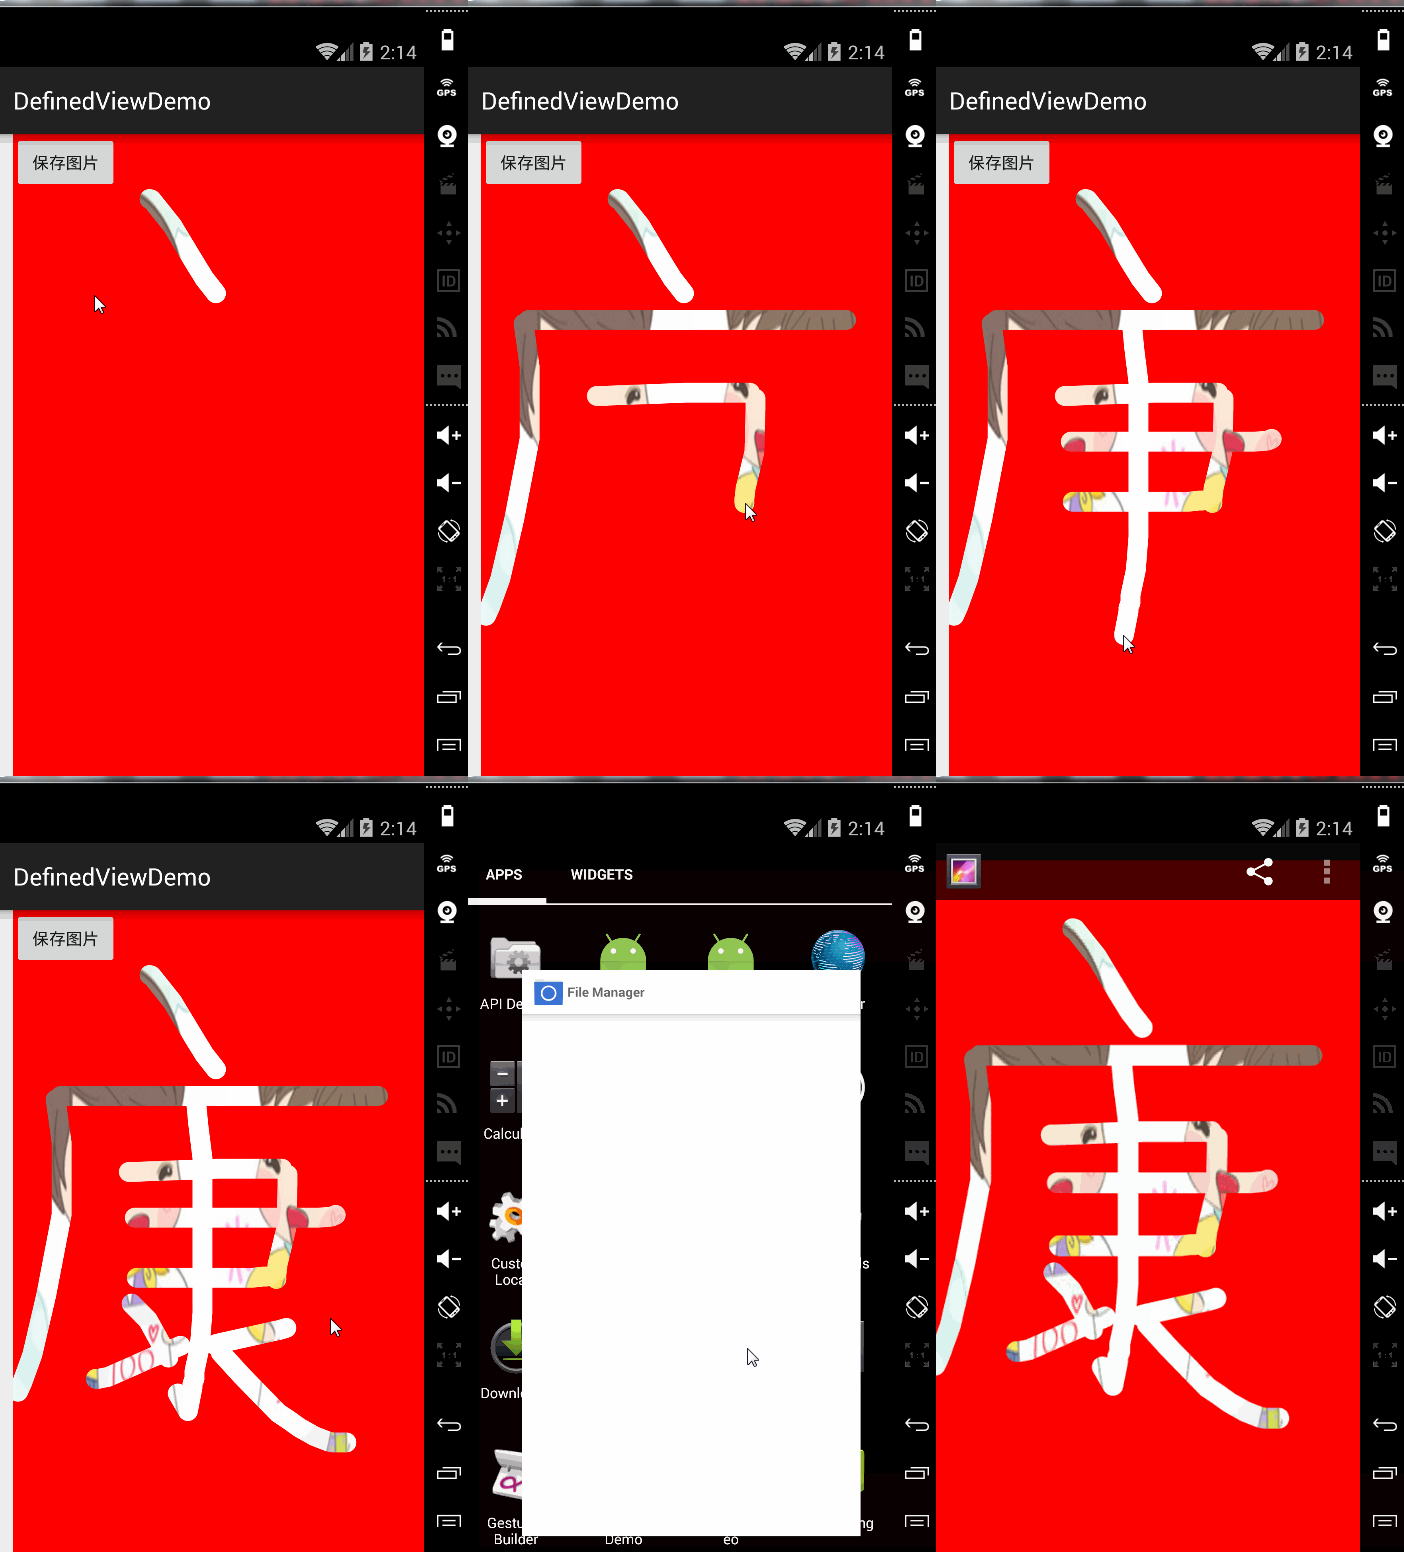
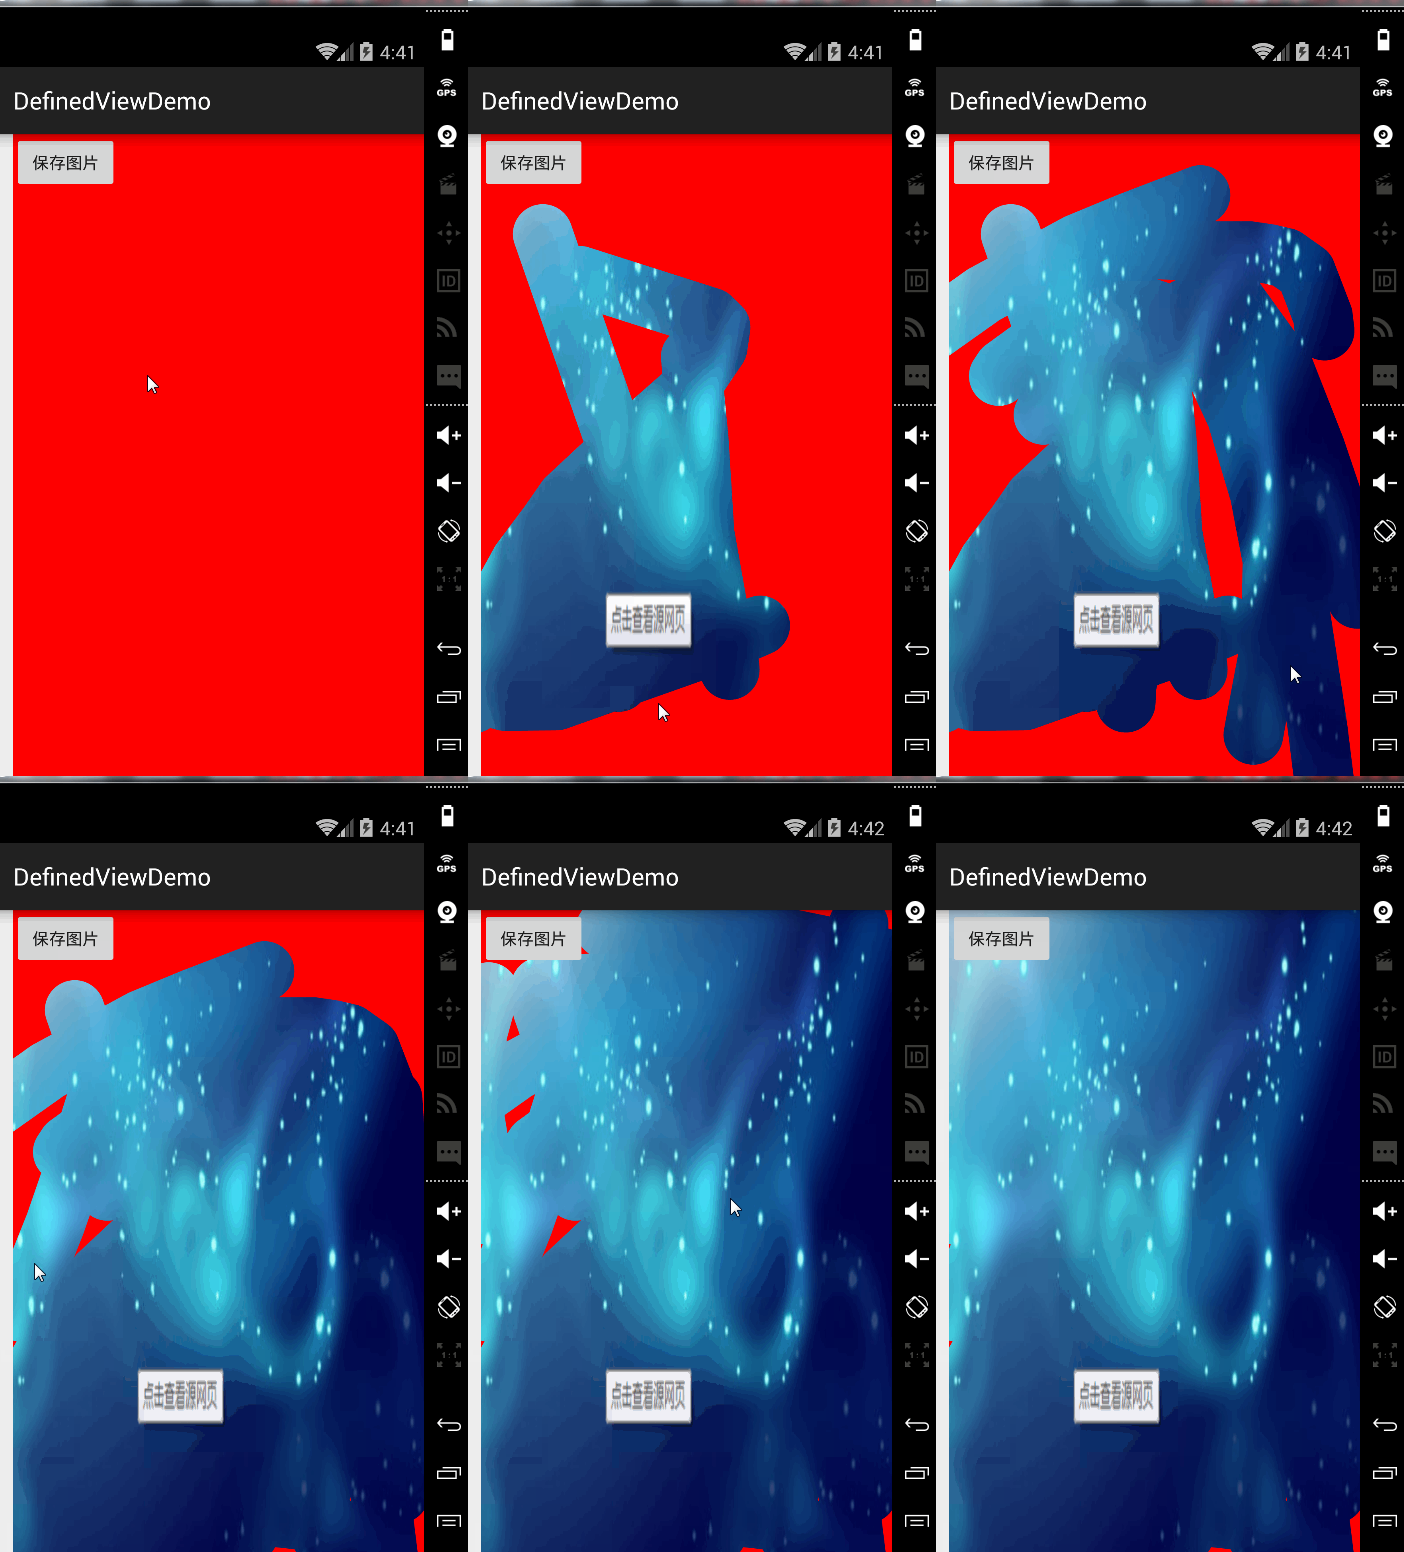
图片描述的是通过手指点击显示出背景图
通过compress压缩图片后,将图片保存到存储卡中
设置自定义View的属性来改变背景图和绘制时画笔的宽度
自定义View
public class MyBitmap2 extends View {
    private int mWidth;
    private int mHeight;
    private Paint mPaintCircle;
    private Paint mPaintRect;
    private Bitmap mBitmap;
    private Bitmap mBitmapBackground;
    private Matrix matrix;

    public MyBitmap2(Context context) {
        super(context);
    }

    public MyBitmap2(Context context, AttributeSet attrs) {
        super(context, attrs);
        //得到定义的values里面的myview_attr.xml文件属性
        final TypedArray a=context.obtainStyledAttributes(attrs,R.styleable.myview);
        //在activity_main.xml中得到背景图片
        BitmapDrawable dra= (BitmapDrawable) a.getDrawable(R.styleable.myview_bitmap_background);
        Log.d("drawable","得到的背景图片");
        if (dra!=null){
            //如果在activity_main.xml中背景图片不为空,则使用里面定义的图片
            Log.d("drawable","drawable:"+dra.getIntrinsicWidth());
            mBitmapBackground=dra.getBitmap();
            }
        else {
            //如果为空则重新定义一张新的背景
            mBitmapBackground=BitmapFactory.decodeResource(getResources(),R.mipmap.tanyan1);

        }
        mPaintCircle = new Paint();
        mPaintRect = new Paint();
        mPaintCircle.setColor(Color.RED);
        mPaintRect.setColor(Color.GREEN);
        PorterDuffXfermode mode = new PorterDuffXfermode(PorterDuff.Mode.XOR);
        mPaintRect.setXfermode(mode);
        mPaintRect.setStrokeJoin(Paint.Join.ROUND);//绘制中间使用的模式
        mPaintRect.setStrokeCap(Paint.Cap.ROUND);
        //得到画笔的宽度,第二个参数是默认值,(如果activity_main里面没设置画笔尺寸的话,就用30)
        int paintwidth=a.getDimensionPixelOffset(R.styleable.myview_bitmap_paintwidth,30);
        mPaintRect.setStrokeWidth(paintwidth);//绘制时画笔的宽度
        mPaintRect.setStyle(Paint.Style.FILL_AND_STROKE);
        mPaintRect.setPathEffect(new CornerPathEffect(360));//手指可360度旋转
        mPaintRect.setAntiAlias(true);
// mBitmapBackground = BitmapFactory.decodeResource(getResources(), R.mipmap.childen);
        matrix = new Matrix();
        path = new Path();
    }

    @Override
    protected void onMeasure(int widthMeasureSpec, int heightMeasureSpec) {
        super.onMeasure(widthMeasureSpec, heightMeasureSpec);
        mWidth = getDefaultSize(getSuggestedMinimumWidth(), widthMeasureSpec);
        mHeight = getDefaultSize(getSuggestedMinimumHeight(), heightMeasureSpec);
        setMeasuredDimension(getDefaultSize(getSuggestedMinimumWidth(), widthMeasureSpec),
                getDefaultSize(getSuggestedMinimumHeight(), heightMeasureSpec));
        mBitmap = Bitmap.createBitmap(mWidth, mHeight, Bitmap.Config.ARGB_8888);
        canvasBit = new Canvas(mBitmap);
// back=Bitmap.createBitmap(mWidth,mHeight,Bitmap.Config.ARGB_8888);
// Canvas canvas=new Canvas(back);
// canvas.drawBitmap(mBitmapBackground,new Rect(0,0,mBitmapBackground.getWidth(),mBitmapBackground.getHeight()),new Rect(0,0,mWidth,mHeight),null);


    }

    private Canvas canvasBit;
    private Bitmap back;

    @Override
    protected void onDraw(Canvas canvas) {
        super.onDraw(canvas);
// canvasBit.drawColor(Color.RED);
        //第一个参数是背景图,第二个参数是得到背景图的宽和高,第三个参数是整个屏幕的宽和高,第四个参数是画笔。这一句是将背景图画到屏幕中去(以屏幕的宽和高填充,即占满整个屏幕)
        canvas.drawBitmap(mBitmapBackground, new Rect(0, 0, mBitmapBackground.getWidth(), mBitmapBackground.getHeight()), new Rect(0, 0, mWidth, mHeight), null);
        canvasBit.drawRect(0, 0, mWidth, mHeight, mPaintCircle);
        canvasBit.drawPath(path, mPaintRect);//用mPaintRect画笔画圆,前面在mPaintRect上设置了(PorterDuff.Mode.XOR),所以重叠部分会显示出背景色
        canvas.drawBitmap(mBitmap, 0, 0, null);
    }

    private float x;
    private float y;
    private float old_x;
    private float old_y;
    private Path path;

    @Override
    public boolean onTouchEvent(MotionEvent event) {
        switch (event.getAction()) {
            case MotionEvent.ACTION_DOWN:
                x = event.getX();
                y = event.getY();
// path.addCircle(x, y, 50, Path.Direction.CCW);
                path.moveTo(x,y);
                invalidate();
                old_x=x;
                old_y=y;
                return true;
            case MotionEvent.ACTION_MOVE:
                x=event.getX();
                y=event.getY();
                path.moveTo(old_x, old_y);
                path.quadTo((x + old_x) / 2, (y + old_y) / 2, x, y);//以贝塞尔曲线画图
// path.lineTo(x,y);//以线画图
                invalidate();
                old_x=x;
                old_y=y;
                return true;
        }
        return super.onTouchEvent(event);
    }
}
布局
<RelativeLayout xmlns:android="http://schemas.android.com/apk/res/android"
    xmlns:tools="http://schemas.android.com/tools"
    xmlns:myview1="http://schemas.android.com/apk/res-auto"

    android:layout_width="match_parent"
    android:layout_height="match_parent" android:paddingLeft="@dimen/activity_horizontal_margin"
   >
<com.example.administrator.definedviewdemo.Wiget.MyBitmap2
        android:layout_width="match_parent"
        android:layout_height="match_parent"
        android:id="@+id/myview"
        myview1:bitmap_background="@mipmap/star"
        myview1:bitmap_paintwidth="50dp"/>
    <Button
        android:id="@+id/button_picture"
        android:layout_width="wrap_content"
        android:layout_height="wrap_content"
        android:text="保存图片"/>
        </RelativeLayout>
主函数
public class MainActivity extends AppCompatActivity {
private Button mButton;
    private MyBitmap2 myBitmap2;
     @Override
    protected void onCreate(Bundle savedInstanceState) {
        super.onCreate(savedInstanceState);
        setContentView(R.layout.activity_main);
        mButton= (Button) findViewById(R.id.button_picture);
        myBitmap2= (MyBitmap2) findViewById(R.id.myview);
        mButton.setOnClickListener(new View.OnClickListener() {
            @Override
            public void onClick(View v) {
                myBitmap2.setDrawingCacheEnabled(true);//这个地方要设置成true,才能保存图片
                Bitmap bitmap=myBitmap2.getDrawingCache(true);
                File file=new File(Environment.getExternalStorageDirectory(),System.currentTimeMillis()+"liujiaorui.jpg");
                if (!file.exists()){
                    try {
                        file.createNewFile();
                    } catch (IOException e) {
                        e.printStackTrace();
                    }
                }
                try {
                    //第一个参数是图片压缩以后的格式,第二个参数是压缩的比率,第三个参数将要保存的图片以输出流的形式写到文件中去
                    bitmap.compress(Bitmap.CompressFormat.JPEG,100,new FileOutputStream(file));
                } catch (FileNotFoundException e) {
                    e.printStackTrace();
                }
            }
        });
      }
 }

