Launcher源码浅析-----Launcher自定义布局属性
在上一篇文章《Launcher源码浅析-----Launcher布局》中,对Launcher的总布局文件Launcher.xml进行了分析。在分析Launcher布局文件代码过程中,会看到一些以launcher:开头而不是以android:开头的布局属性的定义。如launcher.xml文件中id为workspace的视图布局,如下代码:
<com.android.launcher2.DragLayer
    xmlns:android="http://schemas.android.com/apk/res/android"
    xmlns:launcher="http://schemas.android.com/apk/res/com.android.launcher"

    android:id="@+id/drag_layer"
    android:layout_width="match_parent"
    android:layout_height="match_parent">
...
 <!-- Workspace即手机桌面,默认系统是包含可翻转5页 -->
    <com.android.launcher2.Workspace
        android:id="@+id/workspace"
        android:layout_width="match_parent"
        android:layout_height="match_parent"
        android:paddingTop="@dimen/qsb_bar_height_inset"
        android:paddingBottom="@dimen/button_bar_height"
        launcher:defaultScreen="2"
        launcher:cellCountX="4"
        launcher:cellCountY="4"
        launcher:pageSpacing="@dimen/workspace_page_spacing"
        launcher:scrollIndicatorPaddingLeft="@dimen/workspace_divider_padding_left"
        launcher:scrollIndicatorPaddingRight="@dimen/workspace_divider_padding_right">

        <!-- Workspace总共可翻转5个页面,一个 workspace_screen定义一个页面布局-->
        <include android:id="@+id/cell1" layout="@layout/workspace_screen" />
        <include android:id="@+id/cell2" layout="@layout/workspace_screen" />
        <include android:id="@+id/cell3" layout="@layout/workspace_screen" />
        <include android:id="@+id/cell4" layout="@layout/workspace_screen" />
        <include android:id="@+id/cell5" layout="@layout/workspace_screen" />
    </com.android.launcher2.Workspace>
...
</com.android.launcher2.DragLayer>
从上面的代码中,可以知道,布局属性defaultScreen、cellCountX、cellCountY、pageSpacing、scrollIndicatorPaddingLeft、scrollIndicatorPaddingRight都是以launcher:开头的,而不是android:开头(android:开头是android系统中固有的布局属性)。android和launcher分别是属性的命名空间,在xml文件的根元素中定义,如:xmlns:android="http://schemas.android.com/apk/res/android"和xmlns:launcher="http://schemas.android.com/apk/res/com.android.launcher"。其中"http://schemas.android.com/apk/res/是固定的,后面的android和com.android.launcher的分别为对应的包名。com.android.launcher就是Launcher的包名。
也就是说,以launcher:开头的是Launcher系统应用中自己声明和定义的属性,那么这些属性是如何声明、定义以及在代码中利用的呢?接下来还是以id为workspace的视图布局为例进行说明。
--> id为workspace的视图布局对应的是自定义视图类Workspace,Workspace类的代码如下:
public class Workspace extends SmoothPagedView
        implements DropTarget, DragSource, DragScroller, View.OnTouchListener,
        DragController.DragListener {
...
    private int mDefaultPage;
    //一页面默认x轴和y轴方向上的细胞晶格数目(4x4)
    private static final int DEFAULT_CELL_COUNT_X = 4;
    private static final int DEFAULT_CELL_COUNT_Y = 4;
...
 public Workspace(Context context, AttributeSet attrs, int defStyle) {
        super(context, attrs, defStyle);
    ...
        int cellCountX = DEFAULT_CELL_COUNT_X;
        int cellCountY = DEFAULT_CELL_COUNT_Y;

        TypedArray a = context.obtainStyledAttributes(attrs,
                R.styleable.Workspace, defStyle, 0);
    ...
        cellCountX = a.getInt(R.styleable.Workspace_cellCountX, cellCountX);
        cellCountY = a.getInt(R.styleable.Workspace_cellCountY, cellCountY);
        mDefaultPage = a.getInt(R.styleable.Workspace_defaultScreen, 1);
        a.recycle();
    ...
        }
...
}
Workspace的构造函数中,可以知道,TypedArray对象a是通过调用Workspace构造函数第一个参数context的obtainStyledAttributes方法创建的,obtainStyledAttributes方法的第一个参数是Workspace构造函数的第二个参数attrs(AttributeSet)对象。重点是obtainStyledAttributes的第二个参数R.styleable.Workspace,R.styleable.Workspace对应的是一个int[]数组(资源id数组)。而这种以R.styleable.xxx一般是在attrs.xml文件中声明的。
-->为此,跟踪到Launcher中的attrs.xml文件(该文件所在路径为packages/apps/Launcher2/res/values/attrs.xml),该文件中有如下代码:
<resources>
...
    <declare-styleable name="Workspace">
        <!-- The first screen the workspace should display. -->
        <attr name="defaultScreen" format="integer"  />
        <!-- The number of horizontal cells in the CellLayout -->
        <attr name="cellCountX" format="integer"  />
        <!-- The number of vertical cells in the CellLayout -->
        <attr name="cellCountY" format="integer"  />
    </declare-styleable>
...
</resources>
从attrs.xml代码中,可以知道,name="Workspace"的declare-styleable元素数组下分别有子元素defaultScreen、cellCountX、cellCountY,它们均为Launcher中自定义的布局属性名称,attrs.xml文件中的代码就是对Launcher自定义布局属性的声明,format=“xxx”即为布局属性的数据类型,这里的defaultScreen、cellCountX、cellCountY等自定义属性均为integer类型。-->回到上文提到的Workspace的构造函数中的代码:
        TypedArray a = context.obtainStyledAttributes(attrs,
                R.styleable.Workspace, defStyle, 0);
所以,obtainStyledAttributes方法的第二个参数R.styleable.Workspace对应的是attrs.xml文件中声明的属性资源数组<declare-styleable name="Workspace">;
-->通过R.styleable.Workspace创建TypedArray对象a后,就可以调用a的getxxx函数取得在属性资源数组Workspace中声明的各个布局属性的值了,如下:
        cellCountX = a.getInt(R.styleable.Workspace_cellCountX, cellCountX);
        cellCountY = a.getInt(R.styleable.Workspace_cellCountY, cellCountY);
        mDefaultPage = a.getInt(R.styleable.Workspace_defaultScreen, 1);
R.styleable.Workspace_cellCountX表示Workspace资源数组中声明的cellCountX布局属性,只要为Workspace中的声明的布局属性,均用Workspace+下划线+布局属性表示。
a.getInt(R.styleable.Workspace_cellCountX, cellCountX)方法首先会获取布局属性cellCountX定义的值,若该属性的值没有定义,则取第二个参数cellCountX的值作为默认值;在Workspace的构造函数中,cellCountX被赋值为DEFAULT_CELL_COUNT_X,而DEFAULT_CELL_COUNT_X被初始化为4(即workspace的X轴方向上可放置4个快捷图标)。
-->布局属性的值一般都是在布局文件中定义的,如Workspace的构造函数中加载的布局属性defaultScreen、cellCountX、cellCountY的值,在id为workspace的布局代码中定义如下:
    <com.android.launcher2.Workspace
          ...
          launcher:defaultScreen="2"
          launcher:cellCountX="4"
          launcher:cellCountY="4"
          ...
    </com.android.launcher2.Workspace>
有一个问题值得注意:在Workspace的构造函数中加载了defaultScreen、cellCountX、cellCountY自定义属性。但是,id为workspace的视图布局代码中还有pageSpacing、scrollIndicatorPaddingLeft、scrollIndicatorPadding等自定义的布局属性,这些属性并没有在Workspace的构造函数中加载,而是通过PagedView的构造函数来加载;Workspace继承自SmoothPagedView,SmoothPagedView继承自PagedView。也就是说,PagedView为Workspace的父类。所以pageSpacing、scrollIndicatorPaddingLeft、scrollIndicatorPadding这些父类中加载的属性作为Workspace的属性也是理所当然的了。
-->PagedView的构造函数代码如下:
//实现翻页操作的抽象父类,有翻页效果的类都需要继承自它;
public abstract class PagedView extends ViewGroup {
...
    public PagedView(Context context, AttributeSet attrs, int defStyle) {
    ...
        TypedArray a = context.obtainStyledAttributes(attrs,
                R.styleable.PagedView, defStyle, 0);
        mPageSpacing = a.getDimensionPixelSize(R.styleable.PagedView_pageSpacing, 0);
        mPageLayoutPaddingTop = a.getDimensionPixelSize(
                R.styleable.PagedView_pageLayoutPaddingTop, 0);
        mPageLayoutPaddingBottom = a.getDimensionPixelSize(
                R.styleable.PagedView_pageLayoutPaddingBottom, 0);
        mPageLayoutPaddingLeft = a.getDimensionPixelSize(
                R.styleable.PagedView_pageLayoutPaddingLeft, 0);
        mPageLayoutPaddingRight = a.getDimensionPixelSize(
                R.styleable.PagedView_pageLayoutPaddingRight, 0);
        mPageLayoutWidthGap = a.getDimensionPixelSize(
                R.styleable.PagedView_pageLayoutWidthGap, 0);
        mPageLayoutHeightGap = a.getDimensionPixelSize(
                R.styleable.PagedView_pageLayoutHeightGap, 0);
        mScrollIndicatorPaddingLeft =
            a.getDimensionPixelSize(R.styleable.PagedView_scrollIndicatorPaddingLeft, 0);
        mScrollIndicatorPaddingRight =
            a.getDimensionPixelSize(R.styleable.PagedView_scrollIndicatorPaddingRight, 0);
        a.recycle();
    ...
    }
...
}
-->同样地,我们到attrs.xml文件代码中找到R.styleable.PagedView对应的资源数组声明如下:
<resources>
...
<!-- PagedView specific attributes. These attributes are used to customize
         a PagedView view in XML files. -->
    <declare-styleable name="PagedView">
        <!-- The number of horizontal cells in a page -->
        <attr name="cellCountX" />
        <!-- The number of vertical cells in a page -->
        <attr name="cellCountY" />
        <!-- A spacing override for the icons within a page -->
        <attr name="pageLayoutWidthGap" format="dimension" />
        <attr name="pageLayoutHeightGap" format="dimension" />
        <!-- The padding of the pages that are dynamically created per page -->
        <attr name="pageLayoutPaddingTop" format="dimension" />
        <attr name="pageLayoutPaddingBottom" format="dimension" />
        <attr name="pageLayoutPaddingLeft" format="dimension" />
        <attr name="pageLayoutPaddingRight" format="dimension" />
        <!-- The space between adjacent pages of the PagedView. -->
        <attr name="pageSpacing" format="dimension" />
        <!-- The padding for the scroll indicator area -->
        <attr name="scrollIndicatorPaddingLeft" format="dimension" />
        <attr name="scrollIndicatorPaddingRight" format="dimension" />
    </declare-styleable>
...
</resources>
format="dimension"表示属性的值是在dimens.xml定义;所以,workspace布局文件中的其他自定义属性pageSpacing、scrollIndicatorPaddingLeft、scrollIndicatorPadding是这样通过attrs.xml文件声明和PagedView的构造函数加载出来的。至于其他的Launcher自定义的布局属性,同样的也是通过在attrs.xml文件声明、布局文件中定义、自定义视图类的构造函数中加载这几个流程。
编写属于我们自己的自定义属性:
基于上面介绍的launcher中的自定义属性,我们在开发过程中也可以自己去定义我们需要的属性。通过上面的学习我们知道,自定义属性主要有三点:
1.在values文件下创建attrs.xml文件,在该文件里定义和声明我们需要的属性。
2.在相关布局文件中定义命名空间和引用自定义的属性赋值。
3.在相关定义类的构造函数中获取自定义的属性值。
接下来,我们基于以上三点一步步来实现如何自定义自己的属性。
1.创建attrs.xml文件,代码如下:
<?xml version="1.0" encoding="utf-8"?>
<resources>

    <declare-styleable name="MyCustomAttribute">
        <attr name="myText" format="string"/>
        <attr name="myTextColor" format="color"/>
        <attr name="myTextSize" format="dimension"/>
    </declare-styleable>

</resources>
2.在主布局文件activity_main.xml中定义命名空间myattr和赋值自定义的属性,代码如下:
<RelativeLayout xmlns:android="http://schemas.android.com/apk/res/android"
xmlns:tools="http://schemas.android.com/tools"
xmlns:myattr="http://schemas.android.com/apk/res/com.stevenhu.android.custom.attribute"
android:layout_width="match_parent"
android:layout_height="match_parent"
tools:context=".MainActivity" >
<com.stevenhu.android.custom.attribute.CustomView
android:layout_width="wrap_content"
android:layout_height="wrap_content"
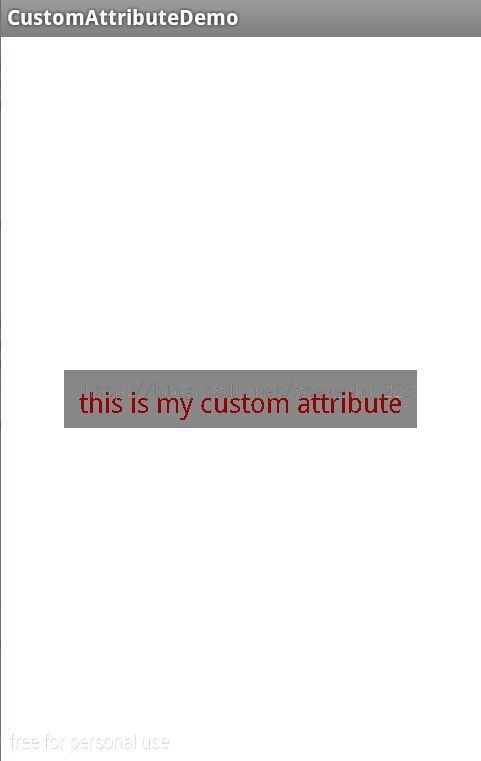
myattr:myText="this is my custom attribute"
myattr:myTextColor="@color/red"
myattr:myTextSize = "18sp"
android:padding="10dip"
android:layout_centerInParent="true"
/>
</RelativeLayout>
3.在相关自定义CustomView类的构造函数中获取自定义的属性值,代码如下:
package com.stevenhu.android.custom.attribute;

import android.content.Context;
import android.content.res.TypedArray;
import android.graphics.Canvas;
import android.graphics.Color;
import android.graphics.Paint;
import android.graphics.Rect;
import android.util.AttributeSet;
import android.util.TypedValue;
import android.view.View;

public class CustomView extends View{

	//文本
	private String mMyText;
	//文本颜色
	private int mMyTextColor;
	//文本字体大小
	private int mMyTestSize;
	//绘制时控制文本绘制的范围
    private Rect mRect;
    //画笔
    private Paint mPaint;


	public CustomView(Context context) {
		this(context, null);
	}

	public CustomView(Context context,AttributeSet attrs) {
		this(context, attrs, 0);
	}

	public CustomView(Context context,AttributeSet attrs,int defStyleAttr) {
		super(context, attrs, defStyleAttr);

		//获取自定义属性样式
		TypedArray typeArray = context.getTheme().obtainStyledAttributes(attrs, R.styleable.MyCustomAttribute,
				defStyleAttr, 0);

		//获取文本内容
		mMyText = typeArray.getString(R.styleable.MyCustomAttribute_myText);
		//获取文本颜色
		mMyTextColor = typeArray.getColor(R.styleable.MyCustomAttribute_myTextColor, Color.BLACK);
		//获取文本字体大小,默认值设为14sp
		mMyTestSize = typeArray.getDimensionPixelSize(R.styleable.MyCustomAttribute_myTextSize,
				(int)TypedValue.applyDimension(TypedValue.COMPLEX_UNIT_SP, 14, getResources().getDisplayMetrics()));

		//样式回收
		typeArray.recycle();

		mPaint = new Paint();
		//设置字体大小
        mPaint.setTextSize(mMyTestSize);
        mRect = new Rect();
        //获取文本绘制区域
        mPaint.getTextBounds(mMyText, 0, mMyText.length(), mRect);
	}


	@Override
	protected void onMeasure(int widthMeasureSpec,int heightMeasureSpec) {

		int widthMode = MeasureSpec.getMode(widthMeasureSpec);
	    int widthSize = MeasureSpec.getSize(widthMeasureSpec);
	    int heightMode = MeasureSpec.getMode(heightMeasureSpec);
	    int heightSize = MeasureSpec.getSize(heightMeasureSpec);
	    int width;
	    int height ;

	    //为EXACTLY时,一般是设置了明确的值或者是MATCH_PARENT
	    if (widthMode == MeasureSpec.EXACTLY)
	    {
	        width = widthSize;
	    }
	    //为AT_MOST时,一般为WARP_CONTENT
	    else
	    {
	        mPaint.setTextSize(mMyTestSize);
	        mPaint.getTextBounds(mMyText, 0, mMyText.length(), mRect);
	        float textWidth = mRect.width();
	        int desired = (int) (getPaddingLeft() + textWidth + getPaddingRight());
	        width = desired;
	    }

	    if (heightMode == MeasureSpec.EXACTLY)
	    {
	    	//为EXACTLY时,采用原先计算的值
	        height = heightSize;
	    } else
	    {
	    	//为AT_MOST时,得根据padding、margin等边距的值计算(如果有的话)
	        mPaint.setTextSize(mMyTestSize);
	        mPaint.getTextBounds(mMyText, 0, mMyText.length(), mRect);
	        float textHeight = mRect.height();
	        int desired = (int) (getPaddingTop() + textHeight + getPaddingBottom());
	        height = desired;
	    }

	    setMeasuredDimension(width, height);
	}

	@Override
	protected void onDraw(Canvas canvas) {
		//绘制区域,背景色为gray
		mPaint.setColor(Color.GRAY);
		//getMeasuredWidth、getMeasuredHeight得到的是自定义view的宽高
		canvas.drawRect(0, 0, getMeasuredWidth(), getMeasuredHeight(), mPaint);
		mPaint.setColor(mMyTextColor);
		//绘制文本,文本颜色为mMyTextColor。getWidth、getHeight得到的是显示屏幕的宽高
		canvas.drawText(mMyText, getWidth()/2 - mRect.width()/2, getHeight()/2 + mRect.height()/2, mPaint);
	}

}
该例子运行效果图如下: